LED strip remote problems usually come from weak batteries, signal blockage, pairing errors, controller problems, or a damaged remote. If your lights stop responding, start with the simple checks before replacing the whole LED strip system.
Therefore, test the batteries first. Next, move closer to the controller and remove signal blockers. Then, reset or re-pair the remote if the lights still do not respond.
For related internal resources, review Elstar’s LED strip lights, LED controllers, LED power supplies, and contact page. For general battery safety guidance, see Energizer’s battery care guide.
Introduction to LED Strip Remote Issues
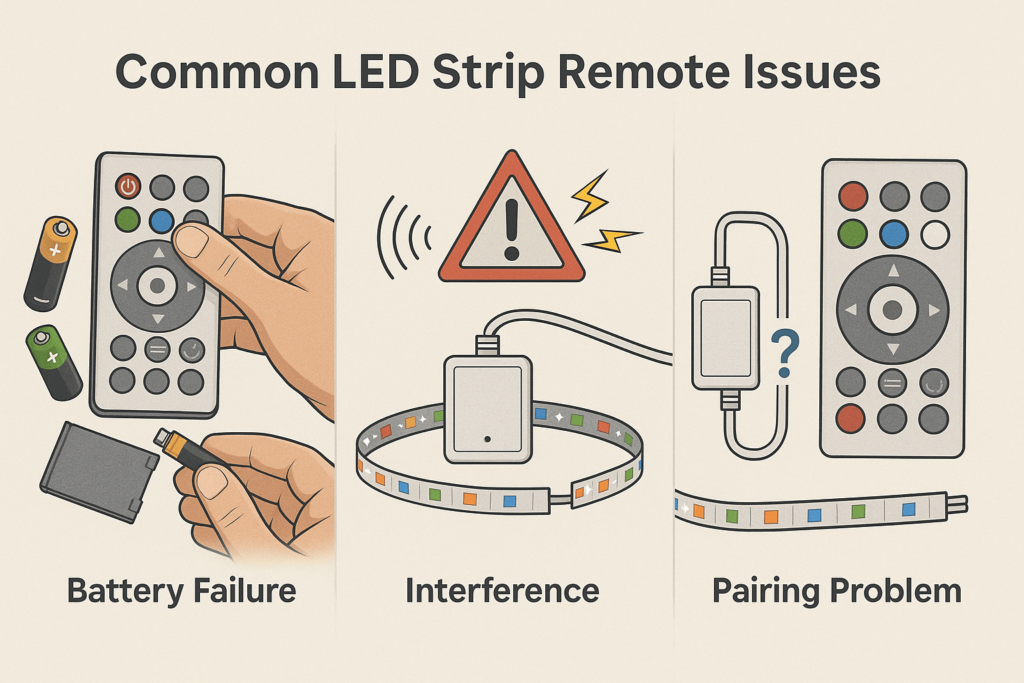
An LED strip remote can fail in several ways. Sometimes, the remote may stop responding, work only at close range, control the wrong mode, or lose connection with the LED controller.
Common LED strip remote symptoms
- At first, the remote may not turn the strip on or off.
- Next, the buttons may work only at close range.
- Also, the strip may flicker or change modes incorrectly.
- Finally, the remote may work after a reset but fail again later.
Why quick troubleshooting matters
Quick checks save time and reduce unneeded part swaps. Also, they help you find whether the issue is the remote, battery, controller, or signal path.
Quick answer
To fix an LED strip remote, replace the batteries, clear the signal path, re-pair the controller, and test with a matching remote or controller if the issue continues.
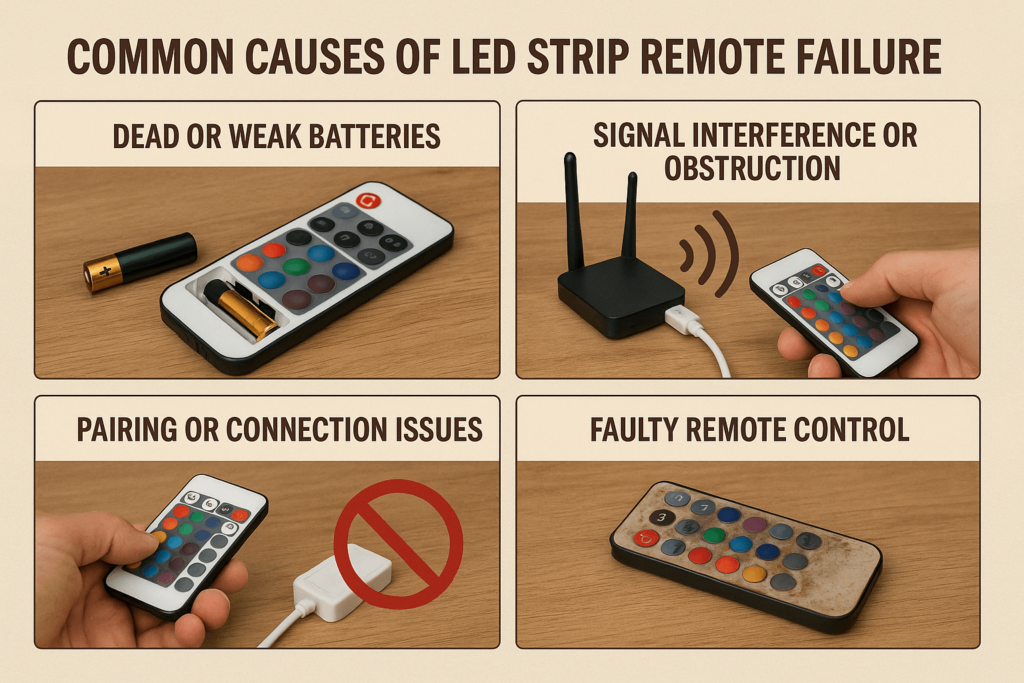
Common Causes of LED Strip Remote Failure
Most LED strip remote issues come from a few common causes. Therefore, check each cause in order instead of guessing.
First, check the easiest cause before opening the controller.
Dead or weak batteries
- Issue: weak batteries make the remote slow or unresponsive.
- Sign: the remote works only sometimes or only very close to the controller.
- Fix: replace the batteries with fresh batteries of the correct type.
Signal interference or blockage
- Issue: walls, metal objects, cabinets, or nearby electronics can block the signal.
- Sign: the remote works better when you move closer or change angle.
- Fix: move the controller, clear the signal path, or reduce nearby interference.
After that, check pairing because many remotes lose their saved link.
Pairing or connection issues
- Issue: the remote may lose pairing with the LED controller.
- Sign: the remote has power, but the strip does not respond.
- Fix: reset and re-pair the remote using the product instructions.
Finally, test the hardware only after the simple checks fail.
Faulty remote or controller
- Issue: the remote or controller may fail after drops, moisture, heat, or wear.
- Sign: battery changes and pairing attempts do not solve the problem.
- Fix: test with a matching new remote or controller.
Use this table as a quick check before buying new parts.
Cause and fix table
| Issue |
Symptoms |
Quick solution |
| Dead batteries |
Remote unresponsive |
Replace batteries |
| Signal interference |
Remote response is irregular |
Clear the signal path |
| Pairing issue |
Remote has power but does not control the strip |
Reset and re-pair |
| Faulty remote |
Complete or repeated failure |
Replace remote or controller |
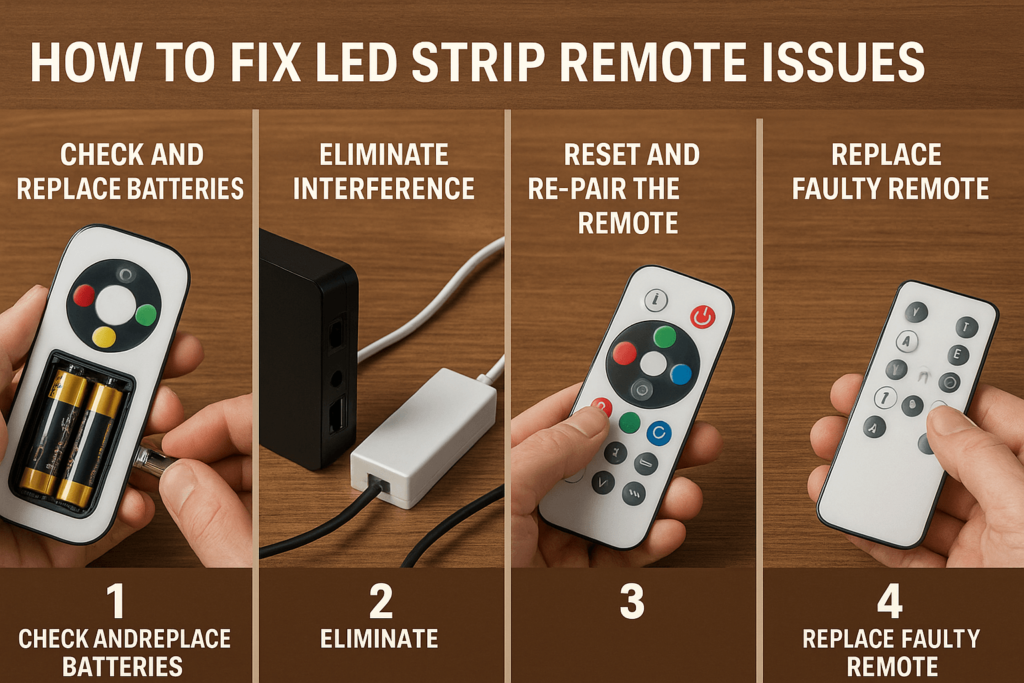
Step-by-Step LED Strip Remote Fix
Use this repair order before buying new parts. In many cases, the first two steps solve the issue.
To begin the fix, start with the part that fails most often.
Step 1: check and replace batteries
- Remove the old batteries from the remote.
- Then, insert fresh batteries that match the remote’s required type.
- After that, test the remote close to the LED controller.
Step 2: remove signal blockers
- Move closer to the LED controller.
- Also, remove metal objects, furniture, or walls blocking the signal.
- Then, test the remote from different angles.
Step 3: reset and re-pair the remote
- Turn off power to the LED controller.
- Next, follow the product instructions for pairing mode.
- Then, re-pair the LED strip remote and test each button.
Step 4: replace faulty parts
- If the issue continues, test with a matching remote.
- Also, test the controller if another remote does not work.
- Finally, replace the part that fails the test.
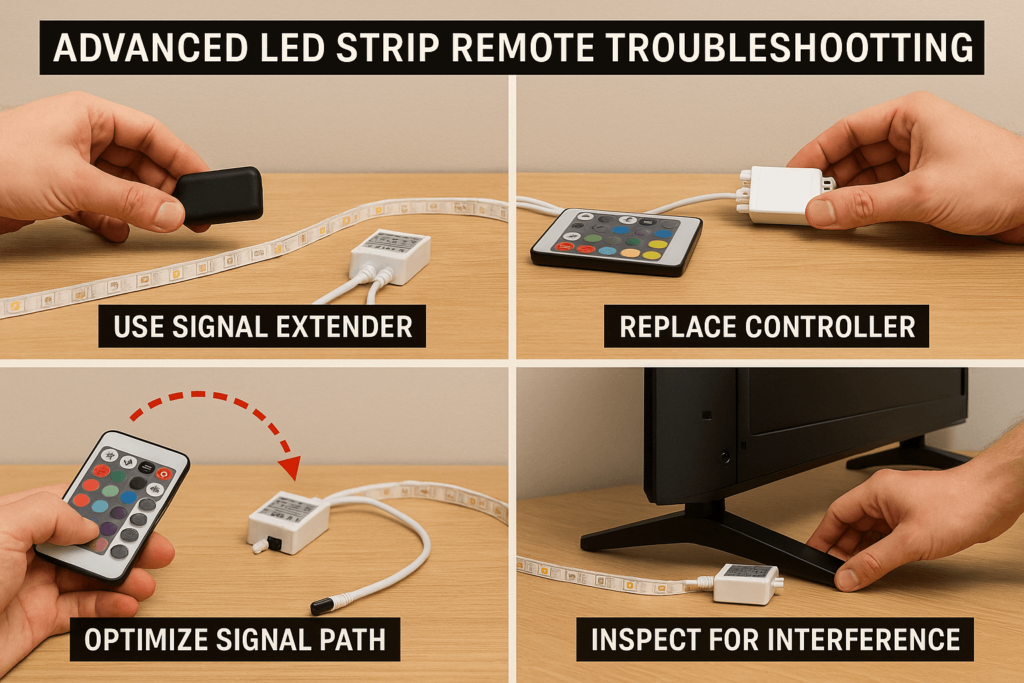
Advanced LED Strip Remote Fixes
If basic steps do not work, move to deeper checks. However, only replace parts after you confirm fit.
If basic steps do not work, move to range and fit checks.
Use a signal extender or repeater
- First, use an extender when the controller sits far away or inside a cabinet.
- Also, place the receiver where the remote has a clear signal path.
Verify remote and controller fit
- Check voltage, color type, control type, and pairing method.
- Then, compare the remote model with the controller model.
- Then, use a matching new if the original remote is not available.
Test and replace the controller
- Test the controller with another matching remote if possible.
- If the controller still fails, replace it with a matching model.
Improve the signal path
- Move the receiver away from large metal parts or thick walls.
- Also, keep it away from strong nearby electronics when possible.
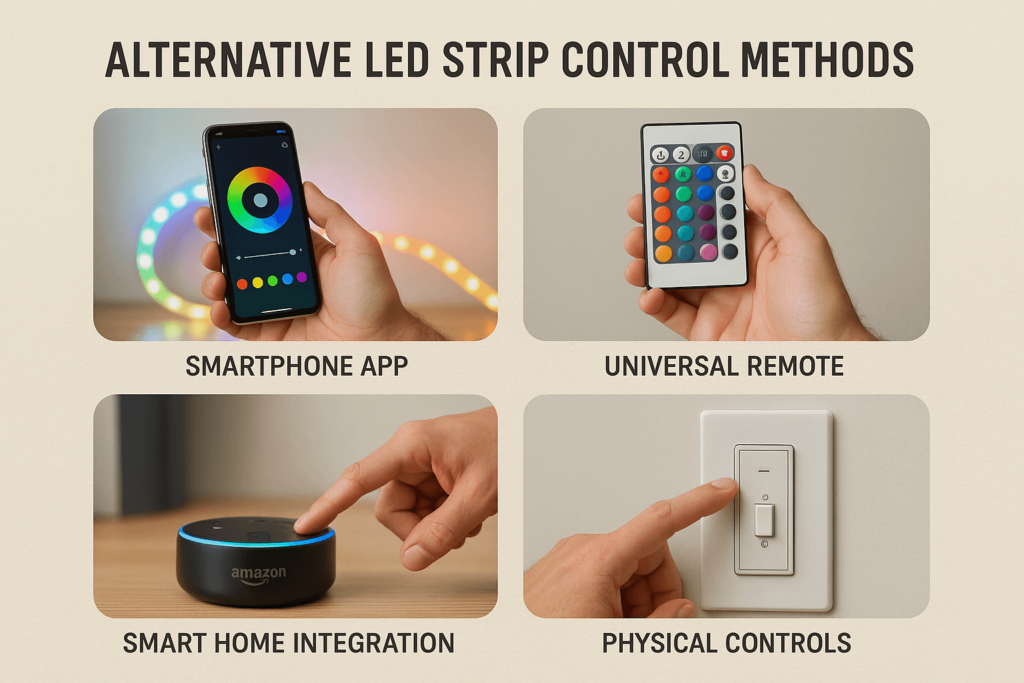
Other LED Strip Control Options
If the original remote keeps failing, consider a different control method. As a result, you may get better range, easier scenes, or smart control.
Smartphone app controls
- First, use Bluetooth or Wi-Fi controllers that support app control.
- Also, confirm that the controller matches the strip voltage and color type.
Universal LED remotes
- Choose a universal remote made for LED strip controllers.
- Then, check pairing steps and supported color modes before buying.
Wi-Fi or smart home controllers
- Next, use smart controllers for voice control, schedules, and scenes.
- However, confirm app support and strip fit first.
Wall-mounted controls
- Finally, use wall dimmers or control panels when a handheld remote gets lost often.
- Also, choose controls designed for LED strip lighting.
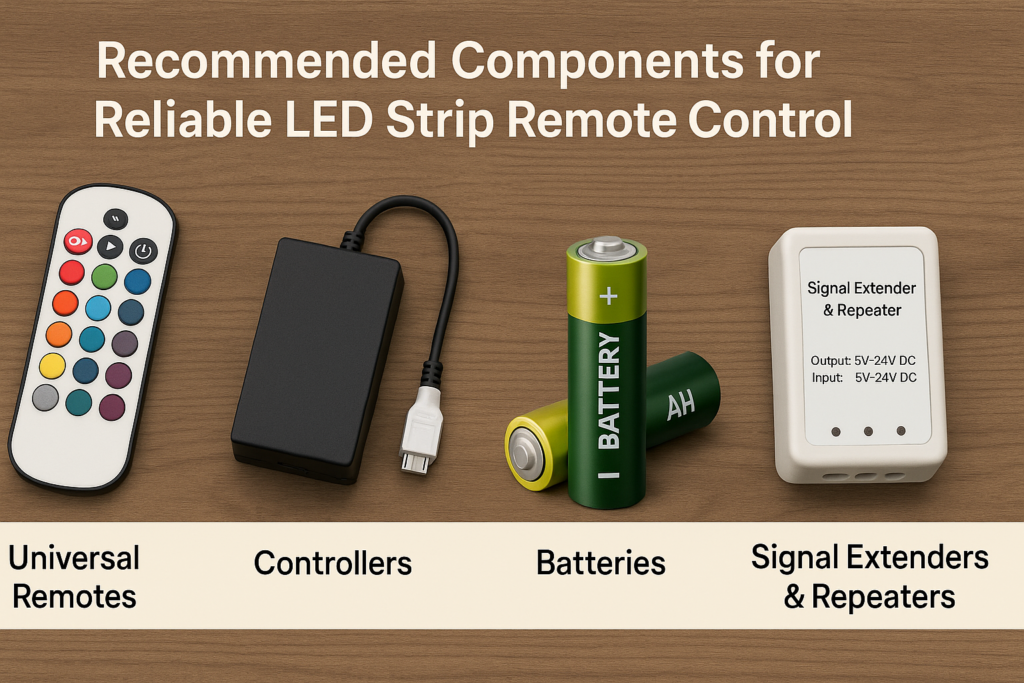
Recommended Parts for Reliable Remote Control
Reliable control depends on the remote, controller, batteries, and signal path. Therefore, choose parts that match your strip system.
For steady control, choose parts that match the strip system.
High-quality new remotes
- Start with remotes made for your LED controller type.
- Also, check color mode support, such as single color, RGB, RGBW, or RGBCCT.
Reliable LED controllers
- Match the controller to the strip voltage and wattage.
- Then, confirm pairing method, dimming support, and color channels.
Quality batteries
- For better response, use fresh alkaline or lithium batteries of the correct size.
- Also, keep spare batteries nearby for quick testing.
Signal extenders and repeaters
- Use repeaters when the controller is far from the remote position.
- However, confirm they work with your control type before installing.
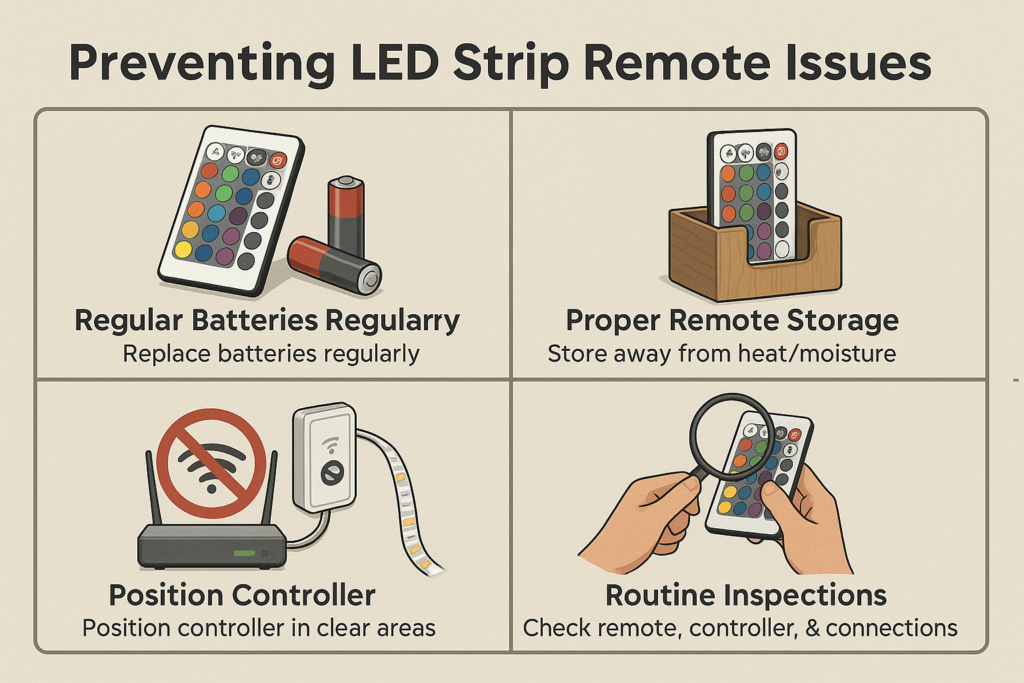
Prevent Future LED Strip Remote Problems
Preventive care can reduce repeat remote problems. In addition, it helps your strip lighting stay easier to control over time.
Before problems return, set a simple care routine.
Replace batteries before they fail
- Change batteries when response becomes slow.
- Also, remove batteries if the remote will sit unused for a long time.
Store the remote safely
- Keep remotes away from moisture, heat, and direct sunlight.
- Then, avoid drops and liquid spills.
Avoid signal blocking
- Place controllers where the remote signal can reach them.
- Also, avoid hiding receivers behind thick metal or dense furniture.
Inspect the system regularly
- Every few months, check remotes, controllers, batteries, and connectors.
- Then, fix small issues before they become repeated failures.
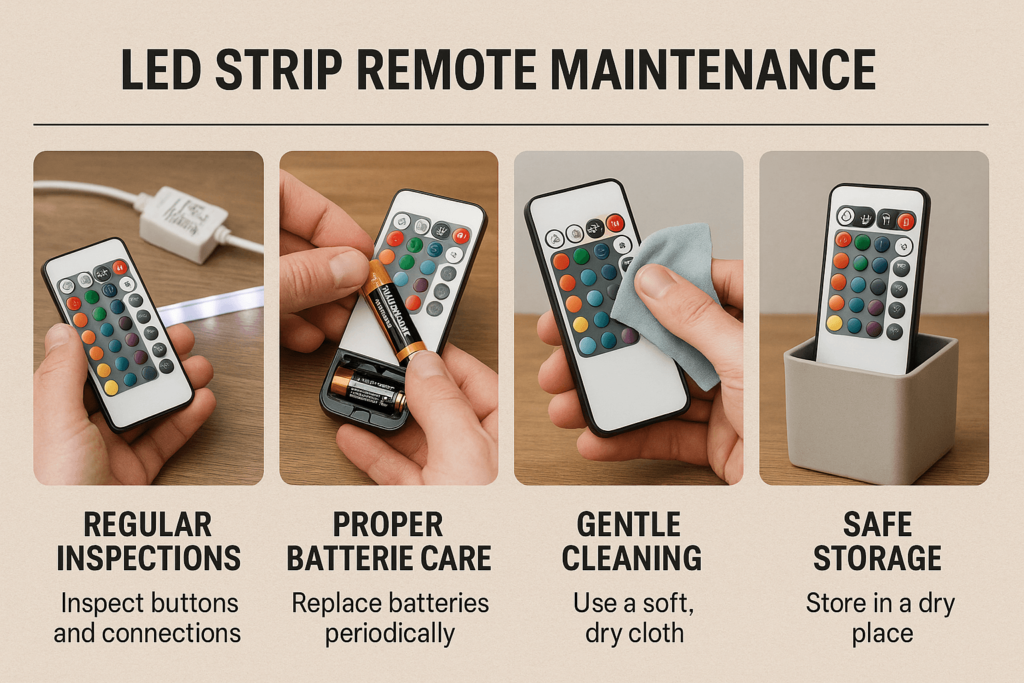
LED Strip Remote Care and Maintenance
Good care keeps the remote responsive. Also, it helps you spot battery leaks, button wear, and signal problems early.
Regular inspections
- During inspection, check the remote buttons and battery compartment.
- Also, test the LED controller response from the normal use distance.
Battery care
- For battery care, replace batteries before they leak or fail.
- Then, clean the battery contacts gently if needed.
Remote cleaning
- Wipe the remote with a soft dry cloth.
- Avoid harsh cleaners and excess moisture.
Safe storage
- Store the remote in a dry location.
- Also, keep it away from high heat and direct sunlight.
FAQs About LED Strip Remote Not Working
Why won’t my LED strip remote work?
Your LED strip remote may fail because of dead batteries, signal blocking, pairing issues, or a faulty remote. Start with batteries and signal path before replacing parts.
How can I reset my LED strip remote?
Usually, you reset it by disconnecting power, removing batteries, waiting a few seconds, restoring power, and pairing again. However, follow your product’s manual if it gives a different reset process.
Can I replace or upgrade my LED strip remote easily?
Yes, if the new matches the controller. You can use a matching original remote, universal remote, app controller, or smart home controller.
What if the remote works only close to the controller?
This often points to weak batteries or signal blockage. Replace the batteries first. Then, move the receiver or remove nearby blockers.
Conclusion: Fixing an LED Strip Remote
An LED strip remote usually stops working because of batteries, signal blockage, pairing errors, controller problems, or remote damage. Start with the easy checks first, then move to pairing and part new if needed.
With the right remote, matching controller, fresh batteries, and clear signal path, your LED strip lighting should stay easy to control.
Ready to improve your LED strip control setup? Browse Elstar’s LED strip lights, LED controllers, or contact Elstar for project support.


