First, plan the sign before you buy lights. A DIY LED sign is not just a font plus a strip light. The build path changes the shape, brightness, mount, power supply, repair access, and final use.
Also, match the method to the job. A simple room sign can use a kit or strip channel. However, a shop sign, booth sign, studio logo, or small batch needs more checks before you cut, bend, wire, or mount the parts.
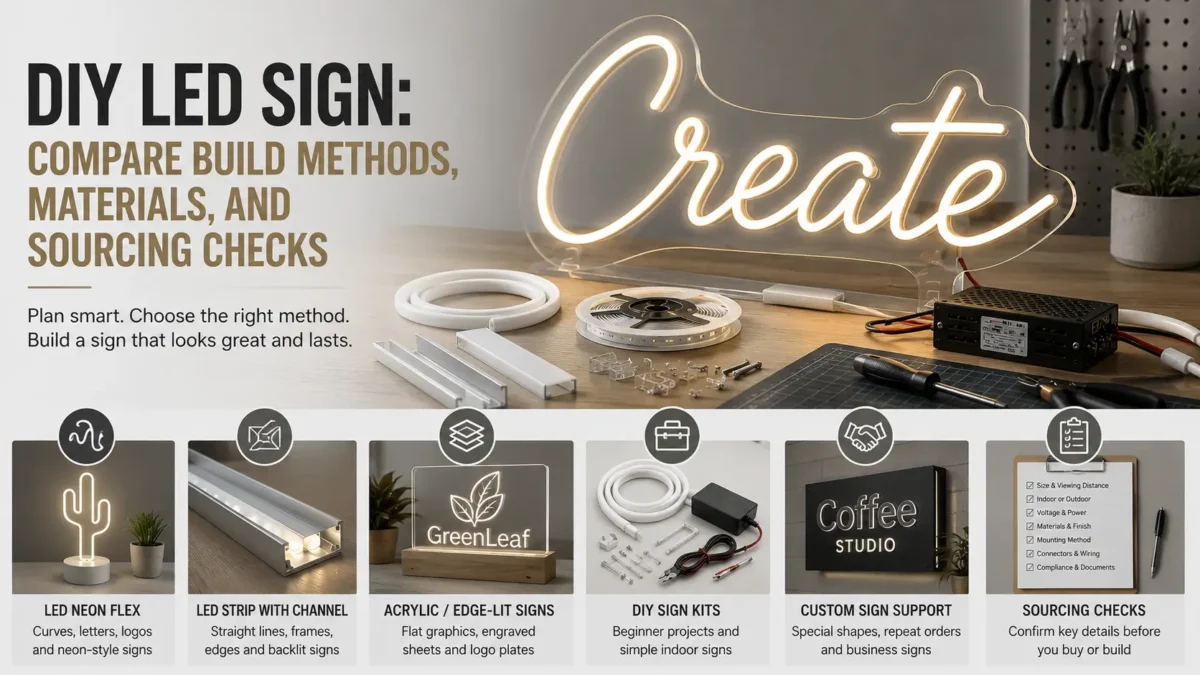
Usually, the best method depends on the sign style. For curved letters and logos, LED neon flex is often the best fit. Meanwhile, LED strip with a channel or diffuser works better for straight lines and simple frames. For flat panel signs, acrylic or backlighting can be a better path. Also, a kit gives beginners an easier start. Therefore, choose by shape, finish, use site, skill level, and whether this is one sign or a repeat order.
First, compare the build path before buying parts. Then match the option to the look you want, the shape, the mount, and whether you need to make the same sign again.
| Method | Best-Fit Use | Strengths | Limits to Check | Good For |
|---|---|---|---|---|
| LED neon flex | Neon-style words, outlines, logos, and décor signs | For example, it gives a smooth light line, easy shaping, and a strong visual look | However, confirm bend way, cut marks, voltage, mount, connector, and indoor/outdoor rating | Therefore, use it for indoor décor, studio signs, event backdrops, and brand displays when the product and site fit |
| LED strip with channel or diffuser | Straight lines, shelf signs, simple frames, and backlit edges | In addition, it is easy to buy and useful for straight or simple shapes | Still, check diffuser effect, bright dots, power load, channel size, mount, and heat | For example, use it for simple signs, wall features, shelves, and display frames |
| Acrylic, backlit, or edge-lit sign | Flat graphics, engraved sheets, and logo plates | As a result, it can give a clean face and a good fit for flat graphics | However, check sheet thickness, cut or print method, LED position, and mount | Therefore, it can fit reception signs, desk signs, shop signs, and branded décor |
| DIY sign kit | Beginner projects and simple indoor signs | Also, it gives fewer buying choices and an easier start | However, review size limits, design freedom, spare parts, and use site | For example, it fits hobby signs, gifts, and small room signs |
| Custom sign support | Hard shapes, repeat jobs, business signs, and unclear use sites | Therefore, it reduces guesswork before you buy or build | Still, it needs drawings, size, quantity, site details, and document needs | As a result, it suits shops, sign studios, resellers, and project buyers |
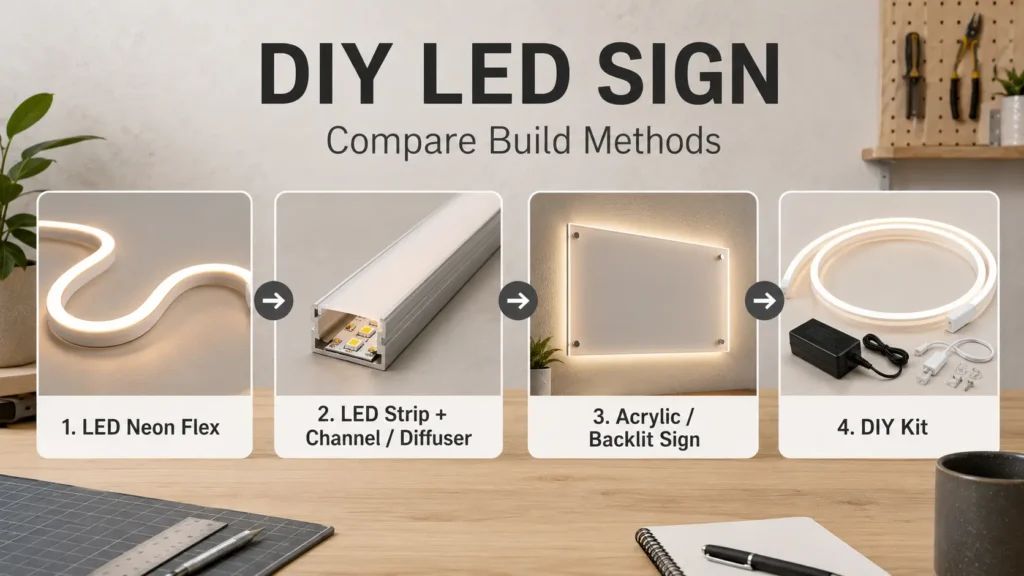
LED neon flex is often the best fit when you want a neon-style line, word, logo, or outline. It gives a smooth light line, so it works well for décor and brand signs.
However, check the bend way, cut marks, voltage, connector, mount parts, and use limits first. Do not assume every flex product bends the same way or can be cut anywhere. The exact cut and connection rules come from the product sheet.
Use this method when curves, letters, icons, or logo outlines matter most. For a neon-flex build flow, see ElstarLED’s DIY neon sign with LED neon flex guide.
LED strip with an aluminum channel or diffuser can work for simple signs. For example, it fits straight lines, frames, edges, and backlit effects. The channel helps with mounting, and the diffuser can hide bright dots.
However, this path is easier for straight or simple shapes. It is harder for tight curves, complex letters, or a smooth neon look.
Before buying parts, check the strip voltage, total load, diffuser effect, channel size, mount method, and service access. For an LED-strip-focused sign article, see ElstarLED’s LED strip sign guide.
Acrylic signs work best when the design is a flat panel instead of a line shape. For example, a logo, word, or graphic can be engraved, cut, printed, or fixed to acrylic, then lit from the edge, back, or frame.
This method can create a clean look for an office, shop, desk, or reception sign. However, it needs more build planning than a basic strip sign. Check sheet thickness, light position, mount, finish, and access for repair after the sign is in place.
DIY kits are a good first step for many beginners because they reduce sourcing choices. They may include light parts, mount parts, templates, or basic tools.
However, a kit is best for a simple indoor project with limited custom needs. Check the size, design freedom, color options, power supply, and spare parts before you buy.
Next, decide whether the project should be DIY, kit-based, or custom. For a simple personal sign, a DIY build can be enough. However, a business sign, repeat order, outdoor sign, or unclear power setup may need kit support or supplier help.
| Path | When It Fits | When to Avoid It | Buyer Note |
|---|---|---|---|
| Full DIY | For example, you want one simple indoor décor sign and can follow the product guide | However, avoid it for complex letters, outdoor use, long-term business use, or unclear wiring | Therefore, it is good for learning and small personal projects |
| DIY kit | Also, you want an easier beginner path with fewer buying choices | However, it may not fit special size, brand color, repeat orders, or special mount parts | Therefore, check size and design limits before ordering |
| DIY materials from supplier | If you know the design, this path gives more control over material, color, size, or quantity | However, avoid this path if you do not know the voltage, mount method, or use site | As a result, prepare specs before asking for advice |
| Custom sign support | When the sign is for a shop, client, event, outdoor area, or repeat job, custom support may fit better | However, it may be too much if you only need a simple hobby sign and do not need custom work | Therefore, share drawings, size, use site, and document needs early |
Often, DIY LED sign issues start before assembly. The design may look simple. However, the material may not bend the right way, cut at the needed point, fit the back board, match the power supply, or work in the use site.
Before buying parts, confirm these details:
Also, do not buy only by the product photo. A sign can look right in a photo but still fail if the material cannot bend to the layout, the power supply does not match, or the mount plan is weak.
Next, check the risks that often cause rework. Even one small detail can stop the sign from lighting well, fitting the board, or staying in place. Therefore, use this list before you cut, wire, or mount the sign.
| Risk Area | What to Check | Why It Matters |
|---|---|---|
| Cut points | First, cut only where the product marks or guide allow | Otherwise, wrong cuts can break a light section |
| Bend direction | Next, check whether the product bends one way or more than one way | However, some layouts need a bend the material cannot make |
| Connection method | Also, review connector, soldering, end cap, and seal needs | As a result, weak joints can cause poor light or failure |
| Voltage | Then, match the light material and power supply voltage | Otherwise, wrong voltage can damage parts or stop the light from working |
| Power load | In addition, check total load against the selected power supply | Therefore, a weak power supply can cause faults |
| Polarity | Also, check positive and negative connection rules where needed | Otherwise, wrong polarity can stop the sign from lighting or damage parts |
| Mounting | Before assembly, plan clips, adhesive, screws, back board, or channel | As a result, weak mounting can hurt the look and make repair harder |
| Outdoor use | For outdoor use, check rating, seals, connectors, and site conditions | Therefore, outdoor signs need product-specific checks |
| Business installation | Finally, check local electrical and sign rules where they apply | In some cases, long-term business signs may need extra review |
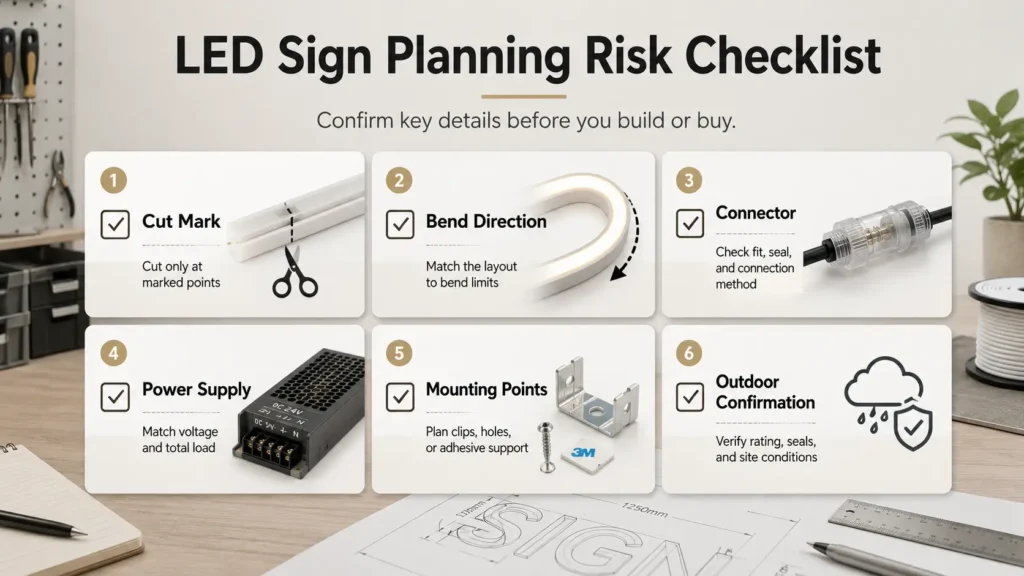
First, do not assume LED neon flex or LED strip can be cut anywhere. Many products have marked cut points. If you cut outside those marks, you may damage that section. Also, check bend direction before you lock the layout. In some cases, the product bends one way only.
Before you finish the design, match the curves with the bend rules. If the design has tight corners, small letters, or complex strokes, check whether the material can make the shape before cutting the back board.
Next, match the power supply to the voltage and load of the light material. Do not choose it only by size or price. Instead, check the voltage, total load, cable length, controller need, and connection method in the product sheet.
For a business sign or repeat order, record the power supply and connection plan. As a result, the same sign is easier to build again.
Also, treat outdoor and business signs with more care. Do not assume a DIY LED sign can be used outside just because it looks sealed. Check rating, sealing, connectors, mount, power supply position, and site conditions for the exact product.
For a long-term business sign, check local electrical and sign rules before installation. This article is not an electrical approval guide. Instead, it helps you ask better questions before choosing parts or asking for custom support. For U.S. electric-sign context, the International Sign Association summarizes UL 48 and NEC/NFPA 70 as relevant standards for electric signs and installation.
If you want supplier help, send enough detail for the supplier to understand the design and use case. Otherwise, a short request such as “I need LED neon for a sign” often creates more back-and-forth.
Before asking for a quote or advice, prepare these details:
| RFQ Detail | What to Send | Why It Helps |
|---|---|---|
| Design file | For example, AI, PDF, SVG, CAD, image, or clear sketch | As a result, the supplier can check shape and build fit |
| Text or logo | Also, exact words, font, logo file, or drawing | Therefore, this reduces design errors |
| Finished size | Next, width, height, letter height, and stroke width | Then the supplier can estimate material and layout |
| Light style | For light style, send LED neon flex, strip and channel, acrylic/backlit, kit, or unsure | As a result, the project can be routed to the right path |
| Color | For color, note single color, RGB, RGBW, warm white, cool white, or brand color target | Therefore, the supplier can select the right light material |
| Voltage preference | If known, share it; otherwise ask for advice | Then it helps match the power supply plan |
| Use site | For the use site, state indoor, outdoor, shop window, wall, event, vehicle, booth, or other site | As a result, rating and mount questions are easier to identify |
| Mount method | For mounting, list acrylic backer, wall mount, hanging, channel, clips, screws, or adhesive | Then the needed parts are easier to plan |
| Quantity | For quantity, state one sample, small batch, repeat order, or bulk need | Therefore, the right buying path is easier to choose |
| Documents needed | Also, ask for product sheet, wiring guide, rating data, test documents, or other project files | As a result, unsupported claims are easier to avoid |
| Timeline target | Finally, share the target date, with some room if possible | Therefore, the supplier can check fit instead of guessing |
Also, send photos of the site if the sign is for business use. If the sign is for outdoor or long-term use, say that clearly. Then the supplier can check whether the selected product and parts fit that condition.
First, choose the build method: LED neon flex, LED strip with channel or diffuser, acrylic/backlit build, or a kit. Then prepare the design, choose the back board or mount method, check the power needs, test the light material, mount it with care, and review the final use site. Exact cutting, wiring, and power steps depend on the product guide.
Usually, common materials include LED neon flex or LED strip, a back board such as acrylic or wood, a power supply, connectors or wiring parts, mounting clips or adhesive, and basic tools. However, the exact list depends on the design, light material, voltage, mount method, and indoor or outdoor use.
Often, faux neon-style signs use LED neon flex or silicone neon-style LED rope instead of a bare LED strip. These products spread the light into a smoother line. However, LED strip inside a channel with a diffuser can work for simpler signs, although it may not create the same neon-like shape.
Only cut LED neon flex where the exact product marks or guide allow. Otherwise, you can damage the light section. Also, reconnection rules depend on the product, connector, seal method, and use site. Therefore, check the product sheet or supplier guide before cutting.
The power supply must match the voltage and load of the selected LED material. First, check the product voltage, total length, wattage or load, controller need, and connection method. Then choose a power supply that fits those data points instead of using a generic adapter.
Do not assume outdoor suitability. Instead, check the exact product rating, seal method, connectors, power supply position, mount method, and site conditions. For business or long-term outdoor signs, also check local rules and confirm the product details before installation.
Build it yourself if the project is simple, indoor, and one-off. Choose a kit if you want an easier start with fewer buying choices. However, consider custom support if the sign has complex letters, business use, outdoor placement, repeat orders, or unclear site needs.
First, prepare the design file or sketch, finished size, text or logo, light style, color, voltage preference if known, use site, mount method, quantity, and document needs. If you are not sure which method fits, send the design and use details first.
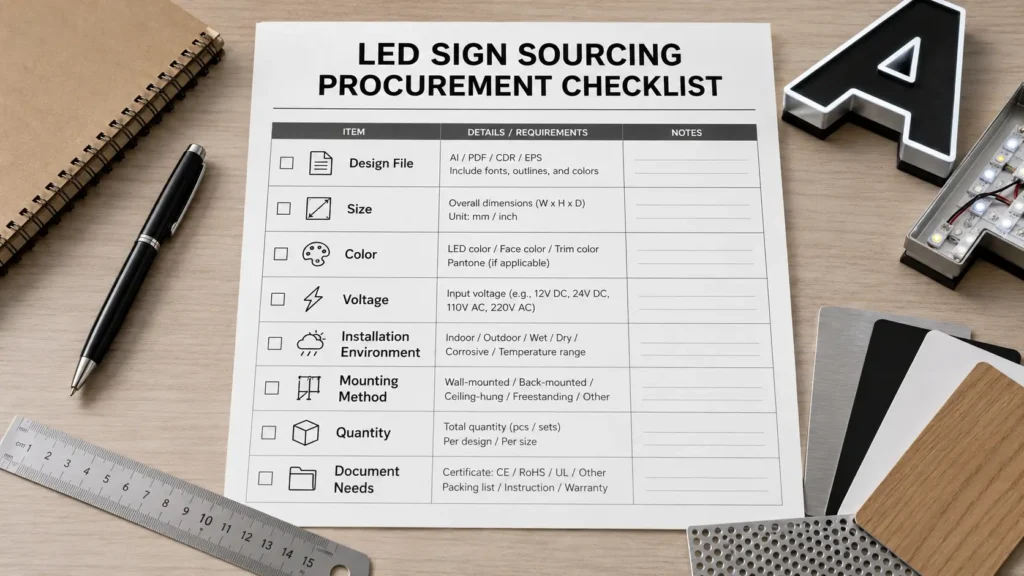
Before choosing materials, prepare your design file, sign size, color target, voltage preference, use site, mount method, quantity, and document needs. As a result, these details make it easier to discuss whether LED neon flex, strip/channel, acrylic/backlit build, a kit, or custom support fits the project.

 English
  Spanish
  French
  Arabic