

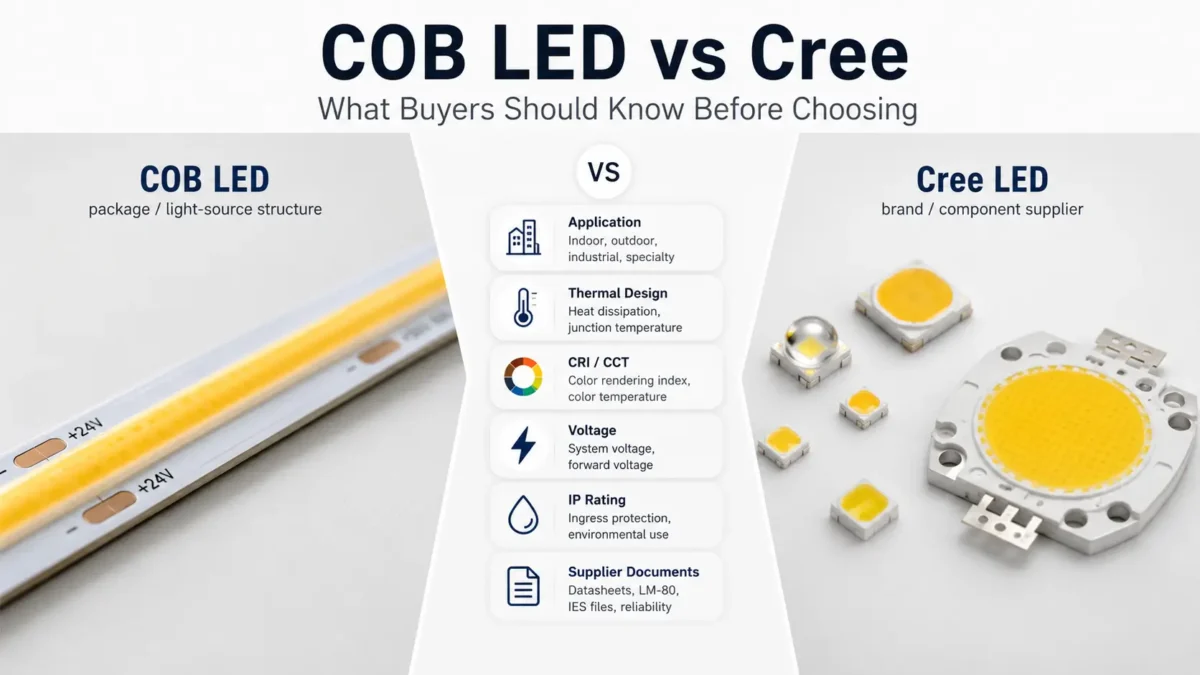
If you are checking COB LED vs Cree, first note that these two terms do not mean the same thing.
First, COB means a chip-on-board LED package or light-source build. Meanwhile, Cree LED is a brand and maker of LED parts and product lines. Therefore, a Cree LED product can also be a COB LED array, based on the product line.
Because of that, a simple “which is better?” answer can lead buyers in the wrong way. For LED strip, display, building, sign, OEM, or custom light projects, the better question is: what use, light effect, power specs, setup area, and supplier docs do you need to check before you choose?
In short, COB LED and Cree LED are not a true apples-to-apples match. First, COB is a chip-on-board LED package or light-source build. Meanwhile, Cree LED is an LED part brand and supplier that also sells COB LED arrays. Therefore, buyers should check use case, light effect, heat design, voltage, CRI/CCT, IP rating, control type, and supplier docs before they choose.
At first, many people search “COB LED vs Cree” as if both terms describe two rival LED types. However, that is only partly true.
First, COB means chip-on-board. Then, it tells you how many LED chips are set close together on a base to form one light source. For example, Lumileds describes a CoB LED as one device with many LED chips set on a heat-friendly base below a phosphor coat.
Meanwhile, Cree LED refers to a supplier and brand of LED parts and product lines. In addition, Cree LED publishes product families such as XLamp LEDs, J Series LEDs, High Brightness LEDs, LED chips, and COB LED arrays.
| Wrong framing | Better framing |
|---|---|
| COB vs Cree as two equal LED types | COB as a package or light-source build vs Cree as a part brand or supplier |
| Which one is always better? | Which setup fits the use, specs, and supplier needs? |
| Choose by brand or package name alone | Choose by use, power design, heat design, light effect, docs, and sourcing needs |
For buyers, this point matters because the final light result depends on more than one term. For example, chip source, package type, strip design, driver or power supply, heat path, setup surface, cover level, and supplier docs can all affect the final choice.

First, COB stands for chip-on-board. In practice, it often means many LED chips are set close together on a base and used as one light-emitting area.
Therefore, buyers should see COB as a structure or light-source format, not as a brand.
For example, in LED strip projects, COB-style products are often used when the job needs a smooth light line. However, the final look still depends on product design, diffusion, and setup conditions. Also, that does not mean every COB product works the same way. As a result, the final choice still depends on power, heat path, CRI/CCT, setup method, and supplier specs.
Before you review a COB LED product, check:
In contrast, Cree LED is not a package structure like COB. Instead, it is an LED part and product supplier.
For example, a buyer may see Cree listed when a product uses Cree LED chips, Cree LEDs, or Cree LED arrays. Also, Cree LED has COB LED array product lines, so “Cree” and “COB” can overlap.
Therefore, the real question is not simply “COB or Cree?” Instead, ask:
As a result, this approach keeps the review useful and avoids choosing by brand or package name alone.
| Comparison Item | COB LED | Cree LED | What Buyers Should Check |
|---|---|---|---|
| What the term means | A chip-on-board LED package or light-source build | An LED part or product brand and supplier | Whether the product uses COB build, Cree parts, or both |
| Category | Package / light-source format | Brand / part supplier | Exact product build and part source |
| Can overlap? | Yes, a COB product may use parts from different suppliers | Yes, Cree LED sells COB LED arrays | Do not assume “Cree” rules out COB |
| Buyer value | Helps check light-source build and product form | Helps check part source and product line | Datasheet, chip source, and supplier docs |
| How to choose | Use, light effect, power design, heat design, product build | Part line, product specs, supplier design, docs | Confirmed specs, not brand name alone |
| Risk if misunderstood | Buyer may assume COB is better or worse by default | Buyer may assume brand alone proves fit | Always match specs to the real project |
First, LED strip lights are not only for bedrooms and gaming rooms. In addition, they can support shop, display, hotel, café, bar, and sign projects when they are planned with care.
For example, retail shelves can use strips to draw the eye to products. Meanwhile, display cases can use them to make small items easier to see. Also, these lights can help show detail when brightness and color are chosen well.
Similarly, cafés, bars, and hospitality spaces can use indirect strip lighting to mark counters, seats, and wall features. Meanwhile, signs can use strips to create a backlit or edge-lit look when the sign build supports it.
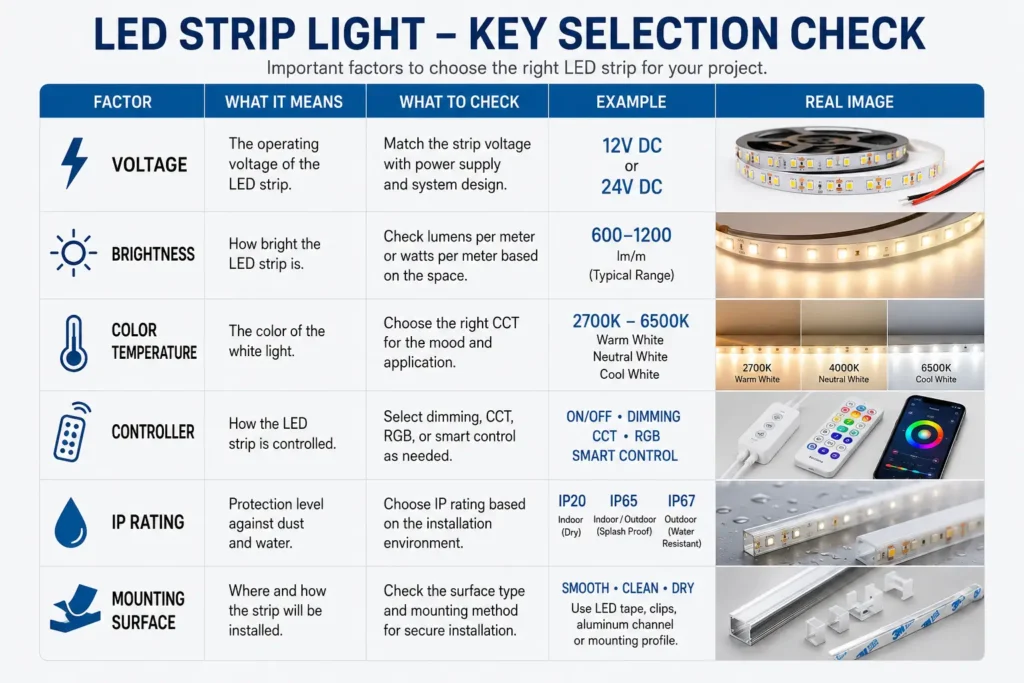
For these uses, do not choose only by color or price. Instead, project spaces need closer checks on brightness, color temperature, color rendering, mounting method, controller access, power supply spot, and service access.
However, a good LED strip idea can fail if the strip does not match the area. Therefore, before you choose a product, connect the idea to the conditions it must handle.
| Selection Factor | Why It Matters | When to Check | Safe Example |
|---|---|---|---|
| Strip length | Affects power planning and layout | Any long run, cove, shelf row, or sign outline | First, measure the full path before you choose strips or a power supply. |
| Voltage | Must match the power supply and system design | Any project that uses a separate power supply | Next, confirm strip voltage before you choose drivers or add-ons. |
| Power draw | Affects power supply size | Long runs, bright strips, multi-strip layouts | Then, estimate total watts before you choose a power supply. |
| Brightness / lumens | Affects whether the strip is for accent or work light | Task lighting, displays, counters, work areas | Use brighter strips for clear sight and softer light for mood. |
| Color temperature | Changes how the space feels | Bedrooms, kitchens, retail, hospitality | Warm or neutral white often feels calmer than very cool white. |
| CRI / color rendering | Affects how items and products look | Retail displays, food, materials, artwork | Higher color accuracy may matter when products must look natural. |
| Controller type | Affects dimming, color change, and user control | RGB/RGBW, smart control, remote control, dimming | Decide whether simple on/off, dimming, or color control is needed. |
| Mounting surface | Affects stick strength and setup method | Painted walls, metal, wood, glass, rough surfaces | Check whether the surface is clean, flat, and fit for mounting. |
| Diffuser or channel | Softens dots and guards the visual finish | Visible strips, shelves, stairs, cabinets | Use a channel or diffuser where exposed LED points would look harsh. |
| IP rating | Shows dust and liquid ingress resistance | Outdoor, damp, kitchen, bathroom-like areas | Also, check the product rating and setup area before use. |
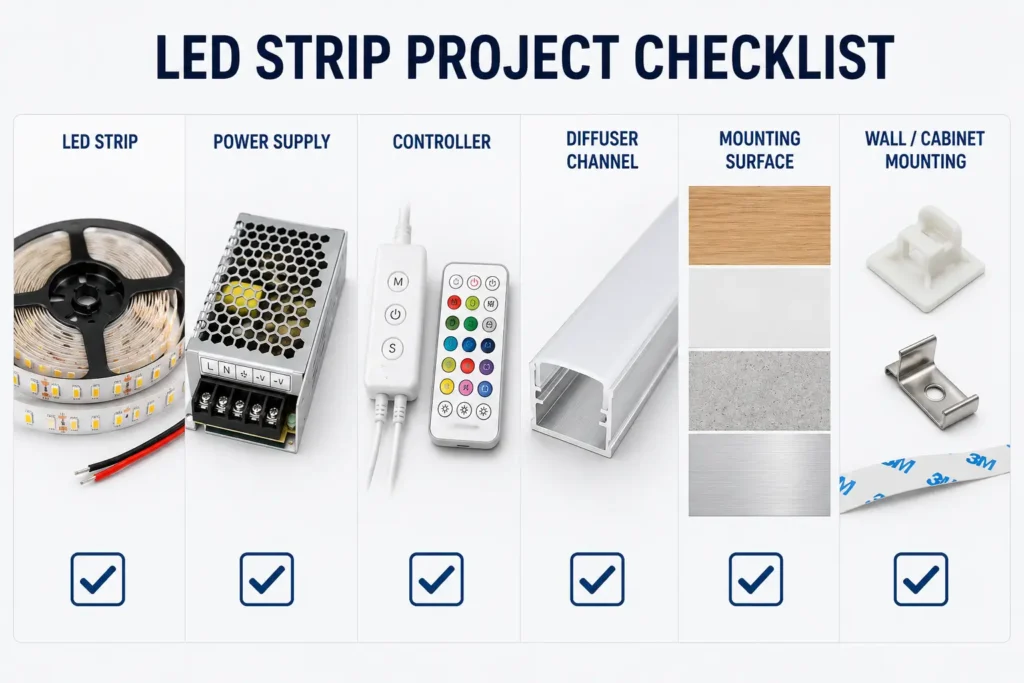
First, define the use. Next, measure the path and check the power spot. Finally, choose the strip, power supply, controller, and mounting method that fit the space.
For example, outdoor and moisture-exposed ideas need extra care. Although a patio, balcony, bar counter, or outside sign may look simple, the strip, power supply, connectors, and mounting method all need to match the area.
Before you choose an outdoor or moisture-exposed LED strip idea, check these points:
| Use Environment | Exposure Risk | What to Check | Planning Note |
|---|---|---|---|
| Dry indoor room | Low moisture risk | Mounting surface, controller, brightness | Usually simple, but still check voltage and power needs. |
| Kitchen or utility area | Possible steam, cleaning, or splashes | Product rating, mounting surface, power spot | Therefore, avoid assuming every strip is safe near moisture. |
| Covered patio | Outdoor air, temperature change, possible dampness | IP rating, power supply spot, mounting | Also, check the whole system, not only the strip. |
| Outdoor sign or feature | Weather exposure | IP rating, box, cable route, service access | Instead, use site-based planning before setup. |
| Long ceiling cove or long shelf run | Uneven brightness or voltage drop risk | Strip length, power supply, feed points | Because of voltage drop risk, long runs may need extra power planning. |
First, do not assume that “outdoor” and “waterproof” mean the same thing. Instead, the right choice depends on exposure, setup position, product rating, and how the power system is protected. Therefore, if the project has wet areas, outside wiring, or a complex setup, get the site conditions checked before you order.
First, leftover LED strips can be useful for small shelves, closets, display boxes, desk edges, or sample mockups. However, reuse depends on whether the parts work together. Therefore, do not assume a leftover strip will work with any power supply or controller.
Before you reuse a strip, check:
For simple accent reuse, small hidden areas are often safer than high-risk spots. Therefore, avoid using unknown leftover strips in wet, outdoor, closed-in, high-heat, or hard-to-service areas.
First, a short planning check can prevent the most common LED strip problems. For example, it can help you avoid wrong length, uneven brightness, exposed dots, poor mounting, hard-to-reach power, or a strip that does not fit the area.
Use this checklist before you buy or install:
If the project is more than a simple room accent, prepare the main details before you contact a supplier. As a result, the supplier or sales team can understand the use without guessing.
| RFQ Detail | Why It Helps |
|---|---|
| Use case | Shows whether the strip is for mood, display, task, sign, or project light. |
| Setup location | Helps separate indoor, damp, outdoor, display, or sign conditions. |
| Estimated length | Supports strip length and power planning. |
| Quantity | Helps show whether the request is for a sample, room, project, or bulk order. |
| Voltage choice | Helps match the power supply and system design. |
| Color or CCT choice | Shows whether the project needs warm white, neutral white, cool white, RGB, or another option. |
| Brightness need | Helps separate soft glow from useful work light. |
| Control type | Shows simple switch, dimming, remote, app, DMX, or other control needs. |
| Mounting surface | Helps show whether channels, clips, or other mounting methods may be needed. |
| Environment | Flags indoor, moisture, outdoor, heat, or cleaning exposure. |
| Destination / market | Helps clarify docs, plug, shipping, or compliance talks later. |
| Photos, drawings, or sketches | Reduces confusion when the layout is custom or hard to explain. |
In short, this information does not replace a technical review. However, it gives the supplier a clearer starting point.
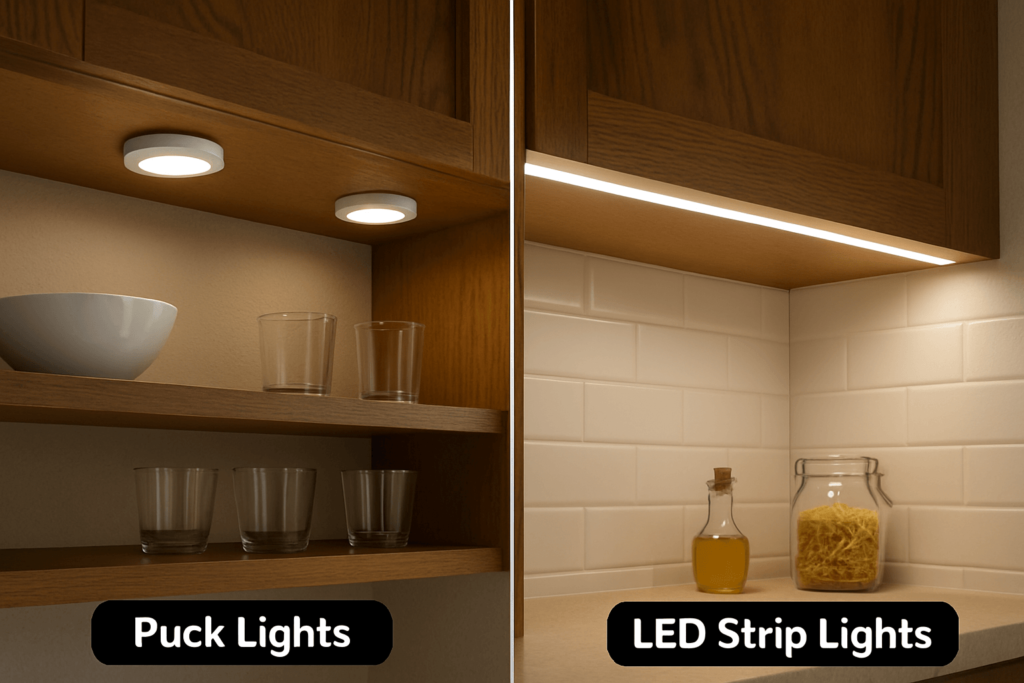
For example, cool ideas include TV backlighting, under-cabinet lighting, shelf lighting, stair accents, bed-frame glow, closet lighting, ceiling coves, gaming desks, display cases, signs, patio accents, and retail shelf lighting. First, match the idea to the spot, power access, mounting surface, brightness, color, and area conditions.
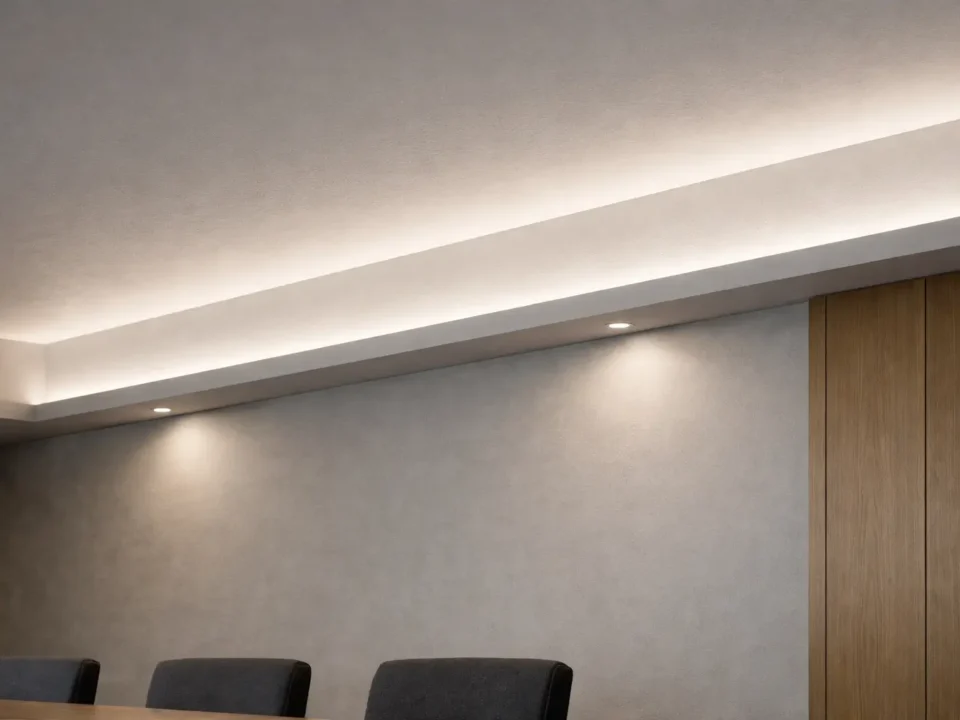
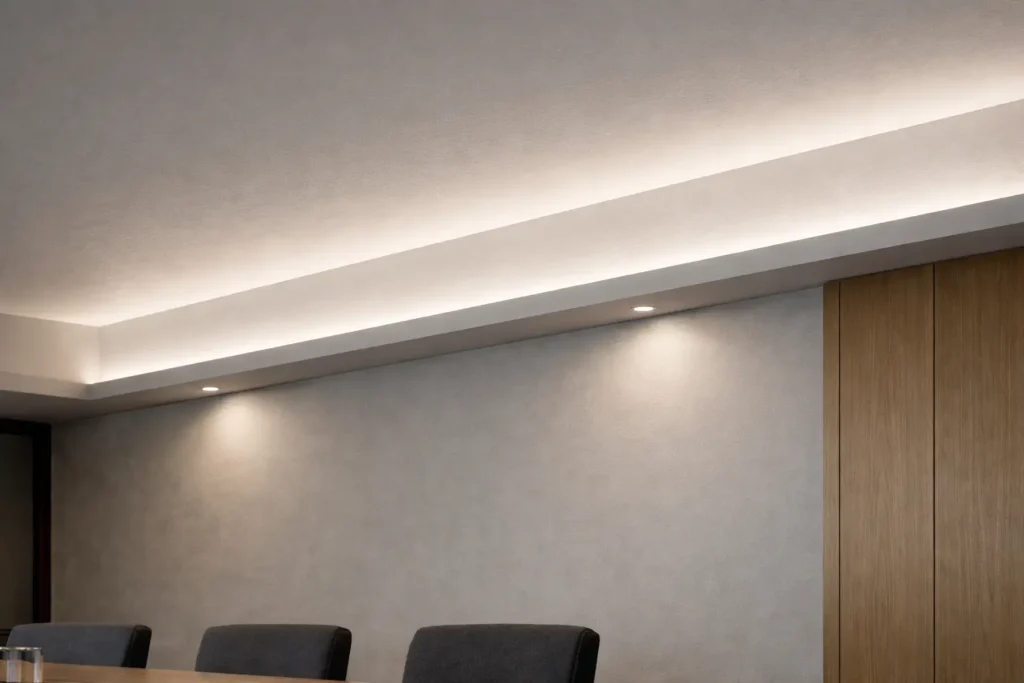
For rooms, good spots include behind a TV, under a bed frame, under shelves, along a desk edge, inside a closet, behind a headboard, under cabinets, or along a ceiling cove. However, in most rooms, hidden or indirect placement gives a cleaner look than exposed strips.
First, use indirect lighting where you can. Also, hide the strip behind an edge, use a diffuser or channel, choose a good color temperature, and avoid bright exposed dots in the line of sight. As a result, bedrooms and living rooms often feel calmer with subtle white or warm light than with strong color effects.
Sometimes, yes. However, reuse depends on the strip’s voltage, cut marks, connector type, controller fit, power supply, left length, and physical condition. Therefore, avoid using unknown or damaged strips in outdoor, wet, closed-in, or hard-to-service areas.
First, check the purpose, length, voltage, total power draw, power supply, controller, mounting surface, brightness, color temperature, diffuser need, cable route, and area. Also, for outdoor or moisture-exposed areas, check the product’s IP rating and the setup conditions.
First, outdoor or moisture-exposed ideas need products and setup methods that suit the exposure. Therefore, check the IP rating, power supply spot, connectors, mounting, and service access. Also, do not assume every LED strip is safe for outdoor or wet-area use.
For example, display, retail, and task lighting projects should compare brightness, color temperature, color rendering, voltage, power draw, strip density, diffuser options, and controller needs. In short, the right choice depends on whether the light is for accent, work, or clear product color.
First, prepare the use case, setup location, rough length, amount, voltage choice, color or CCT, brightness need, control type, mounting surface, area, destination, and photos or drawings if you have them. Also, avoid relying on a short note such as “I need LED strips for a project.”
First, for a project or bulk request, prepare your use case, rough length, amount, setup area, voltage choice, color or CCT, control type, mounting surface, and destination. Also, photos, drawings, or sketches are useful when the layout is custom or hard to describe.
In short, the more clearly you describe the project conditions, the easier it is to narrow the LED strip type, accessories, and next questions before you order.