

So, you’re ready to dive into the world of under-cabinet LED strip lighting? First things first, you’ve got to pick the right LED strip for your space. Think about what you really need. Are you looking for bright task lighting or maybe something softer for a cozy vibe? The brightness you go for will depend on that. Then there’s color temperature—do you want a warm glow or a cooler, more functional light?
Voltage is another biggie. Most LED strips are low-voltage, but you’ve got to make sure they jive with your power supplies. If this all sounds like Greek to you, maybe give an electrician a call for some advice. Oh, and don’t forget—you’ll need enough LEDs to go the distance, so make sure you’ve got a full reel to cover your cabinets.
| Factors | Tips & Tricks |
| Brightness | Determine the desired luminosity. Check the lumens rating on the LED strip. Higher lumens mean brighter light. |
| Color Temperature | Decide if you want warm (yellowish) or cool (bluish) light. Look for the Kelvin (K) rating; 2700K is warm, 6500K is cool. |
| Color Options | For mood lighting, opt for RGB (Red, Green, Blue) LED strips which can be mixed to produce various colors. |
| Length | Measure the area where you’ll install the strip. Buy slightly longer than needed; you can always trim to fit. |
| Power Source | Ensure you have a nearby power source. Consider battery-operated strips for areas without outlets. |
| Water Resistance | For outdoor or bathroom use, choose strips with an IP65 or higher rating, indicating water resistance. |
| Adhesive Quality | Check reviews for feedback on the adhesive’s strength. Consider additional mounting brackets for extra security. |
| Dimmability | If you want adjustable brightness, ensure the LED strip is dimmable and you have the necessary controller. |
| Lifespan & Warranty | Opt for strips with a longer lifespan (usually indicated in hours) and a good warranty for peace of mind. |
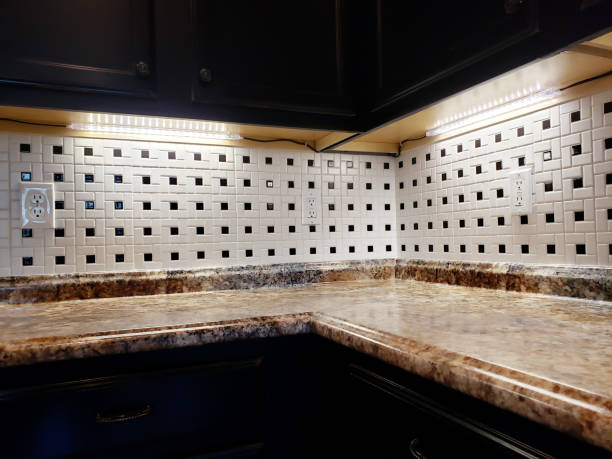
Alright, you’ve got your LED strips. Now, where should they go? Placement is key if you want to get the lighting just right. Focus on the spots that need it most, like your countertop and right under the upper cabinets. Running the strip in a straight line along the bottom of the upper cabinets is usually your best bet. It’s like killing two birds with one stone—functional and looks good.
If you’re sprucing up the kitchen, think about where you spend most of your time. Maybe it’s near the microwave or the coffee maker? Placing LEDs there can make your life a lot easier. The aim is to light up your workspace without turning it into an interrogation room.
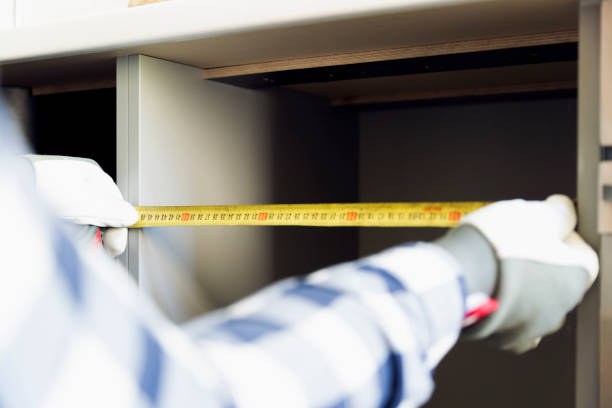
So, you’re all set to jazz up your space with some LED strip lights? Great choice! But before you jump into the thick of things, let’s get some basics sorted. Grab a tape measure and figure out how much LED strip you’re going to need. Measure the space under your cabinets where you want the lights to shine. Jot down these measurements—trust me, you’ll thank yourself later.
Now, about that surface under your cabinets. It needs to be clean and smooth. Think of it like prepping a canvas for painting. If there are any rough patches or bumps, give them a little sanding. You want a nice, flat surface so that the adhesive on the LED strips sticks like a dream.
Alright, before we go any further, let’s do a quick test run. It’s always a good idea to make sure everything’s working before you get too deep into the installation. Connect your LED strip to its power supply. If you’re using a solderless connector or wire nuts, ensure the positive and negative ends match up. Give it some power and see if those LEDs light up as brilliantly as you imagined.
Run into a hiccup? No worries. Double-check your connections and make sure the voltage of your LED strip and power supply are in harmony. If electronics isn’t your strong suit or you’re feeling a tad unsure, don’t hesitate to ring up an electrician. Once you’re confident everything’s in tip-top shape, you’re ready to move on to the next phase.
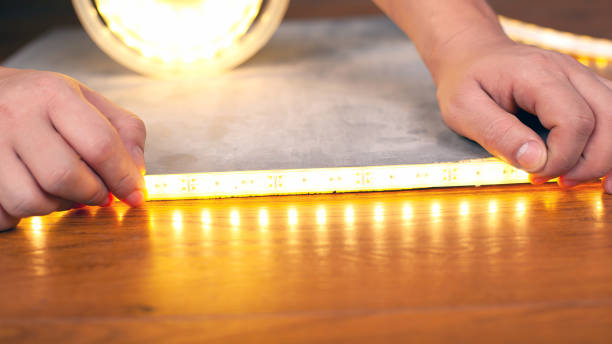
Alright, you’ve given your LED strips a test run and they’re shining bright. Nice! Now, let’s get them to the right size. You’ve probably noticed those little lines marked on your LED strips. Those are your cut lines, and they’re your best friends right now. Grab some sharp scissors or a nifty cutting tool and snip away, following those lines. Need to navigate some corners or angles? No problem. Just use a strip connector to link different pieces together.
Here’s a pro tip: double-check your measurements before making the final cut. You want these lights to nestle perfectly under your cabinets, not dangle off the edge like an afterthought. So, measure twice, cut once, and you’ll be golden.
Okay, deep breath. Wiring might sound like the big bad wolf of this project, but trust me, it’s not as scary as it seems. First things first, safety. Make sure the power’s off in the area you’re working on. No one wants any unexpected surprises.
Now, let’s get those LED strips connected to the power supply. Typically, you’ll be connecting the red wire to the positive end and the black wire to the negative sides. Whether you’re using wire nuts or getting fancy with a soldering iron, make sure those connections are snug.
Got a terminal block with your LED strips? Jackpot! It makes things a tad easier. Pop the wires into the terminal block and give those screws a good twist with a flathead screwdriver. But remember, always double-check your connections. Mixing up the positive and negative ends? Not a fun time. Once you’re all wired up, give those lights another test to ensure they’re shining just right.
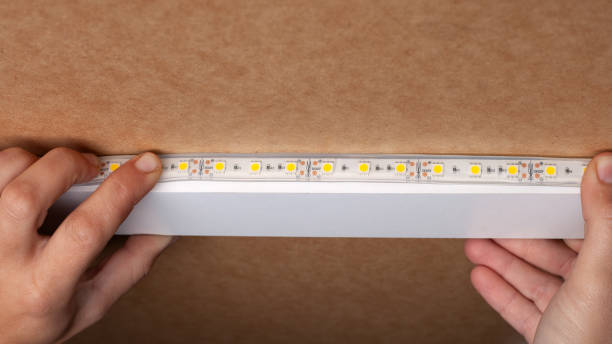
So you’ve double-checked all your connections and everything’s looking good. The last step is to make it all permanent. Most LED strips come with this handy adhesive backing. Just peel off the protective layer and press the strip firmly against the flat surface under your cabinets. Give it a good press to make sure it’s really stuck on there.
But hey, not all surfaces are adhesive-friendly. If you’re dealing with a tricky material, you might have to bring out the big guns: a drill and some screws. Grab a screwdriver, and if your cabinets are made of something tough, get that drill ready. Just make sure your screws aren’t so long that they’ll poke through the other side of the cabinet. Once everything’s secure, you can breathe easy and move on.
Let’s be real, nobody wants to see a bunch of wires hanging out, especially when you’ve put so much effort into this project. So let’s tidy things up. You can use wire nuts or terminal blocks to bundle any stray wires together. Still got some wires peeking out? No worries. Grab some adhesive clips and tuck those wires neatly under the cabinets or behind fixtures. It’s like the finishing touch on a masterpiece, making everything look sleek and professional.
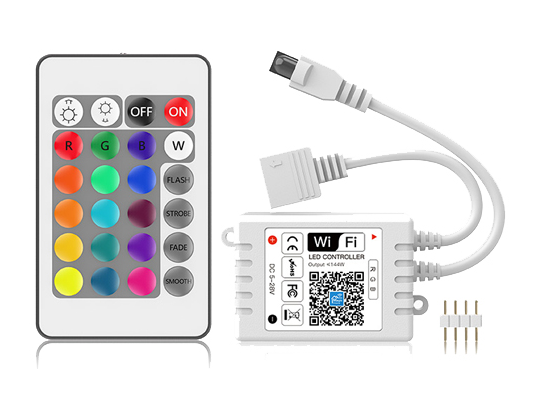
So, you’ve got your LED strips up and they’re looking good. But what if you want to switch up the vibe? That’s where dimmers come in. With a dimmer, you can dial the brightness up or down to fit the mood. Slicing and dicing veggies? Crank it up. Romantic dinner? Dial it down.
Installing a dimmer is usually a piece of cake. Most come with easy-to-follow instructions, and it’s often as simple as connecting a wire or two. If you’re into smart home tech, you might want to go for a smart dimmer. That way, you can control the brightness with your phone or even just your voice.
Nailing the perfect lighting isn’t just about sticking LED strips under your cabinets and calling it a day. It’s about striking that perfect balance between practicality and pizzazz. So, here are a few tips to make sure your lighting game is strong:
Even with careful measurements and the best led strip light preparations, the installation process might present a few challenges. Here’s a quick installation process guide to tackle common hitches:
Safety is paramount every step of the way. Keep these precautions in mind:
Though LED strip lights are generally low-maintenance, a bit of care can extend their lifespan:
As mentioned before, installing LED under cabinet lighting may be challenging. However, as soon as you have the right tools prepared, and spend a little patience, it’s actually a DIY task that can be accomplished well. From selecting the right LED strip lights to cutting and securing them correctly, each step plays a crucial role in the final outcome. If it is beyond your ability, it’s okay to consult an electrician or a professional with experience in LED light strip installation.
The LED strip under cabinet lighting, an important member of home decoration, can be versatile to achieve task lighting and accent lighting at the same time, creating an inviting and comfortable atmosphere for you. If you want to find any high-quality and energy-efficient solution for under-cabinet LED strip lighting, Elstar has been always here to assist you in attaining the ideal lighting effects, feel free to contact us at any time.


