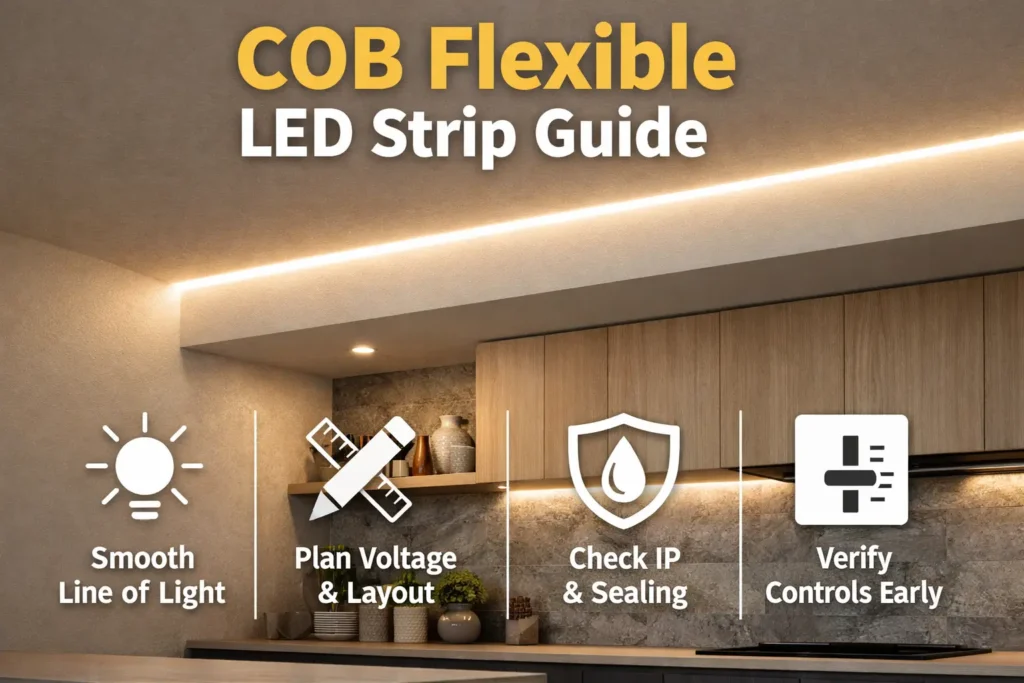
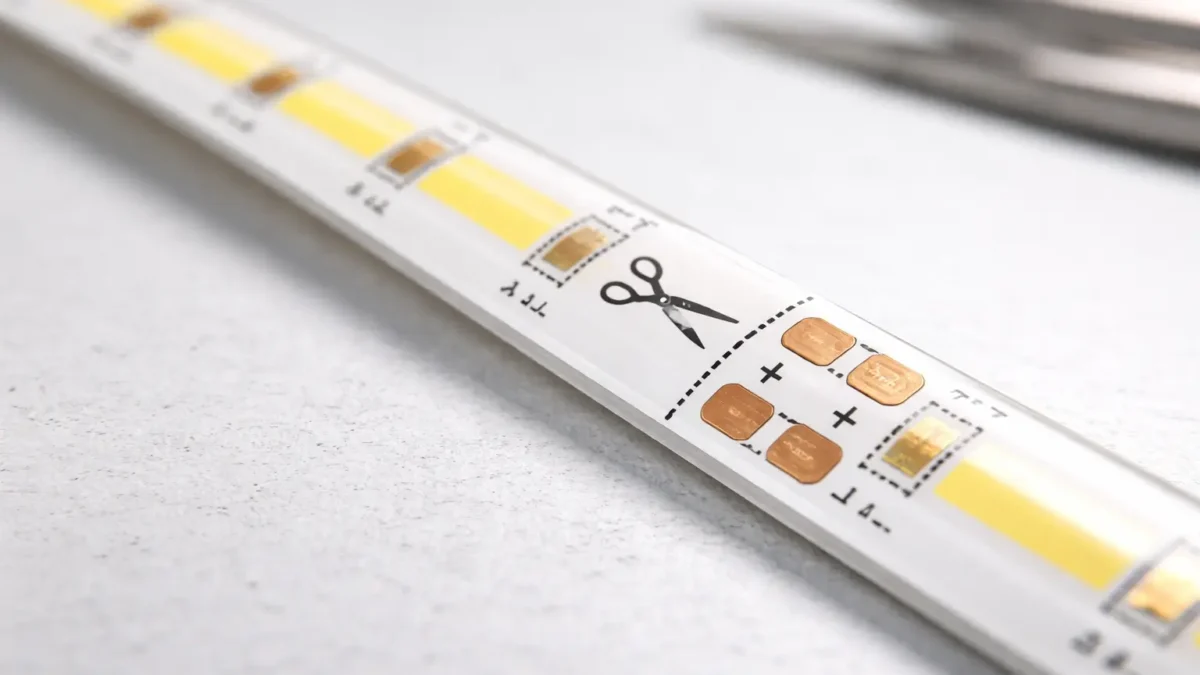
If you need to know how to cut a COB LED strip, start by finding the printed cut marks. Most COB LED strips can only be cut at these marked points. Therefore, do not cut between marks unless the product is clearly labeled as free-cut or cut-anywhere.
Also, remember that cutting is only the first step. After you cut, you may need to test the segment, reconnect it, protect the copper pads, or reseal the end if the strip is waterproof.
You can cut most COB LED strips only at the marked cut points. These marks often use a scissor icon or printed line near copper pads. After cutting, test the segment before final mounting.
| Do | Do Not |
|---|---|
| Cut only on the printed cut line or scissor mark. | Do not cut between marks unless the datasheet allows it. |
| Keep the cut straight and protect the copper pads. | Do not crush or tear the strip with dull tools. |
| Test the cut segment before installing it in a profile. | Do not hide the strip first and troubleshoot later. |
| Reseal the cut end if the strip is IP-rated. | Do not assume waterproofing remains intact after cutting. |
Before cutting, identify the strip type. This step helps you avoid a cut that damages the circuit, removes the pads, or creates wiring problems later.
| Type | What it means for cutting | What to verify |
|---|---|---|
| Standard segmented COB strip | Cut only at marked cut points for each segment. | Confirm cut mark location and copper pad layout. |
| Free-cut / cut-anywhere COB variant | May allow finer trimming than standard strips. | Verify the datasheet, cut diagram, and connection method. |
Single-color strips usually need only positive and negative pads. However, CCT, RGB, RGBW, and addressable strips need more channels or data lines. As a result, wiring mistakes become more likely after cutting.
Boundary conditions: Multi-channel and waterproof strips add risk. Therefore, use the wiring diagram and reseal method for the exact product series.
Most COB strips are designed to be cut at specific cut points. These points keep the segment electrically valid and leave copper pads for a connector or soldered lead.
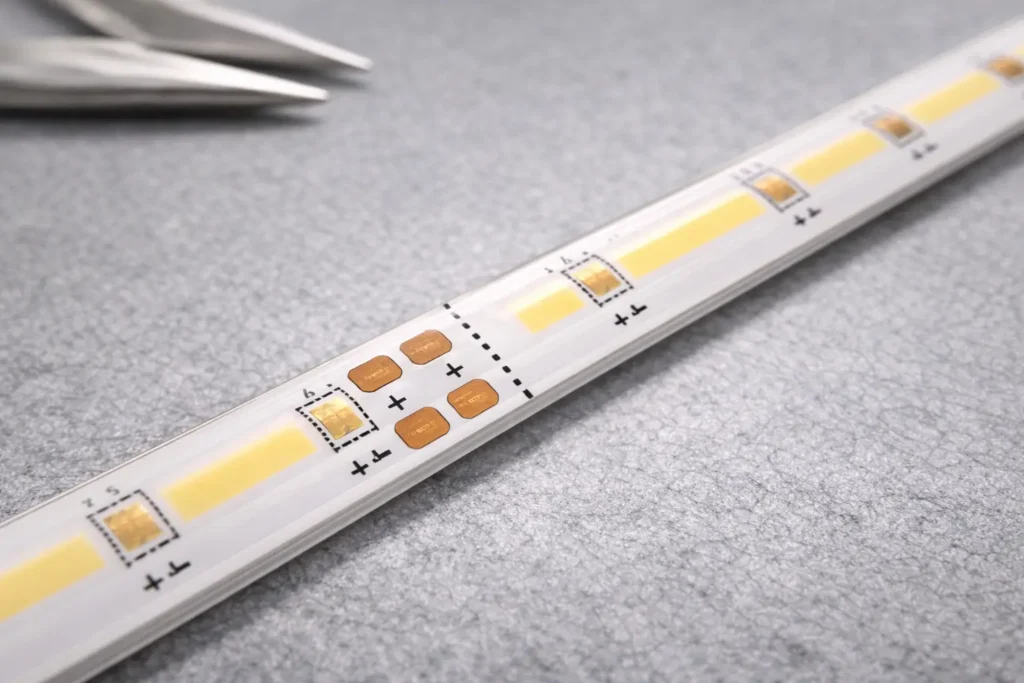
Copper pads are the contact area for solderless connectors or soldered wires. If you cut them off or damage them, reconnection becomes harder. Therefore, keep the cut straight and centered on the approved mark.
Many LED strip guides show the same basic rule: cut through the marked line near copper pads. For an example, see Super Bright LEDs — How to Cut LED Strip Lights.
Boundary conditions: Do not rely on a universal cut interval. Cut pitch and pad layout are model-specific.
The safest way to cut a COB strip is to power off, cut on the mark, protect the pads, and test the segment before final installation.
Do not cut between marks just to get an exact length. Instead, adjust the layout to the closest valid cut point or use a jumper section if the project allows it.
Boundary conditions: Waterproof or coated strips may need extra pad prep and resealing after cutting.
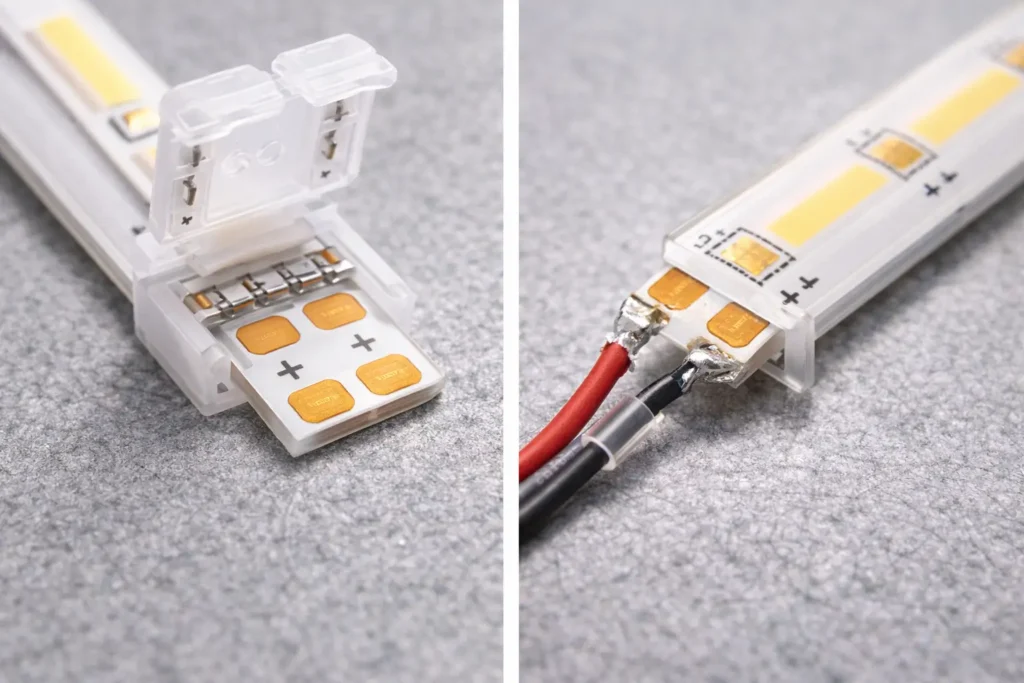
You do not always need to solder after cutting. Solderless connectors are faster. However, soldering can be stronger when the joint must last through vibration, movement, or long-term use.
| Method | Best for | Trade-off | Watch for |
|---|---|---|---|
| Solderless connector | Fast field work, simple cuts, and rework | Must match pad layout and strip width | Flicker from poor contact or misalignment |
| Soldering | Permanent installs and stronger joints | Needs tools and skill | Pad damage from too much heat |
LEDVANCE also explains connector and soldering as common strip connection methods here: LEDVANCE — How to cut LED light strips.
Boundary conditions: Connector fit is not universal. Therefore, verify strip width, pad layout, pin count, and coating before buying connectors in volume.
You can often cut waterproof COB strips at marked points. However, you must reseal the cut end if the strip will stay in a damp, wet, or outdoor area.
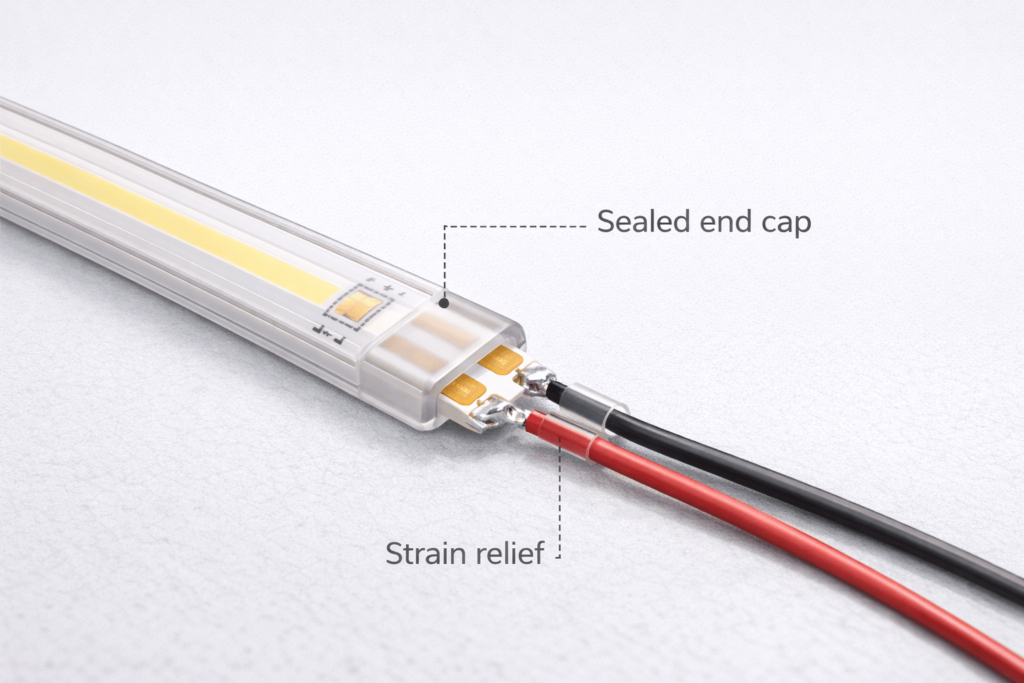
IP ratings describe protection against solids and liquids under defined rules. For background, see the IEC ingress protection overview.
Boundary conditions: Do not assume the original IP rating is restored after cutting. The result depends on the strip build and reseal method.
Most post-cut problems come from cutting off-mark, damaging pads, poor connector contact, or polarity mistakes. Therefore, check the simple causes first.
| Symptom | Likely cause | First check |
|---|---|---|
| Segment is dead | Cut not on a valid mark | Check the cut line and pad area |
| Flicker | Weak connector contact | Re-seat the connector and add strain relief |
| Only some colors work | Channel or pin mapping error | Check strip labels and controller output |
| Works on bench but fails after mounting | Stress on cut end or connector | Check bends, pressure, and strain relief |
| Uneven brightness | Feed or wiring issue | Check feed points before closing profiles |
If pads are torn, contacts are dirty, or the strip flickers when moved, stop and fix the joint before installation. Otherwise, the same fault may return after the strip is hidden.
Boundary conditions: Multi-channel and addressable strips add mapping risks. Therefore, use the exact wiring guide.
Multi-channel strips have more conductors and more controller rules. As a result, wrong wiring is easier after cutting. Therefore, confirm the channel order before final installation.
| Strip type | Confirm before reconnecting | Bench test |
|---|---|---|
| Single color | Positive/negative polarity | Lights at expected brightness |
| CCT | Warm, cool, and common wiring | Warm and cool channels both work |
| RGB / RGBW | Channel order and controller output type | Each color channel works correctly |
| Addressable | Data direction, protocol, and controller support | Data/control works on a short segment |
Boundary conditions: Do not copy pinouts across product families. Instead, use the exact model’s wiring guide.
Segmenting changes wiring paths and feed points. Therefore, plan power feeds before closing profiles or channels.
If a long segment gets power only from one end, the far end may look dimmer. As a result, the project can look uneven even when the strip itself is not faulty.
Boundary conditions: There is no universal maximum run length. It depends on strip voltage, load, wiring, and layout.
Yes, most COB LED strips can be cut. However, cut only at the marked cut points unless the strip is clearly documented as free-cut.
Cut on the printed cut line or scissor mark near copper pads. Also, keep the pads intact so the strip can be reconnected.
Usually, no. Standard segmented COB strips must be cut at marked points. Free-cut strips are special products and should be verified by datasheet.
Not always. Solderless connectors can work when they match the strip width, pad layout, pin count, and coating. However, soldering is often stronger when the joint must last.
Common causes include cutting off-mark, damaging copper pads, poor connector contact, or reversed polarity. Therefore, check the cut mark, pads, connector, and wiring order first.
Often, yes, at marked cut points. However, the cut end must be resealed using the approved method if the strip will be used in a wet or outdoor area.
Cutting a COB LED strip is simple when you follow the marked cut points, protect the copper pads, and test before final installation. Most problems come from cutting off-mark, weak contact, wrong polarity, or skipped resealing.
For project orders or distributor support, keep the model documents aligned with the installation workflow. If you need a model-specific cut diagram, wiring diagram, connector fit guidance, or waterproof reseal notes, you can start at: Elstar LED strip & COB manufacturing.


 English
  Spanish
  French
  Arabic