
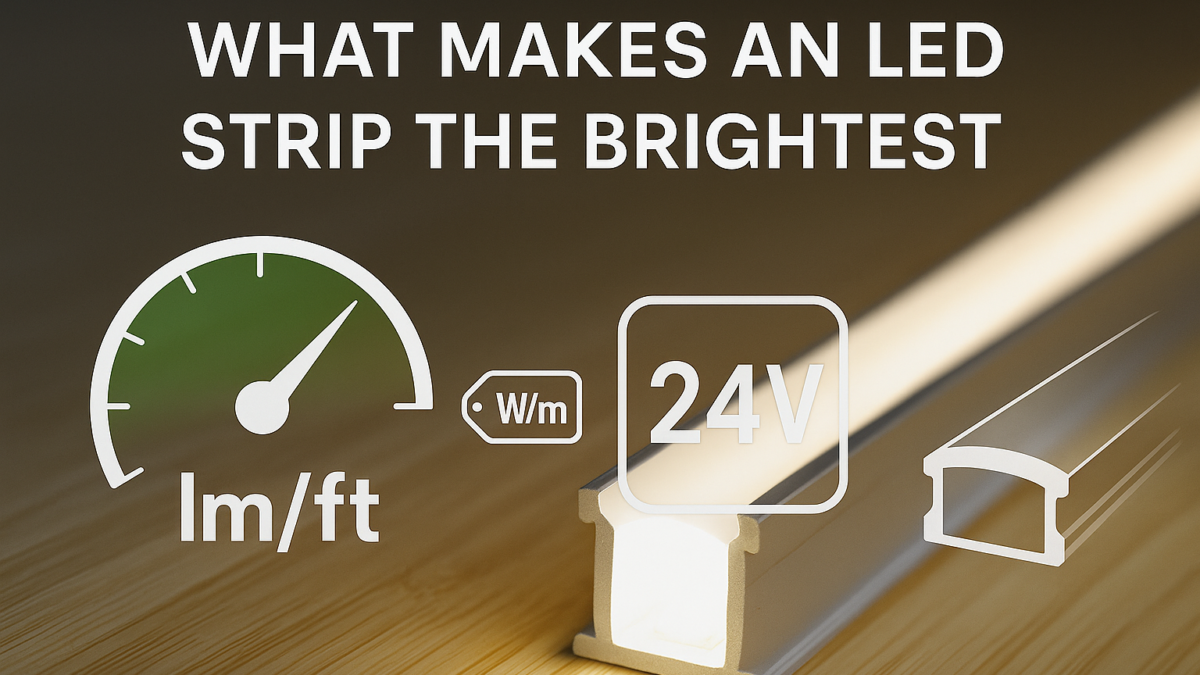
Brightest doesn’t just mean watts. Use lumens per foot (lm/ft) with LED density, package/row layout, and heat handling. Then pair the right voltage (12V/24V) and a driver with ≥1.2–1.5× headroom for reliable peak output.
Measure “brightest” by lumens per foot (lm/ft), not watts alone. Check W/m (heat/input), LED/ft for uniformity and ceiling, and the package/row layout (COB, 5050, single/dual/quad). For long bright runs, prefer 24V and size the driver at ≥1.2–1.5× load.
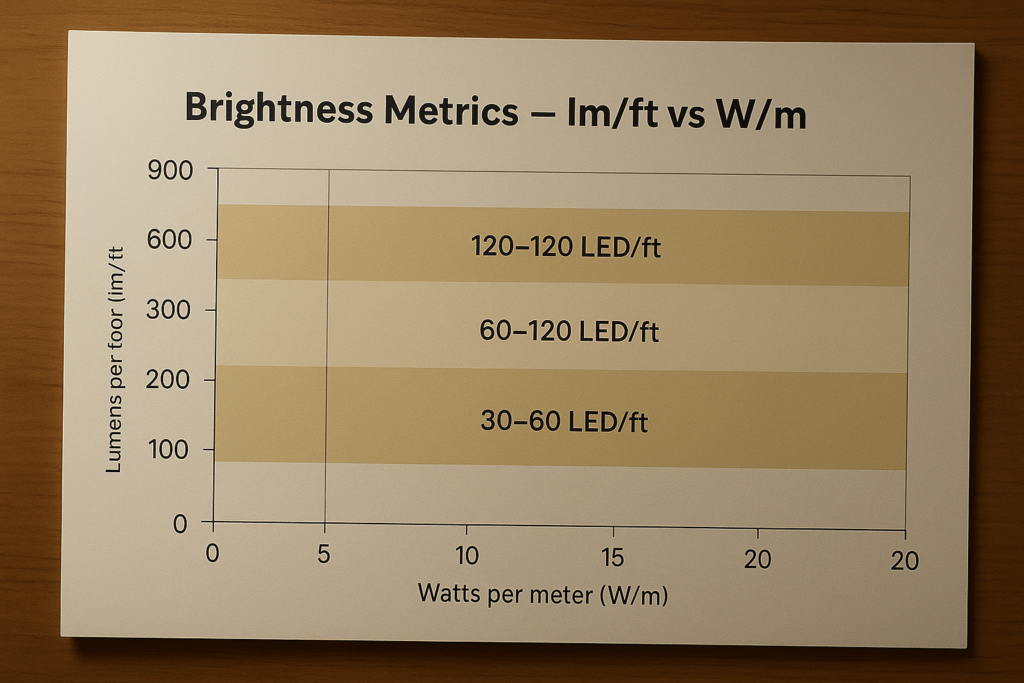
lm/ft is the outcome (what you see). W/m is the input and thermal load. LED/ft drives uniformity and the maximum feasible output. As a guide: task lines 150–300 lm/ft; architectural wash 300–500 lm/ft; signage 700–1000+ lm/ft. Validate claims with lab data when available.
| Application | Target lm/ft | Typical W/m | LED/ft (band) | Package/Rows | Suggested CCT/CRI | Profile & Diffuser | PSU (≥1.2×) |
|---|---|---|---|---|---|---|---|
| Architectural wall-wash | 300–500 | 12–18 | 60–120 | COB / Dual-row | 3000–4000K / CRI≥90 | Deep channel + opal | 1.2–1.5× total W |
| Signage / display | 700–1000+ | 18–24+ | 120–180 | Quad-row 5050 | 4000–6500K / CRI≥90 | Deep channel + glare control | 1.2–1.5× total W |
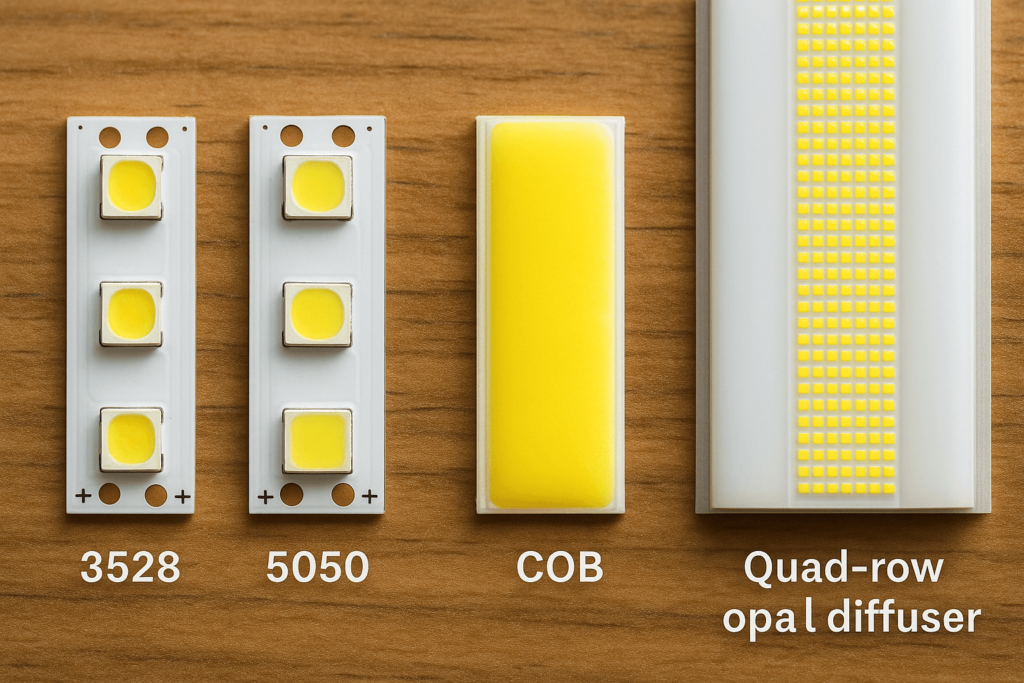
5050 packages push higher output per LED than 3528; COB yields dot‑free lines. Multi‑row (dual/quad) boards raise lm/ft dramatically but add heat and current demands. Use a deeper, opal aluminum profile for uniformity and thermal margin.
High output should still look true. Pair brightness with TM‑30 metrics (Rf/Rg) and ensure ANSI C78.377 CCT tolerance to avoid greenish or shifted whites. Use color tuning options when color fidelity matters.

24V extends bright runs and limits voltage drop. Plan center or multi‑injection and choose suitable wire gauge to keep ends from dimming.
| Voltage | Watts/m | Max run (single‑end) | Wire gauge | Injection points | Notes |
|---|---|---|---|---|---|
| 12V | 12 | 5–7 m | 16–18 AWG | Center‑feed >5 m | Short bright runs |
| 24V | 12 | 10–15 m | 16–18 AWG | Multi‑injection >10 m | Better for high output |
| 24V | 18–24 | 7–12 m | 14–16 AWG | Early multi‑injection | Heat & drop rise with W/m |

High W/m drives heat. Aluminum profiles act as heat sinks and, with opal diffusers, control glare and hotspots. Provide airflow and respect profile depth to maintain output and delay lumen depreciation.

Use a constant‑voltage driver and size it at 120–150% of load for thermal and inrush margin. Keep the unit ventilated and accessible; verify listings and correct polarity/terminations.
Shop Power Supplies for matched options.

Match control to load: 0–10V/TRIAC for analog builds; SPI/DMX for effects. Set an adequate PWM frequency and low‑end trim to avoid shimmer, especially on camera.
Explore Controllers & Dimmers.

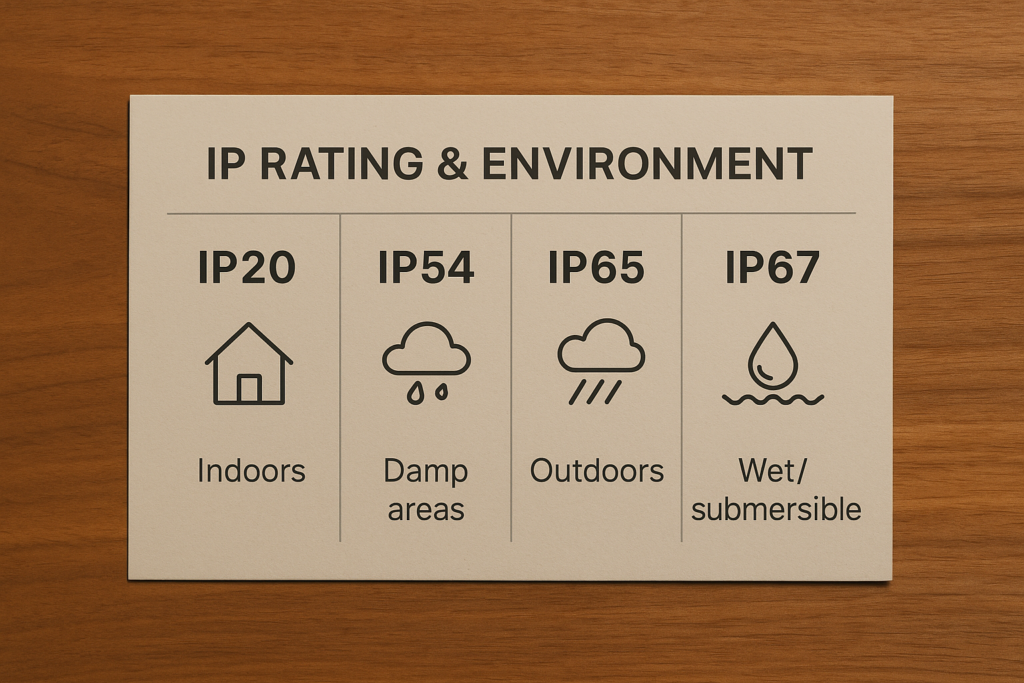
Indoors and dry: IP20. Damp areas: IP54/65 with gasketed profiles. Outdoors: IP65/67 depending on exposure and cleaning access. Note encapsulation affects heat—balance protection with thermal needs.
Browse indoor/outdoor LED strip lights.
Questions? Visit Support.

What’s the objective way to define “brightest”? Lumens per foot verified by lab data, with W/m and LED/ft context.
Can COB be the brightest? COB is the smoothest; absolute peak lm/ft often comes from multi‑row SMD designs.
Best voltage? 24V for long, even runs.
How do I avoid dim ends? Plan center/multi‑injection and appropriate wire gauge.
Minimum profile depth? Enough to hide hotspots and dissipate heat—deeper channels with opal diffusers work best.
Driver size rule? Choose ≥1.2–1.5× the calculated load. See Power & Driver.
Need a tailored bill of materials? Request a quote.
Specify “brightest” with real metrics, choose the right package/row layout, manage heat, feed with 24V and proper injection, and size power correctly. That’s how you get maximum output without compromising quality or lifespan.
Request a quote or browse our LED strip lights to get started.


