

When only half of your LED strip lights up, it’s likely caused by one of a few common issues. Identifying the root cause early can save you time and effort in troubleshooting. Here are the most frequent reasons:
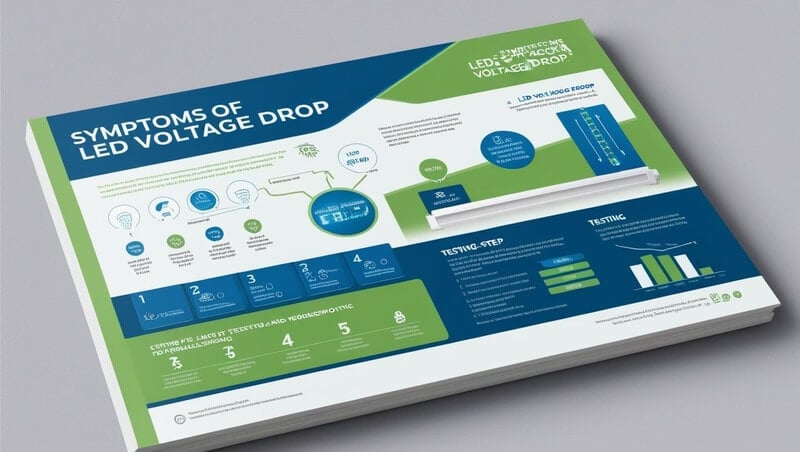
One of the most common causes for half of your LED strip not lighting up properly is a voltage drop. When the electrical power doesn’t reach the entire length of the strip, it can result in dimming or failure at the far end of the strip. This is especially common with longer LED strips, where the power gradually weakens as it travels the length of the strip.
Symptoms:
How to Test for Voltage Drop:
Fixing Voltage Drop:
LED strips are polarity-sensitive, meaning the positive (+) and negative (-) connections must be correctly aligned. If you reverse the polarity when reconnecting or cutting the strip, part of it may stop working. This is commonly seen when strips are cut and reconnected without checking the polarity.
Symptoms:
How to Fix Reversed Polarity:
LED strips are made of small copper traces that connect each LED. If any of these traces are damaged or if there’s a cold solder joint (where the solder didn’t form a proper connection), part of the strip will stop working.
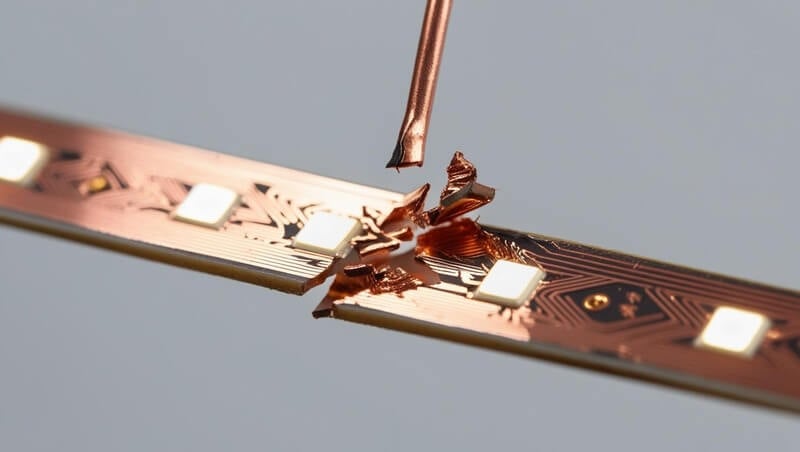
Symptoms:
How to Fix a Broken Trace or Solder Joint:
If you’re using an RGB LED strip, over-driving one of the channels (red, green, blue) can cause it to stop working or cause uneven lighting. This often happens when too much current is sent through a single color channel, causing the LEDs to burn out.
Symptoms:
How to Fix Over-Driven RGB Channels:
| Cause | Symptom | Quick Test | Fix Level | Tools Needed |
| Voltage Drop | Dim or non-functioning section | Measure voltage drop | Moderate | Multimeter, power supply |
| Reversed Polarity | Partial strip lighting, intermittent | Inspect polarity | Easy | Multimeter, basic wiring tools |
| Broken Copper Trace | One section of strip dead | Visual inspection | Advanced | Soldering iron, copper tape |
| Over-Driven RGB | Only one color lighting | Test power supply | Advanced | Power supply, multimeter |
One of the most common causes of half of your LED strip not lighting up properly is a voltage drop. This happens when the electrical power isn’t able to travel the full length of the LED strip, resulting in dimming or even complete failure at the far end.
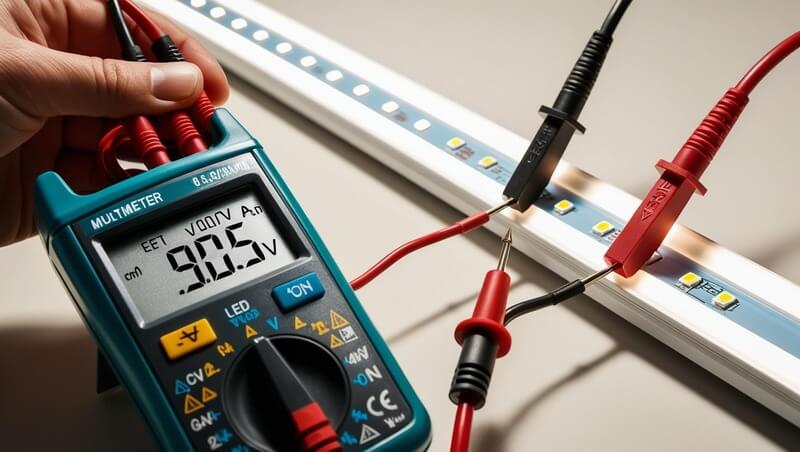
To determine if voltage drop is the issue, follow these steps:
If voltage drop is confirmed, here are a few solutions to fix the issue:
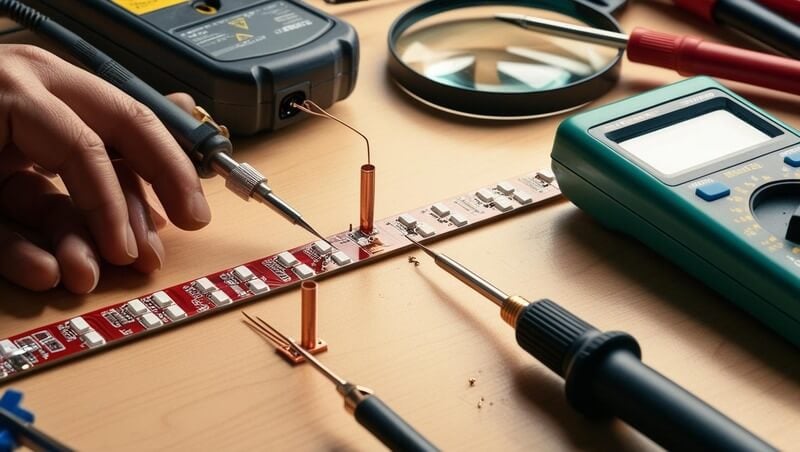
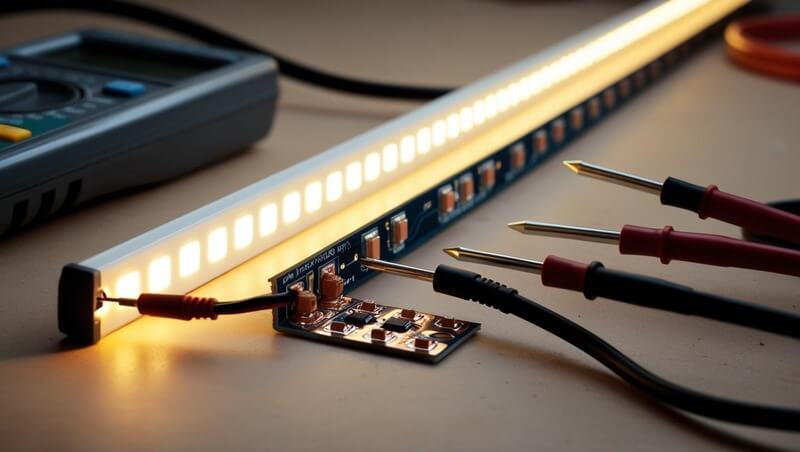
If you’ve confirmed that one section of your LED strip is not working, here’s a step-by-step guide to test and repair the dead segment.
First, visually inspect the LED strip for any visible breaks, damaged areas, or burnt-out sections. Look for any discoloration in the LED segments, or any cracks along the copper traces.
Using a digital multimeter, test the voltage at the cut marks (where the LED strip was previously cut). Check for continuity and ensure the voltage reading at the cut point matches the required value (12V or 24V depending on your LED strip type). If there’s a significant drop in voltage at this point, it’s likely that the break or damage in the circuit is causing the issue.
If you find that the copper pads are broken, you can either re-solder the copper pads or use a clip connector to reconnect the segment. To re-solder:
If you prefer an easier method, clip connectors are a good alternative. These allow you to simply attach the two ends of the strip without the need for soldering.
If the LED strip is IP-rated for outdoor or waterproof use, make sure to seal the joints and connections with silicone to prevent water or dust from affecting the strip’s functionality.
To avoid voltage drop, it’s essential to ensure that your power supply matches the total power requirement of your LED strip. Here’s a simple formula to calculate the power needs for your LED setup:
Example Calculation:
For a 12V LED strip consuming 12 watts per meter and having a length of 5 meters, the calculation would be:
12W × 5 meters = 60W
This means you need a 60W power supply to run the strip, but to ensure stable performance, it’s recommended to select a power supply rated for 20-30% more than the required wattage.
In this case, you should opt for a 72W power supply to provide enough power without overloading. This will help avoid voltage drop and ensure the LEDs perform optimally.
Tip: Always select a power supply with a higher current rating than the total required current. For instance, if the strip needs 5 amps, you should select a 6-amp power supply.
To help you calculate your LED power requirements, check out our Voltage Drop Calculator.
When dealing with a partially working LED strip, one of the key decisions is whether to repair it or replace the entire strip. This section will help you weigh the pros and cons of each option, based on cost, time, and effectiveness.
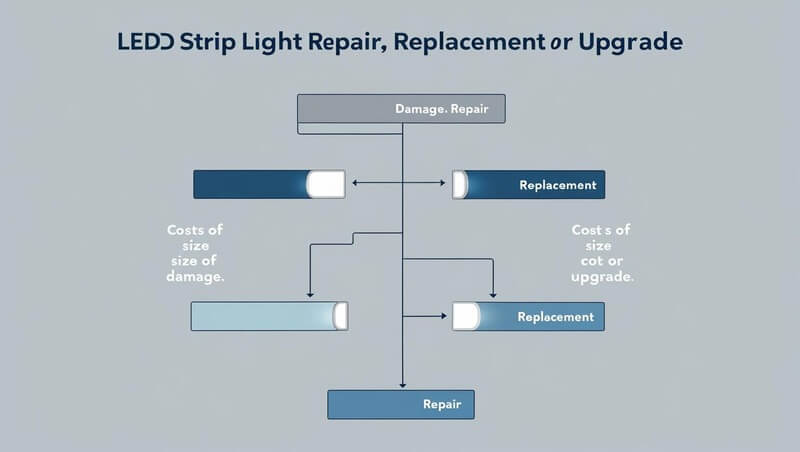
The cost to repair a LED strip depends on several factors:
While repairing is often a cost-effective solution, there are situations where replacing the LED strip is the smarter choice:
When deciding between repairing and replacing your LED strip, consider both the cost and time involved. If the damage is minor and the tools are available, repairing the strip can be a great solution. However, if the damage is extensive or the cost of repair approaches the cost of a new strip, replacing the strip may be the more practical and reliable choice.
Let’s continue with the next section:
Once you’ve repaired your LED strip, the next step is to ensure it continues to work properly in the future. Proper maintenance and preventive measures can extend the lifespan of your LED strip and reduce the chances of partial failures.

A stable power supply is crucial for preventing voltage drop and other issues. Always choose a power supply that provides 20-30% more capacity than the total wattage required by the LED strip. This ensures that your power supply is not overloaded and will provide consistent voltage throughout the strip.
LED strips can get hot, especially if you’re running long lengths at high brightness. To prevent overheating, consider installing the LED strip in an aluminium profile. These profiles act as heat sinks, helping to dissipate the heat and keep the LEDs cool, which will improve their performance and longevity.
LED strips are flexible, but tight bends can cause internal damage to the copper traces and the LEDs themselves. When installing your LED strips, make sure to avoid sharp angles and bends. Try to keep a larger bend radius (the minimum allowed by the manufacturer) to ensure the strip lasts longer.
Dust and debris can accumulate on the strip, especially in areas with poor ventilation. Regularly clean the strip with a dry, soft cloth to remove dust and dirt. Be careful not to get moisture or cleaning chemicals on the strip, as this can damage the circuit.
By ensuring you use a proper power supply, protecting your LED strips from heat, and avoiding tight bends, you can prolong the life of your LED strip and prevent the common causes of partial failures. Preventive maintenance is key to keeping your strips running smoothly for years to come.
Here are some of the most frequently asked questions about LED strips and their common issues:
Answer: This issue often occurs when one of the channels (red, green, or blue) stops functioning. The most likely causes include a damaged chip on the LED or an issue with the controller. Try testing the voltage at the controller, and if necessary, replace the faulty LED module or controller.
Answer: Yes, many of the same troubleshooting steps apply to Christmas string lights that use LED technology. Voltage drop, reversed polarity, and broken traces are common issues in both LED strips and string lights. Just ensure that the string lights have a compatible power supply for your repair.
Answer: Cutting out the dark segment of an LED strip will not damage the remaining part of the strip as long as the cut is made along the proper cut line (usually marked on the strip). However, make sure to reattach the power connections properly after cutting.
Answer: A properly repaired LED strip can last for several more years, especially if the issue was minor (e.g., broken trace or solder joint). However, if the strip had significant damage, the repaired segment may not be as durable as the original. Always monitor repaired sections for any signs of further failure.
Answer: Polarity reversal can damage the LED controller if the connections are made incorrectly. Always double-check the wiring before powering up your LED strip to ensure the correct polarity. Some controllers have built-in protection against polarity reversal, but it’s better to be cautious.
Answer: For a basic LED strip repair, you’ll need:
In this guide, we’ve covered the most common causes of partial LED strip failure, from voltage drop and reversed polarity to broken traces and over-driven RGB channels. We’ve also provided step-by-step instructions on how to test and repair these issues, ensuring your LED strips stay bright and functional.
If you’re still facing issues after trying the repairs, it might be time to replace your LED strip or upgrade to a more powerful power supply to prevent voltage drop.
Still unsure about your setup? Check out our Voltage Drop Guide for more information on how to calculate the right power supply.


