How to Specify a 5mm COB LED Strip
A 5mm COB LED strip is made for tight channels, slim profiles, and narrow details where wider strips may not fit. Also, because it uses COB light output, it can look smoother than many strips with spaced LED points.
However, do not treat “5mm” as only a size label. Instead, treat it as a system limit. You still need to check fit, wiring, heat, waterproofing, connectors, and sample results.
Quick decision table
| Decision | What to choose or confirm | Why it matters for 5mm strips |
|---|---|---|
| Fit | Channel inner width, corners, bend limits | Bad fit causes rework and stress at joints |
| Look | Dotless goal and diffuser need | Final look depends on distance, surface, and profile |
| Variant | Single color, CCT, RGB, or RGBW | Variant changes controller channels and wiring |
| Voltage | Match strip, power supply, and controller | Voltage affects current and voltage drop |
| Power plan | Runs, feed points, wires, and connectors | Narrow strips need careful feed planning |
| Environment | IP level and sealing method | Wet areas fail at ends, joints, and cable exits |
| Buying | Datasheet, wiring notes, and sample test | Prevents install problems and wrong orders |
Fast checks before buying
- First, confirm the profile inner width and strip width.
- Next, confirm the voltage and control type.
- Also, check how corners, cuts, and wire exits will be handled.
- Then, ask for the datasheet and wiring notes.
- Finally, test one short strip in the real profile before bulk order.
Boundary conditions: Electrical and IP details vary by model. Therefore, confirm the datasheet and test an installed sample before final approval.
What Is a 5mm COB LED Strip and When Is It the Right Choice?
A 5mm COB LED strip is an ultra-narrow LED tape with a 5mm PCB width. It uses COB-style light output, so it can create a smoother line than many point-source strips in narrow profiles.
When 5mm width matters
Choose 5mm when space is the main limit. For example, slim aluminum channels, thin reveal details, compact cabinet grooves, and small sign cavities may not fit wider strips.
Why 5mm needs extra planning
- First, a narrow strip may have less room for strong copper paths.
- Next, wire exits and joints may be harder to protect.
- Also, tight channels may hold more heat.
- Therefore, power feeds, profiles, and service access matter more.
What dotless means in practice
Dotless means reduced visible hotspots. However, it does not mean every setup looks perfect without a diffuser. Viewing distance, channel depth, diffuser opacity, and glossy surfaces can still change the result.
When another strip may be better
- Use a wider COB strip if the channel has enough space and you want easier handling.
- Also, use SMD if the strip is hidden and the diffuser already hides dots well.
- Finally, use LED neon if the project needs a protected, fixture-like line.
Boundary conditions: “5mm” only states width. Output, power, cut points, IP build, and bend rules are model-specific.
5mm COB vs Wider COB vs SMD: Trade-offs for Appearance, Installation, and Maintenance
A practical choice starts with the strip family. First, decide whether the project truly needs 5mm COB. Then, compare it with wider COB and SMD options.
Comparison table
| Option | Appearance | Install fit | Maintenance risk |
|---|---|---|---|
| 5mm COB | Often smoothest in tight spaces | Best for slim channels | Needs careful feeds and joints |
| Wider COB | Smooth line with more room | Easier wiring if space allows | Often easier to service |
| SMD strip | Can show dots without diffusion | Broad options and accessories | Appearance depends on diffuser and depth |

Does COB look dotless without a diffuser?
Sometimes, yes. In deeper channels or from a longer viewing distance, COB can look nearly continuous. However, in shallow channels, close-view areas, or reflective surfaces, a diffuser often improves comfort and smoothness.
Heat and service trade-offs
- First, tight profiles can trap heat.
- Next, narrow strips can be less forgiving of weak joints.
- Also, hard-to-access channels make repair harder.
- Therefore, build extra care into power feeds, mounting, and service access.
Project decision rule
If the project needs a very narrow profile, choose 5mm COB. However, if space allows, a wider COB strip may give better wiring and handling margin.
Boundary conditions: The dotless result depends on profile, diffuser, and viewing distance, not only strip type.
Choosing the Right Variant, Voltage, and Dimming/Control
Choose the light type first because it sets the channel count. Then, choose voltage and control so the strip, controller, and power supply match.
Pick the light type first
- Single color: simplest wiring and dimming.
- CCT: needs warm and cool white channel control.
- RGB/RGBW: needs more channels and a matching controller.
Variant control table
| Variant | Typical control need | What to verify before ordering |
|---|---|---|
| Single color | Single-channel dimming | Voltage, dimming method, and load margin |
| CCT | Two-channel control | CCT controller support and wiring plan |
| RGB/RGBW | Multi-channel control | Channel count, channel order, and controller fit |
12V vs 24V decision rules
In general, higher voltage can reduce current for the same power. As a result, 24V can be easier for longer runs. However, 12V may be useful for shorter cut increments or existing 12V systems.
Compatibility checklist
- First, confirm strip voltage.
- Next, match the power supply or driver output.
- Also, match controller channels to the strip type.
- Then, confirm total system load and safe headroom.
- Finally, confirm feed points, corner transitions, and connectors.
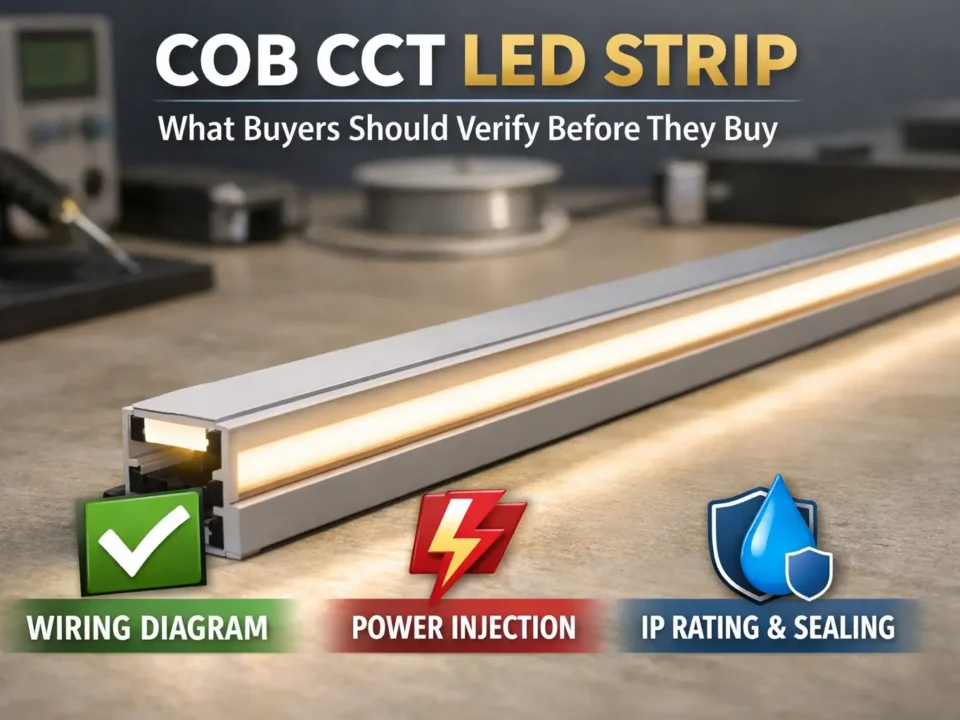
Boundary conditions: Control and wiring rules vary by model. Therefore, request a wiring diagram for the selected strip.
Power Planning for 5mm COB Runs: Voltage Drop and Power Injection
Power planning is often where slim-channel projects succeed or fail. Therefore, use a simple workflow: confirm load, design runs, plan injection, choose connections, and test in the real profile.
Why voltage drop happens
Voltage drop comes from resistance in wires, copper paths, and joints. It increases with current and distance. As a result, the far end may look dimmer or less stable.
For background, see the QuinLED power injection guide and the UltraLEDs voltage drop guide.
Voltage drop symptoms
- Uneven brightness along the run
- Dimmer output at the far end
- Color or white shift on multi-channel variants
- Warm connectors or feed points
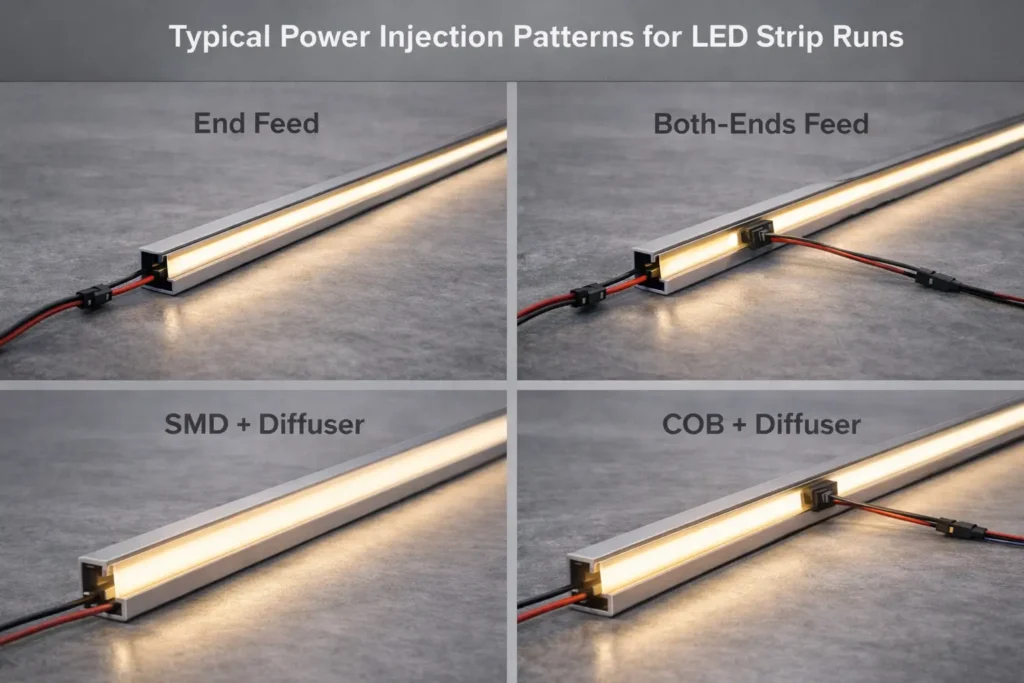
Power injection workflow
- First, break the install into logical run sections.
- Next, choose feed points that avoid one long daisy chain.
- Then, mark where injection wires can enter cleanly.
- Also, strain-relieve wires at corners and exits.
- Finally, test a short section in the actual profile.
Common mistakes
- Running one long strip from one feed point without a power plan.
- Also, using weak connectors in tight channels.
- Next, leaving no strain relief at strip-to-wire transitions.
- Finally, skipping a test run before final install.
Boundary conditions: Injection needs depend on strip specs, wiring, and environment. Therefore, do not use one universal run length.
IP Rating and Waterproof Boundaries
Choose IP rating by exposure. Then, plan how to seal strip ends, joints, cable exits, and injection points. The IP code is defined under IEC 60529 and describes resistance to solids and water. For reference, see the IEC IP ratings overview.
Environment-to-IP table
| Environment | Practical IP direction | Service notes |
|---|---|---|
| Dry indoor | Lower protection is often enough | Focus on appearance, access, and profile fit |
| Damp or occasional condensation | Added protection may help | Plan cable entry and airflow |
| Splash zones | Higher protection is often needed | Confirm end sealing and cleaning exposure |
| Covered outdoor exposure | Higher protection plus strong sealing | Protect joints, cable entries, and water paths |
| Direct rain or harsh exposure | High protection and careful install | Confirm model suitability and service access |
Waterproof install realities
- Ends, joints, and cable exits are the highest-risk points.
- Also, strain relief helps seals last longer.
- In addition, condensation can move inside channels if drainage is ignored.
- Therefore, plan sealing as a system, not just a product label.
Is IP65 waterproof?
IP65 can be useful for splash or jet resistance in many cases. However, it is not a submersion rating. If pooling or immersion is possible, use a product and install method made for that use.
Boundary conditions: Submersion suitability depends on the exact rating and construction. Also, field conditions may exceed lab test assumptions.
Installing 5mm COB in Slim Channels
A reliable 5mm COB install depends on the profile, the install steps, and the corner method. Therefore, test fit before peeling the adhesive or closing the channel.

Choose the right profile
- First, confirm the inner width and depth.
- Next, make sure the strip sits flat without pinching wires.
- Also, choose a diffuser if glare or hotspot control matters.
- Finally, consider aluminum for heat spreading and clean alignment.
Step-by-step install workflow
- Dry-fit the strip and wiring path in the channel.
- Next, clean and prepare the mounting surface.
- Then, pre-test the strip, controller, and power supply.
- After that, install the strip without sharp bends or pad stress.
- Also, install the diffuser and check the light line.
- Finally, test again before closing access points.
Corners and transitions
- Choose jumpers, soldered leads, or corner connectors before install.
- Also, add strain relief at strip-to-wire points.
- In addition, route injection wires before the channel is closed.
- Finally, document the wiring path for service.
Boundary conditions: Tight channels can increase heat and limit join methods. Therefore, confirm profile fit and strip handling notes early.
CCT and Color Quality for Projects
For project work, good color means the light matches the use case and stays consistent across the run. Therefore, specify CCT, color quality, and sample checks before buying.
CCT by use case
- Task areas: choose clear light and check glare control.
- Hospitality or homes: choose a warmer feel and test with real surfaces.
- Retail displays: check how materials look under the light.
Verification checklist
- First, confirm the datasheet covers the exact variant and voltage.
- Next, build a sample in the final channel and diffuser.
- Also, check the look from normal viewing distances.
- Then, confirm dimming behavior and color mix if needed.
- Finally, document acceptance notes before bulk order.
Boundary conditions: The same CCT can look different with different surfaces and diffusers. Therefore, sample testing is important for visible projects.
B2B Sourcing Checklist for 5mm COB LED Strips
For projects and bulk orders, use a clear sourcing workflow. First, request documents. Next, test samples. Then, confirm QC and scope details before production.
RFQ verification table
| Category | What to verify | Why it matters |
|---|---|---|
| Electrical | Voltage, channels, load, wiring, and injection | Prevents voltage mismatch and uneven output |
| Mechanical | Width, bend, corner method, connectors, and strain relief | Prevents fit and joint failure |
| Environment | IP build, sealing method, and end treatment | Prevents wet-area rework |
| Control | Controller fit, dimming method, channel order | Prevents control mismatch |
Documents to request
- Product datasheet for the exact model, voltage, and IP option.
- Also, wiring notes or a wiring diagram.
- Next, controller notes for CCT, RGB, or RGBW variants.
- Then, install notes for slim channels, bends, corners, and ends.
- Finally, compliance or certificate scope if required by the project.
Sample approval workflow
- First, build a short sample in the final profile.
- Next, test it with the intended controller and power supply.
- Then, validate feed or injection points for the layout.
- Also, define pass checks for look, control, and sealing.
- Finally, freeze key variables for production consistency.
QC and change control
- Agree on QC checks that match project risk.
- Also, define how material or build changes are reported.
- In addition, confirm certificate scope by exact model or series when needed.
Boundary conditions: Document depth should match project risk. Therefore, high-visibility or wet-area projects need stronger sample and QC checks.
FAQ
What is a 5mm COB LED strip?
It is an ultra-narrow 5mm LED strip made for slim channels and compact details. Also, it uses COB output to create a smoother light line than many point-source strips.
Does a COB LED strip look dotless without a diffuser?
Often, it can look very smooth. However, channel depth, viewing distance, surface gloss, and diffuser choice still affect the final look.
Should I choose 12V or 24V for a 5mm COB strip?
Choose the voltage that fits the run layout and control system. In general, 24V can be easier for longer runs, while 12V may fit some short or custom layouts.
How do you prevent voltage drop on long 5mm COB runs?
Plan power early. First, confirm load from the datasheet. Next, split long runs into segments. Then, inject power where needed and test in the real channel.
What IP rating do I need for wet areas or outdoor use?
Choose IP by exposure. Also, seal ends, joints, and cable entries. For reference, see the IEC IP ratings overview.
How do you install a 5mm COB strip in an aluminum channel?
Dry-fit first, plan corners, pre-test the strip, and then install with clean surface prep. Also, add strain relief at wire exits and test again after the diffuser is installed.
What should buyers verify before ordering?
Request the datasheet, wiring notes, controller notes, IP build notes, and sample approval plan. Then, test a short section in the real profile before bulk order.
Summary and Next Steps
A 5mm COB LED strip is mainly a fit-driven choice. However, reliable results depend on power planning, profile fit, corner handling, IP needs, and sample testing.
Key takeaways
- First, choose 5mm COB when the profile is truly narrow.
- Next, confirm dotless appearance with a real sample.
- Also, treat voltage, control, and injection as one plan.
- Then, choose IP rating by real exposure and sealing method.
- Finally, use a document and sample workflow before bulk order.
Scenario-based next steps
- Slim indoor channels: test the look in the real profile and diffuser.
- Long runs: plan injection and wire routing before install.
- Wet or outdoor exposure: confirm IP build, sealing, and service access.
- Project buying: request datasheet, wiring diagram, sample plan, and scope notes.

 English
  Spanish
  French
  Arabic