LED strip fire risk is usually low when you use good parts, correct voltage, safe wiring, and proper heat control. However, the risk can rise when LED strips are overloaded, installed badly, placed on unsafe surfaces, or powered by poor drivers.
Therefore, treat LED strips like real electrical gear, not simple decoration. If you plan power, heat, wiring, and the install area first, your lighting can stay safe and reliable for a long time.
For related internal resources, review Elstar’s LED strip light range, LED power supply range, and contact page.
Introduction to LED Strip Fire Risk
LED strip lights are usually safe when used the right way. Still, fire risk can rise when the strip gets too hot, the power supply is overloaded, or wires are loose.
Can LED strip lights cause fires?
Yes, but it is rare in a good install. A fire risk is more likely when the strip uses the wrong voltage, poor parts, bad wiring, or weak heat control.
Why LED strip safety matters
Early checks help protect homes, shops, and project sites. Also, they help avoid flicker, heat damage, short circuits, and early strip failure.
Fast safety rule
- Start with tested and well-made parts.
- Then, match the strip voltage with the power supply.
- In addition, mount strips where heat can escape.
- After that, secure wires and joints.
- Before long-term use, inspect the system every few months.

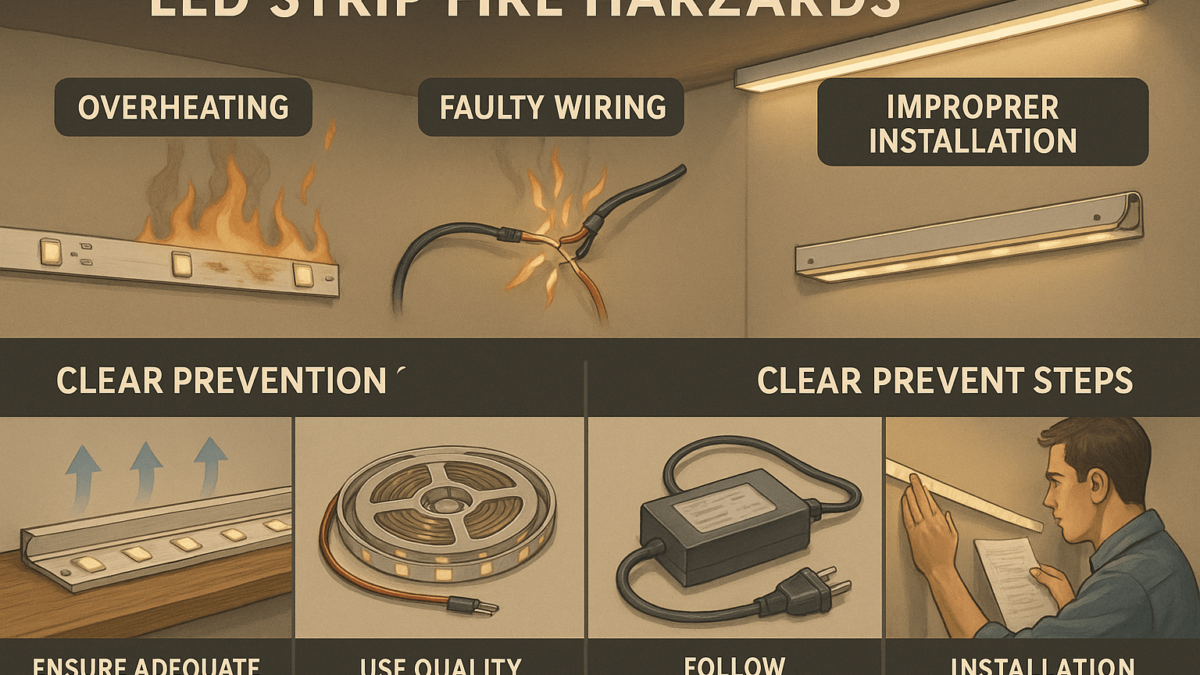
Common Causes of LED Strip Fire Risk
Most safety issues come from a few clear causes. Therefore, check heat, part quality, wiring, voltage, and mounting before you power the strip.
First, check heat because it is one of the easiest risks to spot early.
Overheating from poor heat control
- Issue: poor airflow or no heat path can make strips too hot.
- Warning signs: strong heat, color change, warped parts, or odd smells.
- Fix: use aluminum channels, avoid sealed spaces, and reduce load if needed.
Next, review part quality because weak drivers and thin copper paths can fail under load.
Low-quality or faulty parts
- Issue: weak strips, drivers, or controllers can fail under load.
- Warning signs: flicker, dim spots, hot drivers, or uneven light.
- Fix: choose known brands, clear datasheets, and suitable safety marks.
After that, check voltage and wiring because many faults start at the connection point.
Wrong voltage or poor wiring
- Issue: wrong voltage, loose joints, or poor wire choice can cause heat or shorts.
- Warning signs: burning smell, repeated flicker, or dark marks near joints.
- Fix: match voltage, check polarity, and use secure connectors.
Finally, inspect mounting because strain and sharp bends can damage the strip over time.
Poor installation methods
- Issue: sharp bends, stress at connectors, or weak mounting can damage the strip.
- Warning signs: sagging strips, cracked coating, or loose ends.
- Fix: support the strip, add strain relief, and follow the product guide.
Use this table as a quick screen before you leave the system running for long periods.
Comparison table
| Cause |
Signs and symptoms |
Quick fix |
| Poor heat control |
Overheating, discoloration, smell |
Use aluminum channels and airflow |
| Low-quality parts |
Flicker, hot drivers, early failure |
Choose tested and well-made parts |
| Wrong voltage or wiring |
Burning smell, dark marks, flicker |
Check voltage, polarity, and wire joints |
| Poor mounting |
Loose strips, sagging, cracked ends |
Use clips, clean surfaces, and strain relief |

Step-by-Step Safety Measures
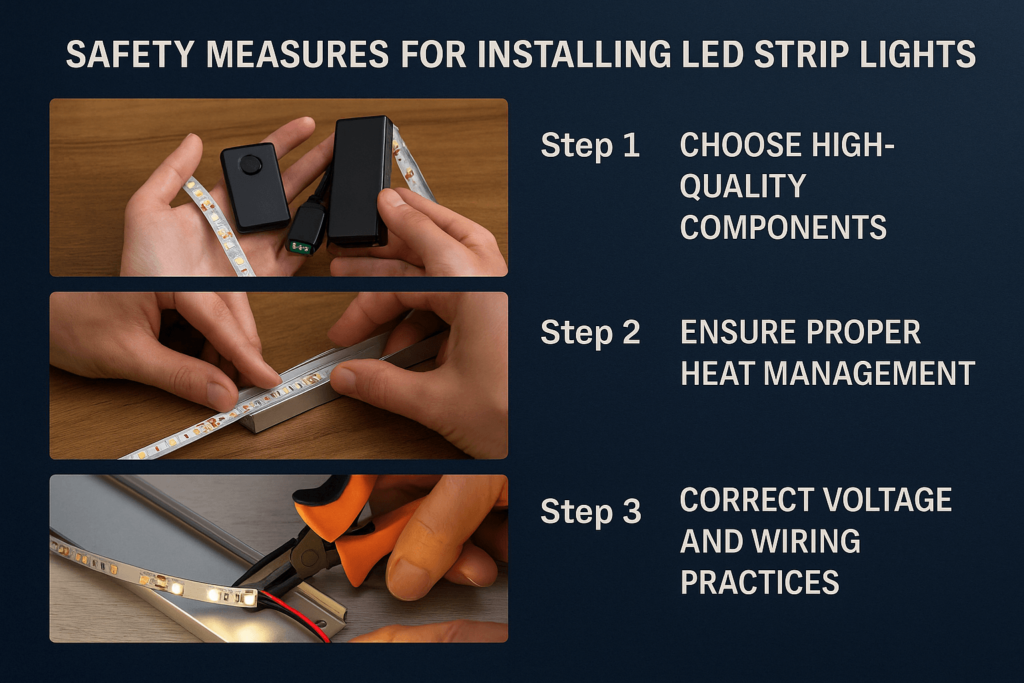
A safer LED strip system starts before the strip is installed. First, choose the right parts. Then, plan power, wiring, heat, and mounting.
Step 1: choose good parts
- Choose LED strips, drivers, and controllers from reliable suppliers.
- Also, check safety marks and datasheets when the project requires them.
Step 2: manage heat
- Use aluminum channels or heat sinks where heat may build up.
- Also, leave space for air to move around drivers and strips.
Step 3: match voltage and wiring
- Confirm whether the strip needs 12V, 24V, or another voltage.
- Next, use a power supply that matches that voltage.
- Then, use wire and connectors made for the load.
Step 4: mount the strip correctly
- Follow the maker’s install guide.
- Also, avoid tight bends, crushed wires, and loose joints.
- Finally, inspect the strip after the first test run.
Quick answer: To reduce LED strip fire risk, use good parts, match voltage, keep heat low, secure the wiring, and check the install on a schedule.
Best Practices for Safe LED Strip Installation
Good install habits can prevent many safety issues. In addition, they improve light quality and make the system easier to repair.
Before installation, confirm that the parts match the project and the strip rating.
Use certified parts
- Select strips, drivers, and controllers with suitable safety marks.
- Also, make sure each part matches the strip voltage and wattage.
Control heat
- Install strips in aluminum channels where needed.
- Keep drivers away from fabric, foam, dust, and sealed spaces.
- Also, avoid covering strips with heat-trapping material.
Secure the wiring
- Use the right wire size for the load and run length.
- Choose strong connectors or clean solder joints.
- Then, add strain relief at strip ends and corners.
Use safe mounting methods
- Clean the surface before sticking the strip.
- Use clips or channels where adhesive alone is not enough.
- Finally, support long runs so the strip does not pull on joints.
Inspect the system
- Look for heat, smell, flicker, loose joints, and color changes.
- Also, fix small issues before they become safety risks.
Quick answer: The safest install uses certified parts, good heat control, secure wiring, strong mounting, and routine checks.

Recommended Parts and Safety Tools
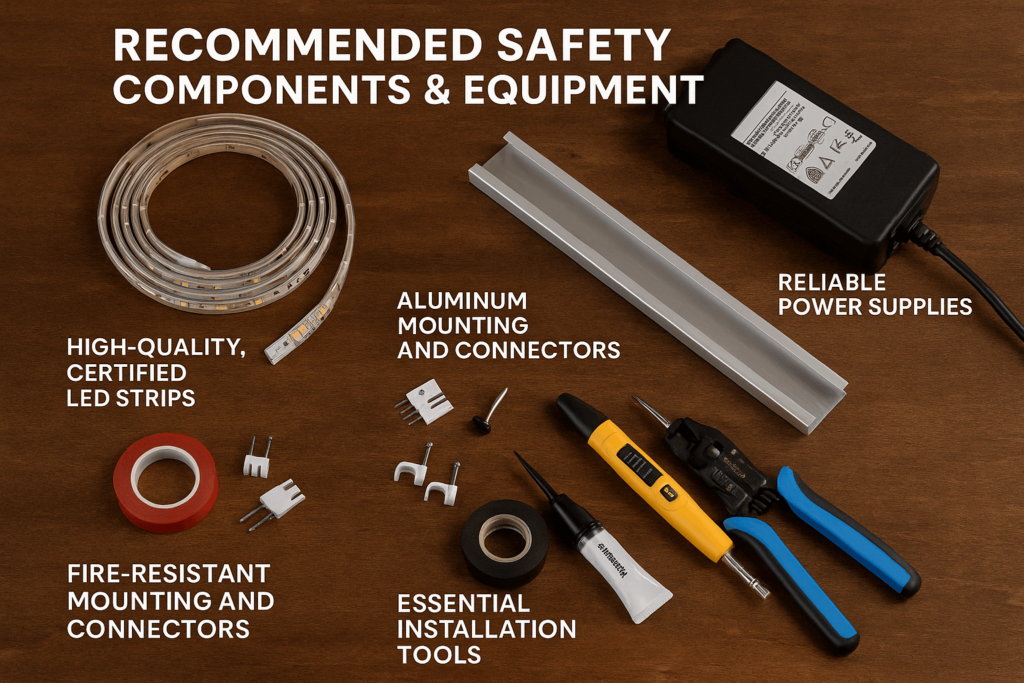
Good parts reduce LED strip fire risk. Therefore, do not choose strips or drivers only by price. Instead, compare safety marks, datasheets, and support.
Quality LED strips
- Select strips with clear voltage, wattage, and IP rating information.
- Then, select the right strip for indoor, damp, or outdoor use.
Reliable power supplies
- Choose a power supply that matches strip voltage and total wattage.
- Also, look for short-circuit and overload protection.
Aluminum channels
- Add aluminum channels to support the strip and spread heat.
- In addition, use diffusers where glare or touch risk matters.
Connectors and mounting parts
- Pick connectors, clips, and tapes that match the strip and environment.
- For hot or high-load areas, use heat-resistant parts where needed.
Basic install tools
- Keep a voltage tester, wire stripper, insulating tape, and basic hand tools ready.
- Also, use heat-shrink where soldered joints need extra protection.
Quick answer: Safe LED strip systems need good strips, reliable drivers, heat paths, secure connectors, and the right tools.
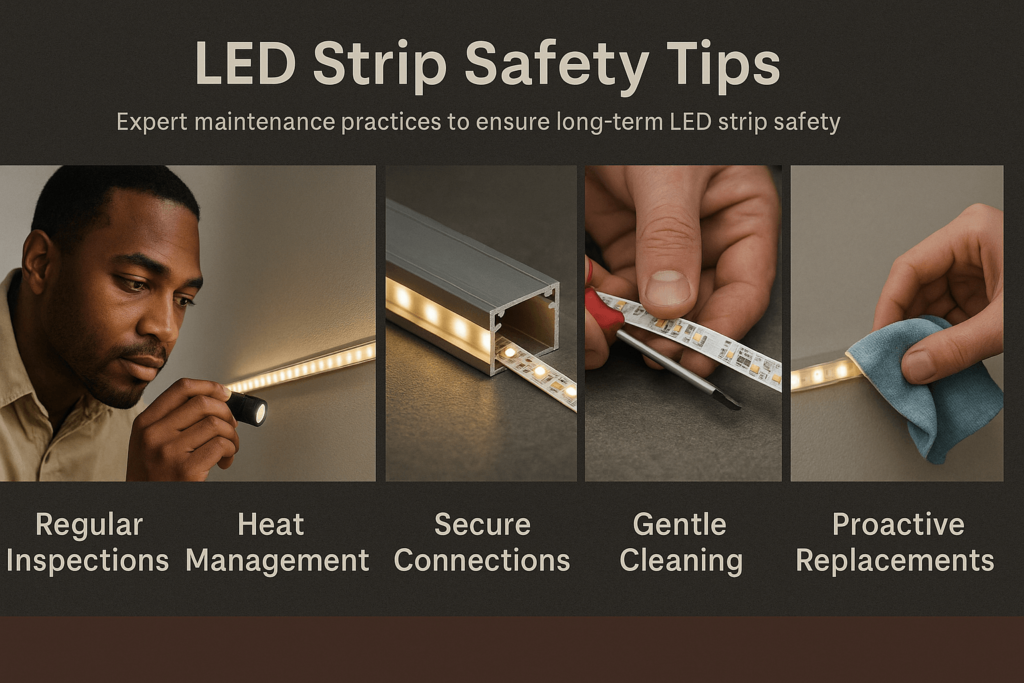
Maintenance for Long-Term LED Strip Safety
Even a good install should be checked over time. As a result, you can catch heat, dust, loose joints, and aging parts early.
After installation, use a simple check schedule so small issues do not get missed.
Visual checks
- Inspect strips, drivers, controllers, and wiring every few months.
- Also, look for dark spots, cracked coating, smell, or loose joints.
Heat checks
- Touch near the strip and driver carefully after normal use.
- If parts feel too hot or smell odd, turn the system off and inspect it.
Connection checks
- Review connectors and wires for movement, corrosion, or damage.
- Then, tighten or replace parts that look weak.
Cleaning
- Clean dust with a soft dry cloth.
- Also, avoid harsh cleaners and too much moisture.
Part replacement
- Change aging drivers, controllers, or wires before full failure.
- For replacements, choose tested parts that match the strip voltage and load.
Quick answer: Inspect LED strips every few months and clean them about twice a year, or more often in dusty or hot spaces.
Maintenance Schedule for LED Strip Fire Safety
A simple schedule helps lower LED strip fire risk. Also, it makes maintenance easier to remember.
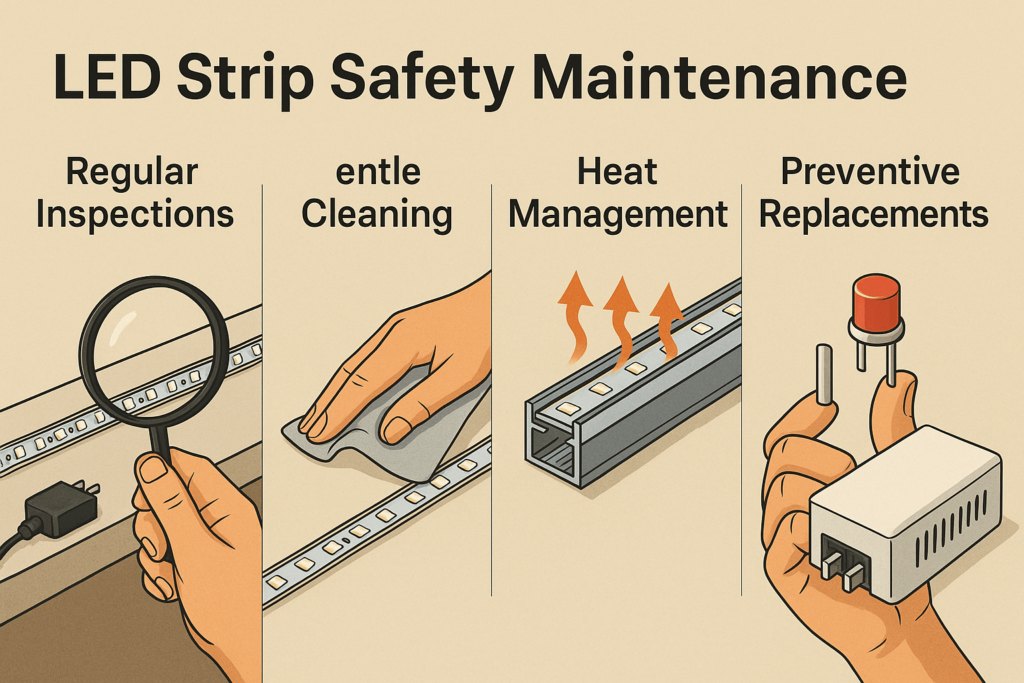
For ongoing safety, start with a short inspection every few months.
Every 3 to 6 months
- Look for heat, smell, loose joints, and visible damage.
- Also, confirm that drivers still have airflow.
Then, add a deeper cleaning and full-brightness test about twice a year.
Every 6 months
- Clean dust from strips, channels, and power supply areas.
- Then, test the strip at full brightness for a short time.
When to replace parts
- Remove parts that flicker, overheat, smell bad, or show dark marks.
- In addition, replace damaged cables or loose connectors right away.
Quick answer: Regular checks and early replacement are simple ways to reduce safety problems.
Common FAQs About LED Strip Fire Risk
Can LED strip lights actually cause fires?
Yes, but it is rare. However, fires are more likely when strips use poor parts, wrong voltage, weak wiring, or poor heat control.
What causes LED strip lights to catch fire?
The most common causes include overheating, wrong voltage, faulty wiring, poor parts, and bad mounting. Therefore, check power, heat, and wiring first.
How can I prevent LED strip fires?
Use certified parts, match voltage, manage heat, secure wiring, and inspect the system. Also, avoid mounting strips on heat-trapping materials.
Are LED strips safe to leave on continuously?
High-quality strips can run for long periods when they have proper power, airflow, and heat control. Even so, routine checks are still important.
Conclusion and Next Steps
LED strip fire risk is mostly preventable. Start with good parts. Then, match voltage and power correctly. After that, control heat, protect wiring, and inspect the system.
If you follow these steps, LED strip lights can be safe, reliable, and long-lasting. However, complex installs, hidden wiring, or wet-area projects may need expert help.
Ready to improve your lighting safely? Explore Elstar’s Safe LED Lighting Solutions →



 English
  Spanish
  French
  Arabic