Adding LED strips to your PC case can make your build look like a high-end showroom rig. However, if the strip, voltage, connector, or layout is wrong, the mod can damage hardware, block airflow, or look messy.
Therefore, treat a DIY PC LED strip case mod as a small lighting system. First, choose the right strip type. Next, plan power and control. Then, route cables cleanly and test everything before final mounting.
Before You Start: What a DIY PC LED Strip Case Mod Involves
A DIY PC LED strip case mod is about three things: compatible hardware, safe power, and clean installation. As a result, you need to check both the look and the wiring before buying parts.
Main goals of the mod
Choose compatible hardware. Pick RGB or ARGB strips, or a PC LED kit, that fits your case and matches your motherboard headers or controller.
Plan power and control. Decide whether to use motherboard headers, a powered hub, or a dedicated controller.
Install safely and cleanly. Plan placement, test strips, mount them, and route cables so airflow and service access stay clear.
Skill level check
You do not need to be an electronics engineer. However, you should be comfortable opening the PC case, reading header labels, and following a step-by-step plan.
First, confirm you can identify motherboard RGB or ARGB headers.
Next, check whether you can read PSU connector labels.
Also, make sure you can route cables without touching fans or sharp case edges.
Finally, ask a more experienced builder for help if the physical install feels risky.
Tools and parts checklist
Basic tools: Phillips screwdriver, small flashlight, zip ties, or Velcro cable ties.
Helpful extras: isopropyl alcohol, lint-free cloth, cable clips, and adhesive cable tie bases.
Parts: RGB or ARGB LED strips, extension cables, splitters, and a controller or hub if needed.
Information: motherboard manual, PSU wattage, and free SATA or Molex connectors.
Boundary note: Having the manual, tools, and cable ties ready makes power design, layout, and installation much smoother.
Choose the Right LED Strip Type for Your PC Case
The strip type decides what effects you can run and what connector you need. Therefore, this choice is the foundation of a safe and good-looking mod.
Common PC strip choices
12V RGB strips: all LEDs change color together.
5V ARGB strips: addressable LEDs or segments can show moving effects.
Pre-built PC LED kits: strips, controller, cables, and sometimes software support come together.
RGB, ARGB, and kit comparison
Option
Tensión
Typical connector
Efectos
Install complexity
Typical use
12V RGB strip
12V
4-pin 12V RGB header or PSU adapter
Whole-strip colors and basic effects
Medium
Simple accent lighting and budget builds
5V ARGB strip
5V
3-pin 5V ARGB header or controller
Per-LED or per-zone patterns
Medium to high
Gaming rigs and animated effects
PC LED kit
5V or 12V
Usually ARGB or proprietary controller
Depends on kit
Low to medium
Quick upgrades and first-time mods
DIY strip vs PC LED kit
Approach
Upfront cost
Wiring effort
Flexibilidad
Best for
DIY strip + separate controller
Medium
Más alto
Highest
Tinkerers and multi-project builders
Generic PC LED strip kit
Low to medium
Low
Moderate
First-time PC modders
Premium PC LED kit
Medium to high
Low to medium
Medium to high within the brand
Brand ecosystem builds
If you need LED strips for other projects as well, it can help to compare a broader LED strip light series so you understand how PC strips differ from architectural strips.
Can you use generic LED strips in a PC?
Yes, but only when voltage, connector type, and wiring match what the PC expects. If you mix them up, you can damage strips, headers, or controllers.
Use 12V strips only with a 12V source or 12V RGB header.
Use 5V ARGB strips only with a 5V ARGB header or matching controller.
Also, use proper adapters and insulation when a connector does not match directly.
Finally, avoid unknown-voltage strips or bare-wire installs if you cannot verify the wiring.
Boundary note: When in doubt, PC-specific kits are often safer because they include clearer labels, cables, and instructions.
Plan How to Power and Control Your LED Strips
After choosing the strip type, decide how power and control will work. A good plan keeps the LED load within safe limits and makes the lighting easier to service later.
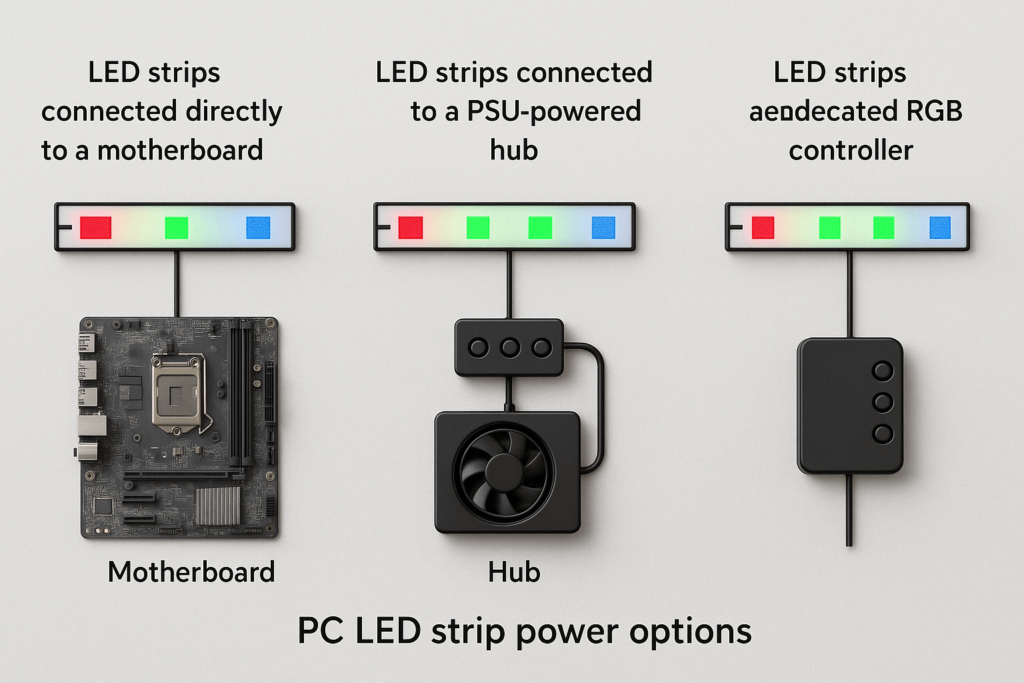
Main power options
Motherboard RGB or ARGB headers only: simple and good for small setups.
Motherboard headers plus powered hub: better for more strips, fans, or longer runs.
Dedicated RGB or ARGB controller: useful when you need more channels, effects, or no board header is available.
Using motherboard headers safely
Most modern motherboards include 12V 4-pin RGB headers and 5V 3-pin ARGB headers. However, they are not interchangeable.
First, match voltage and pin count before connecting anything.
Next, connect 12V RGB strips only to 12V RGB headers.
Then, connect 5V ARGB strips only to 5V ARGB headers.
Also, never force a 3-pin ARGB plug into a 4-pin RGB header.
Finally, check the header current limit in the motherboard manual.
When to add a powered hub or controller
Add a hub or controller when one motherboard header may not safely carry the load. As a result, the motherboard can still provide a control signal while the PSU supplies most of the current.
Use a motherboard header for one or two short strips plus a few ARGB fans.
However, use a powered hub for several long strips or many ARGB devices.
If your board has no suitable ARGB header, use a dedicated controller.
How many strips per header?
Every header or controller channel has a current limit. Therefore, estimate the strip load before connecting long runs.
Find the strip power per meter from the datasheet or product page.
Then, calculate current using current = power / voltage.
After that, compare the result with the header limit.
Finally, stay comfortably below the limit or use a powered hub.
Power draw and electric bill note
LED strips use far less power than a CPU or GPU. However, they are not free. In most PC builds, the bigger concern is header safety and PSU headroom, not the electricity bill.
For more background on LED efficiency, see the U.S. Department of Energy overview of LED lighting efficiency.
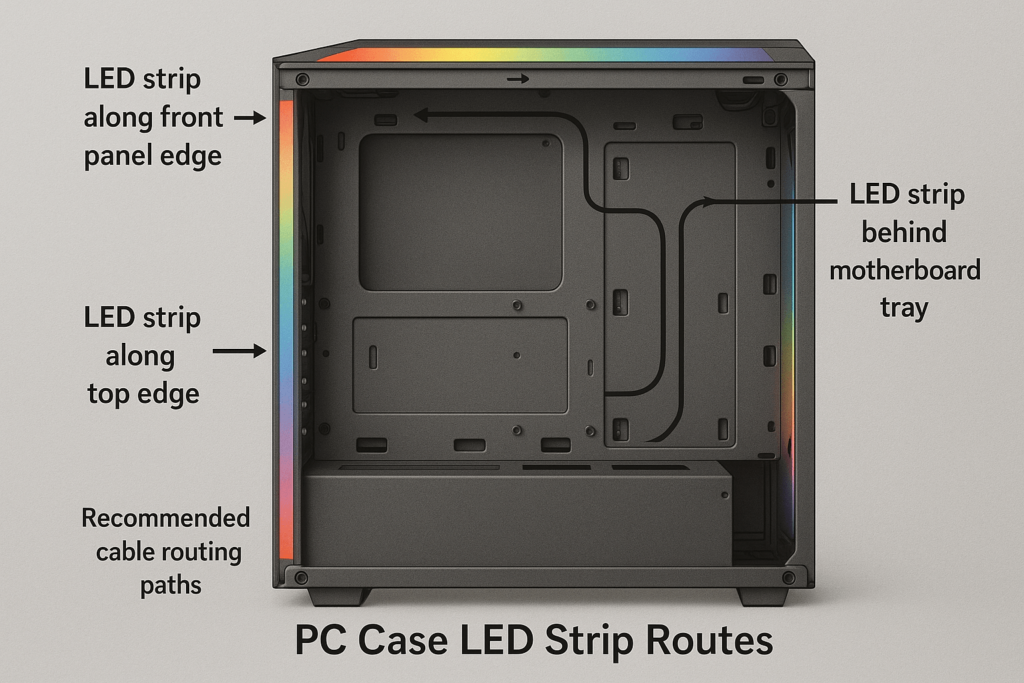
Design Your Layout: Placement and Cable Routing
Even a safe power plan can look bad if placement and cable routing are messy. Therefore, design the light path and cable path together.
Think in case zones
Front panel and intake area
Top and bottom case edges
Rear area and PSU shroud
Behind the motherboard tray
Where to mount strips for even light
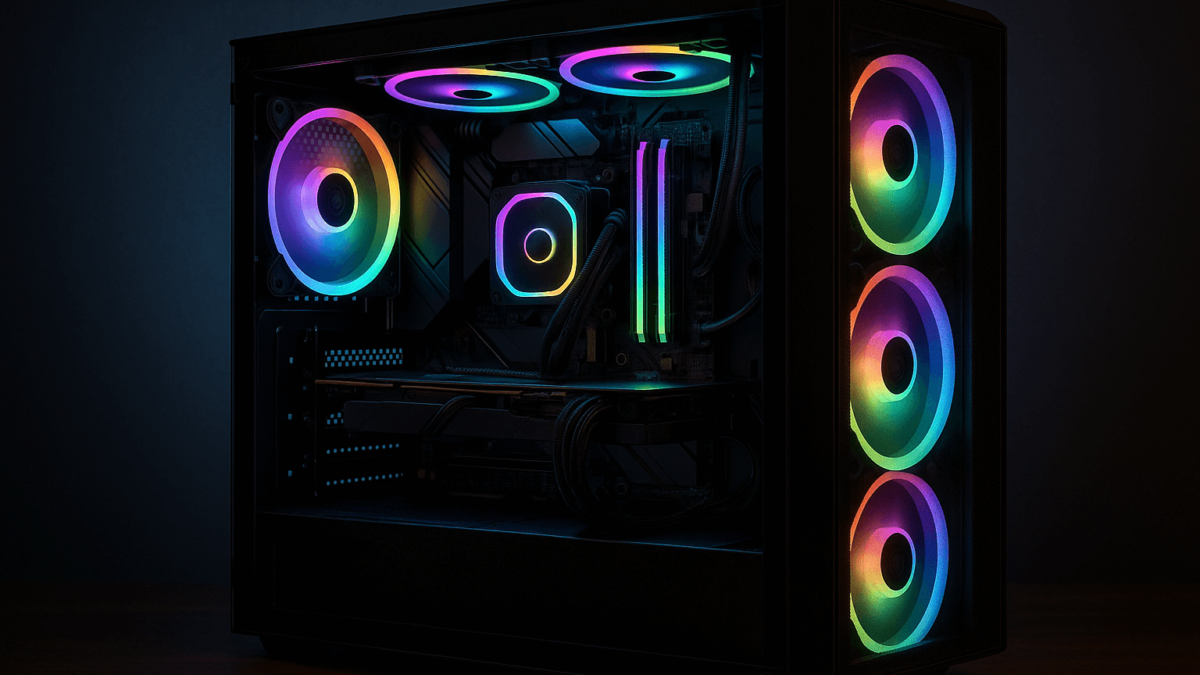
Great PC lighting is about glow, not staring at LED dots. Therefore, place strips where they bounce light off case surfaces.
Mount strips along the inside edge of the front panel.
Also, place strips around the glass perimeter, tucked away from direct sight.
Then, use the PSU shroud, back panel gaps, or case edges as bounce surfaces.
Finally, avoid placing strips where fans or panels will crush them.
When to use diffused bars
Diffused or neon-style bars help when you want a smooth line instead of visible dots. However, they are larger and less flexible than bare LED strips.
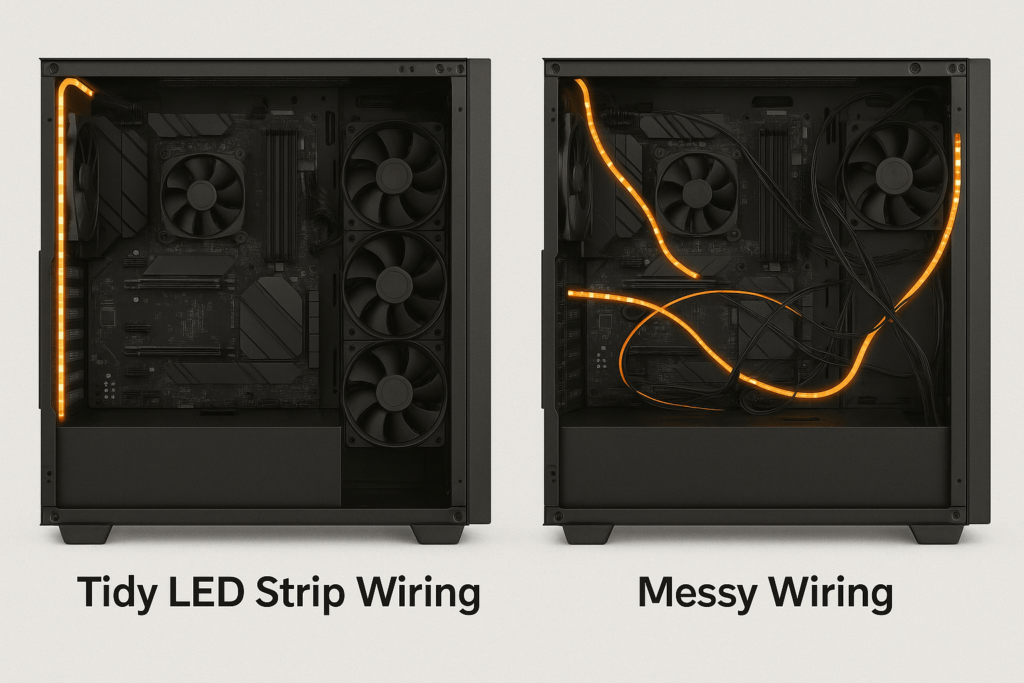
Cable routing patterns
Use case cut-outs so strip connectors can disappear behind the motherboard tray.
Route LED wires along existing cable bundles where possible.
Secure cables with zip ties or Velcro straps behind the tray.
Keep cables away from intake and exhaust fans.
Also, leave a small service loop near controllers and headers.
Boundary note: Planning cable paths early is often what separates a clean PC mod from a messy one.
Step-by-Step: Safely Installing LED Strips in Your PC Case
Use a staged process so you can catch problems before the strips are permanently mounted. This saves time and protects the PC.
High-level install sequence
Plan strip runs and cable paths.
Test strips and controllers outside the case.
Dry-fit strips inside the case with tape or magnets.
Route cables and confirm they do not block airflow.
Clean surfaces and mount the strips.
Run the final safety check, then power on.
Safety checklist before power-on
Confirm voltage and header type match.
Also, check that connectors are fully seated and not offset by one pin.
Make sure no bare copper pads or wires touch the case metal.
Then, confirm cables are not pinched at panel edges.
Finally, check total strip length against the safe header limit.
Install and test steps
Bench test first. Connect the strip to the controller or header outside the case and confirm it works.
Dry-fit inside the case. Use masking tape or magnets before peeling adhesive.
Route cables. Choose the header, hub, or controller path and keep cables away from fans.
Clean mounting surfaces. Use isopropyl alcohol and let the surface dry.
Mount the strips. Peel the backing in short sections and press evenly.
Tidy cables. Use zip ties or Velcro along planned routes.
Power on carefully. Watch for flicker, smell, unusual heat, or dead sections.
Boundary note: If something seems off, shut down and inspect before continuing.
Configure DIY Modes and Advanced Lighting Effects
After the strips are stable, you can set custom modes and effects. However, the effects depend on the hardware you chose.
Effect limits by strip type
12V RGB strips: whole-strip color changes, breathing, and simple pulsing.
5V ARGB strips: per-LED animations, waves, rainbow effects, and gradients.
Proprietary kits: effects depend on the controller and software.
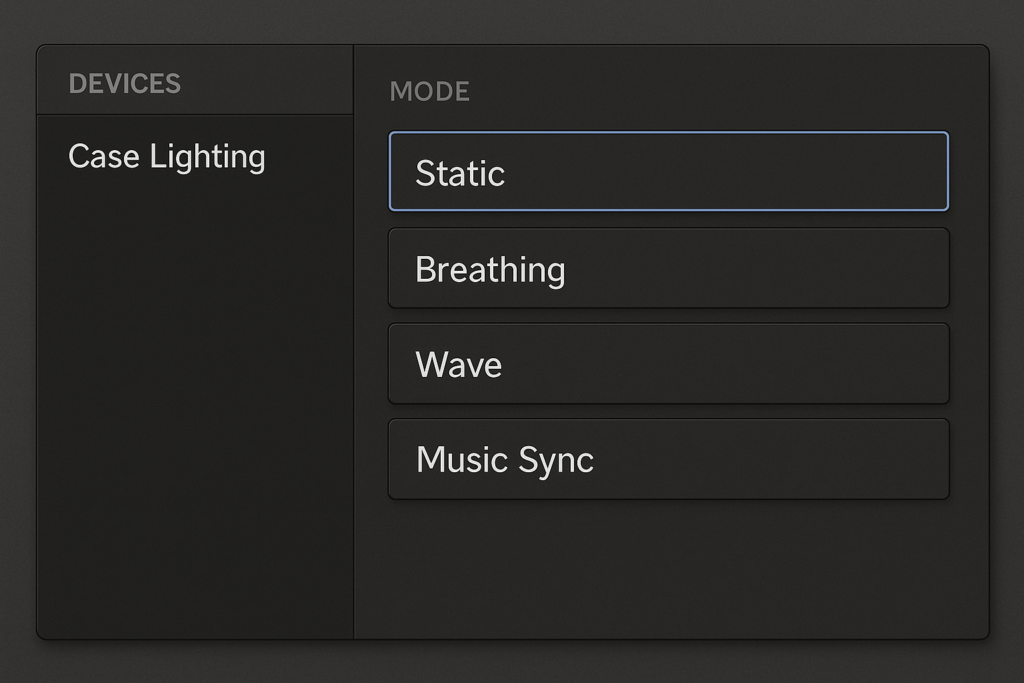
Setting up DIY modes
First, select the device or channel in the software.
Next, choose a mode type, such as static, breathing, color cycle, wave, or custom.
Then, set colors, gradients, speed, direction, and brightness.
After that, preview the effect and adjust it.
Finally, save the profile and assign it to games or power states if supported.
Breathing, animation, and music sync tips
Use lower speeds and moderate brightness for a cleaner look.
Also, avoid too many competing animations in a small case.
For music sync, confirm whether the software reads system audio, one app, or a microphone.
Finally, set sensitivity so the lights react to rhythm instead of staying bright all the time.
Boundary note: Advanced music and per-LED effects usually need ARGB strips and an addressable controller.
Common Mistakes and Safety Risks to Avoid
Even experienced builders make a few classic mistakes. Therefore, review wiring and layout risks before powering on the PC.
Wiring mistakes that damage hardware
Putting 5V ARGB on 12V RGB headers: LEDs can burn out immediately.
Offsetting connectors by one pin: this can short pins or miswire the strip.
Ignoring current limits: too many devices on one header can overload it.
Leaving exposed copper pads: exposed conductors can short against the case.
How to avoid wiring mistakes
First, double-check header labels and strip markings.
Next, respect safe length and current estimates.
Also, insulate soldered joints or adapters.
Finally, never force a connector that does not line up naturally.
Layout mistakes that hurt airflow or looks
Cables across front intake fans can block airflow.
Strips crushed by panels can fail early.
Dusty or oily surfaces can make adhesive fail.
Strips in direct line of sight can show dots and hot spots.
Cleaner layout approach
Route cables behind the motherboard tray where possible.
Also, use tie-down points and cable channels.
Then, clean mounting surfaces before applying adhesive.
Finally, aim strips at case surfaces instead of your eyes.
Boundary note: Treat the LED mod as part of the build, not as a temporary decoration.
PC LED Strip Mod FAQ
Can you put LED strips in a PC?
Yes, if the voltage and connectors match your motherboard headers or controller. For example, 12V RGB strips belong on 12V RGB headers, while 5V ARGB strips belong on 5V ARGB headers.
How do I add LED strip lights to my computer case?
First, plan strip locations and cable paths. Next, test the strips outside the case. Then, dry-fit, route cables, clean surfaces, mount permanently, and run a safety check before powering on.
How many LED strips can I run from one header?
It depends on the header current limit and the strip power. Therefore, calculate the rough current and stay below the header limit. If you are close, use a powered hub or controller.
Do LED strip lights raise the electric bill?
A typical PC LED setup adds only a small amount of power draw. However, the more important issue is PSU headroom and safe header loading.
What is the best place to put LED strips in a PC case?
Mount strips along case edges, behind panels, around the glass perimeter, or near bounce surfaces. Also, avoid direct sightlines and fan paths.
Should I use a dedicated controller or motherboard header?
For one or two short strips, a motherboard header may be enough. However, for longer runs, more devices, or independent zones, use a PSU-powered hub or dedicated controller.
How do you use DIY mode on LED lights?
In most software, select the LED device, choose a custom or DIY mode, pick colors and effects, adjust speed and brightness, preview the result, and save the profile.
Summary and Key Takeaways for Safe PC LED Strip Mods
A clean DIY PC LED strip mod should look good, stay safe, and remain easy to service. Therefore, choose compatible parts, keep current within limits, and plan airflow before mounting.
Key takeaways
First, choose the right strip type: 12V RGB, 5V ARGB, or a PC LED kit.
Next, match strips to headers, hubs, or controllers correctly.
Then, size strip length conservatively per header or channel.
Also, route strips and cables so airflow stays clear.
Finally, test effects and DIY modes without overloading the system.
Final build rule
If you follow these steps, your PC LED strip mod can look cleaner and stay easier to maintain. As a result, future upgrades will be simpler too.


 English
  Spanish
  French
  Arabic