Vous avez besoin d'un produit de qualité en peu de temps ? Nous avons un plan pour vous.


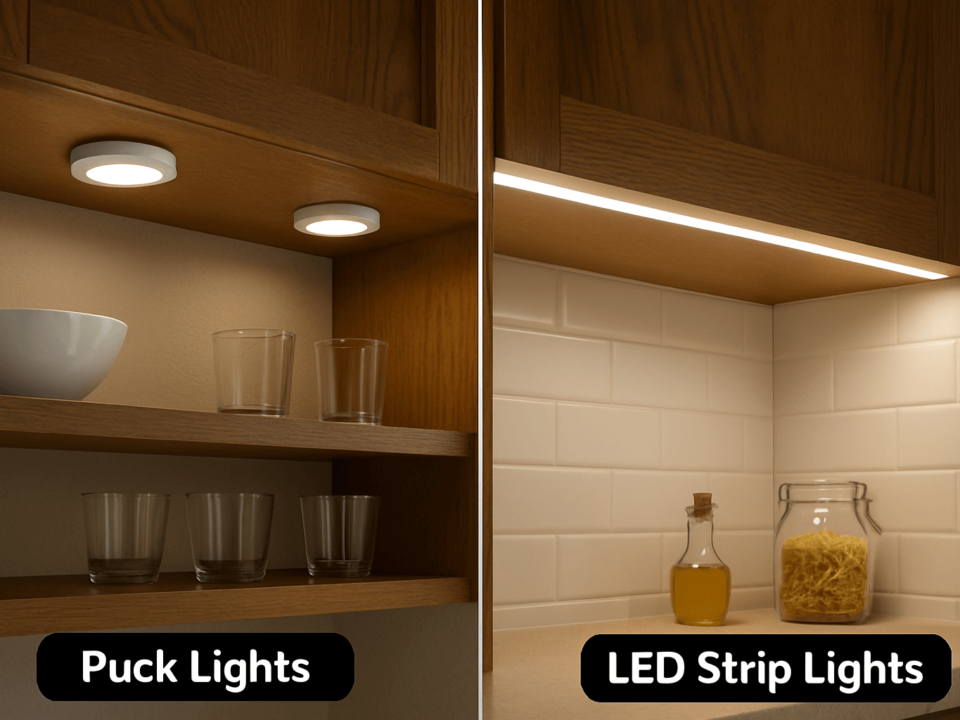
Under-cabinet LED strip lighting can make a kitchen counter easier to use. However, placement changes the result. For example, a strip near the front of the cabinet will not look the same as a strip near the back wall. Cabinet depth, counter finish, backsplash shine, diffuser choice, and wire path can all change the final look.
Therefore, do not start with one fixed rule for every cabinet. Instead, match the strip position to the main goal: éclairage d'appoint, soft accent light, or a mix of both.
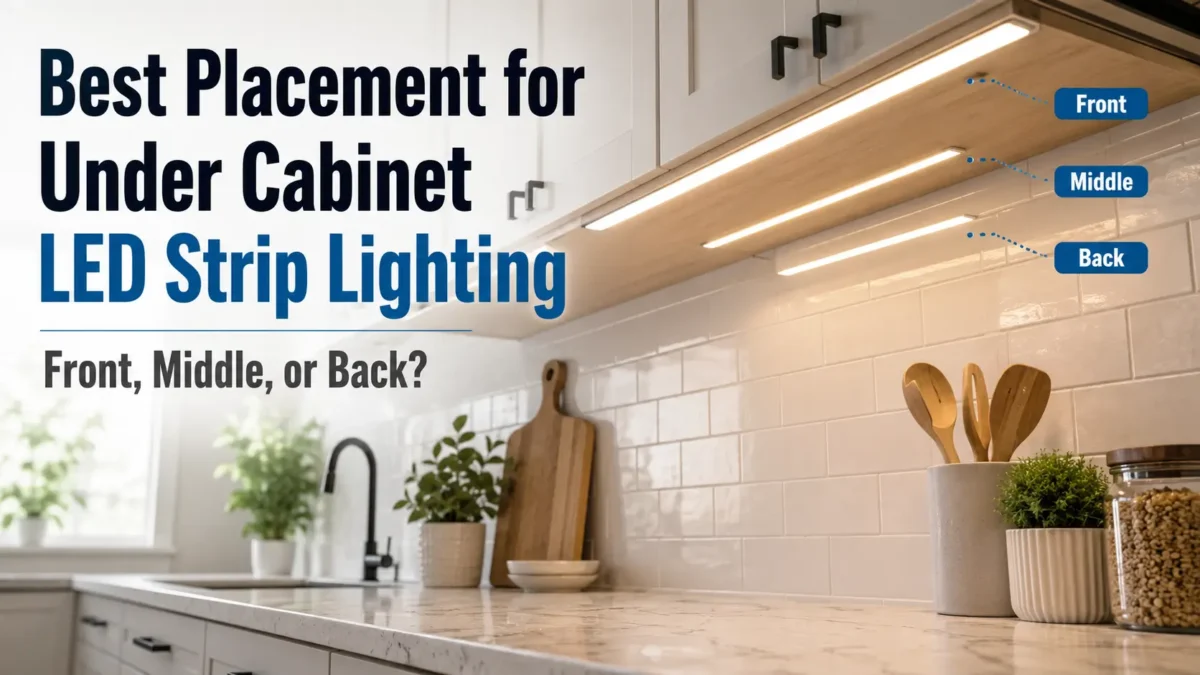
For task lighting, under-cabinet LED strip lights usually work best near the front or middle-front of the cabinet. This position sends more light to the counter. However, back placement can work when the goal is backsplash glow or soft mood light. Therefore, test the strip before you stick it down or mount the channel.
First, decide what the light should do.
If the main goal is to light the counter for cooking, reading labels, or food prep, place the strip closer to the front half of the cabinet. As a result, more light reaches the work area instead of mainly lighting the wall.
However, if the main goal is a soft glow on the backsplash, back placement may work well. This choice is more decorative, so it is better for mood light than for strong work light.
Also, some kitchens need both effects. For example, a deep counter, shiny stone surface, or glossy tile wall may need more than one test position before final mounting.
The table below gives a good starting point. Still, treat it as a guide, not a strict rule.
| Placement | Best For | Watch-Outs | When to Test |
|---|---|---|---|
| Front edge / near cabinet lip | Stronger counter task light | The strip or LED dots may show if there is no lip or channel | Test if the cabinet has no front lip or people sit below the light line |
| Middle-front | Balanced task light with easier hiding | Shiny counters may still show glare | Test if the counter is glossy or the cabinet is shallow |
| Center | General light under the cabinet | The work area may get less direct light than with front placement | Test if the cabinet depth is not standard |
| Back / near wall | Backsplash glow and soft accent light | The front counter area may look darker | Test if you still need task light or if the backsplash is glossy |
| Front + back / two-zone plan | Deep counters or mixed task and accent goals | More wire planning, control space, and channel space may be needed | Test if one strip position does not give the look you want |
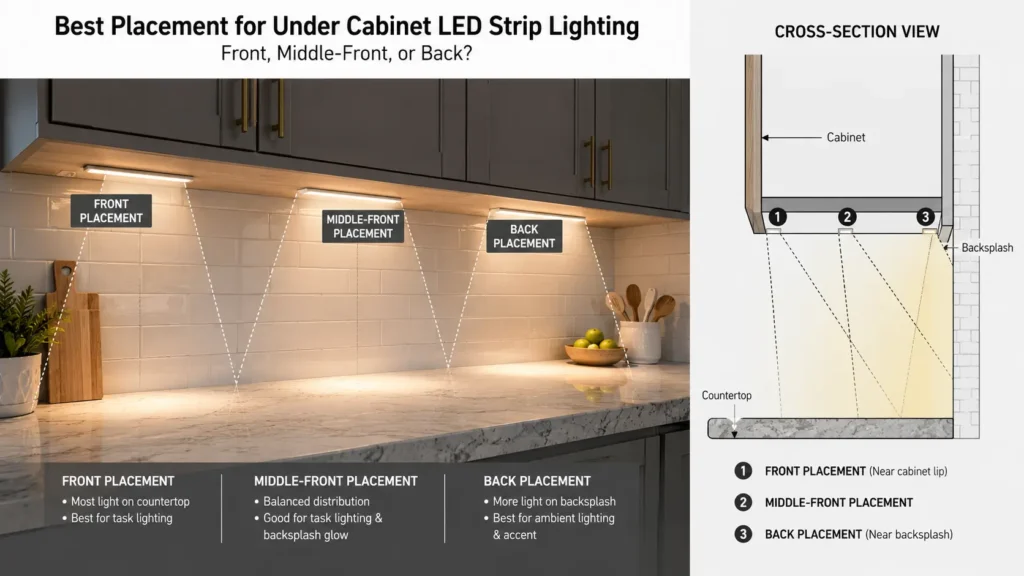
In general, front or middle-front placement is the safer start for task light. However, back placement is a good option for a soft wall glow. When the counter or backsplash is shiny, testing matters more than any single rule.
Next, look at the counter and backsplash materials. They can change how the light feels.
For example, a matte counter tends to hide glare better. However, glossy stone, polished tile, or glass can show LED dots, bright lines, or reflected glare. Because of this, strip position, channel depth, diffuser type, and viewing angle can matter as much as the strip itself.
Before final mounting, check these conditions:
| Condition | Why It Matters | Placement Note |
|---|---|---|
| Glossy counter | It can show LED dots or bright lines | Try middle-front placement with a diffuser or channel first |
| Shiny backsplash | It can bounce light back toward the viewer | Back placement may create more glare |
| Deep cabinet or counter | One strip may not light the full work area evenly | Test front and middle-front positions |
| No cabinet lip | The strip may be easy to see from normal angles | Use a channel, or choose a spot that hides the strip |
| Dark counter | It may look like it absorbs more light | Test brightness and placement before final mounting |
| Light counter | It may look brighter and show glare more easily | Check glare from standing and seated positions |
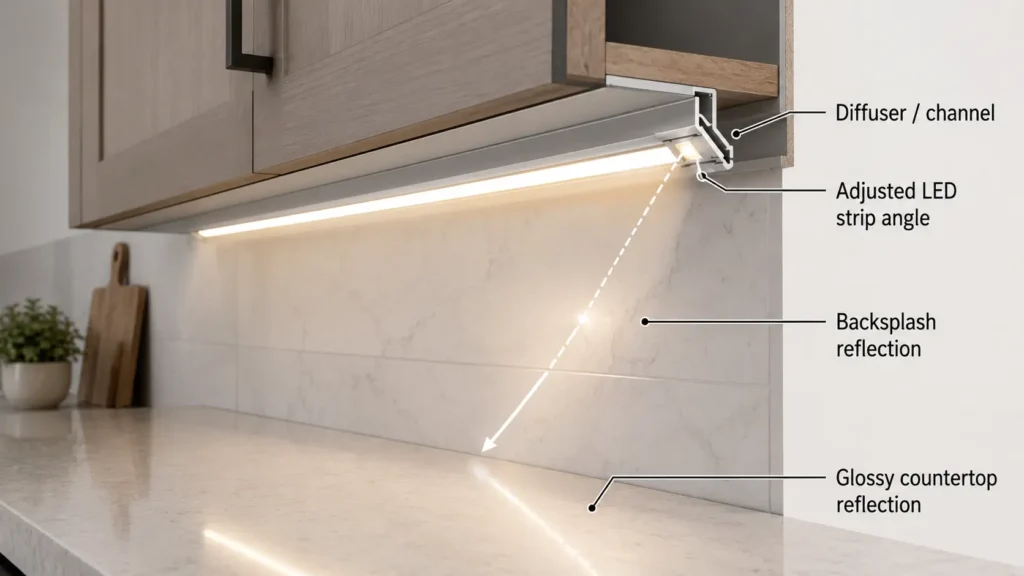
A diffuser or aluminum channel can help soften the light line. However, it is not a sure fix for every glare issue. Therefore, check the strip position, viewing angle, surface shine, and cabinet shape before you choose the final spot.
Before you stick the strip down, test the layout in place. LED strips may use adhesive backing, clips, or channels, so changes are easier before the final mount.
Use this pre-mount checklist:
Testing is especially useful with shiny counters, glass tile, polished stone, dark surfaces, unusual cabinet depths, or long strip runs.
Even so, many under-cabinet LED strip problems start with a rushed choice. Often, the strip position is picked before the full lighting plan is checked.
For example, common mistakes include the issues below. For more background, see this LED strip installation mistake guide.
| Mistake | Why It Causes Problems | Safer Approach |
|---|---|---|
| Mounting only at the back when task light is needed | The wall may get more light than the counter work area | Start with front or middle-front placement for task light |
| Putting the strip where LED dots can be seen | The result can look harsh or unfinished | Hide the strip behind the cabinet lip, or use a channel and diffuser |
| Ignoring glare from the counter | Glossy counters can show bright lines | Test the position before final mounting |
| Choosing the wrong strip type | Brightness, color, width, or bend direction may not fit the job | Confirm the use case before buying |
| Using the wrong power supply | The strip may not work as expected | Match the power supply to the strip and total run |
| Cutting outside marked cut points | The strip section may stop working | Cut only at marked positions |
| Using a dimmer or controller that does not match | Dimming or control may fail | Check control match before install |
| Skipping the test stage | Problems may show only after the strip is fixed in place | Test before adhesive, clips, or channels are finalized |
Because of this, “best placement” should not mean one fixed distance from the wall. Instead, ask which position gives the right light on this cabinet, with this counter, from normal viewing angles.
For one DIY cabinet, a simple test may be enough. However, for a project, showroom, remodel, retail shelf, or repeat job, it is better to prepare the details before asking for product help.
Also, use this checklist before you contact a supplier or send an RFQ:
| Detail to Prepare | Why It Helps |
|---|---|
| Cabinet layout or photos | Shows depth, corners, gaps, and mounting surfaces |
| Total strip length | Helps plan strip amount and power needs |
| Desired placement | Shows whether the plan is front, middle-front, back, or mixed |
| Lighting goal | Clarifies task light, accent light, display light, or mixed use |
| Color tone or CCT | Helps match the kitchen, shelf, or project style |
| Dimming or control needs | Helps avoid a dimmer or controller mismatch |
| Channel or diffuser plan | Helps manage strip view, light softness, and mounting method |
| Counter and backsplash material | Helps check glare risk |
| Quantity | Shows whether this is one cabinet or a project order |
| Ship-to area | Helps with quote and shipping talk |
| Drawings or install photos | Helps the supplier see limits before suggesting options |
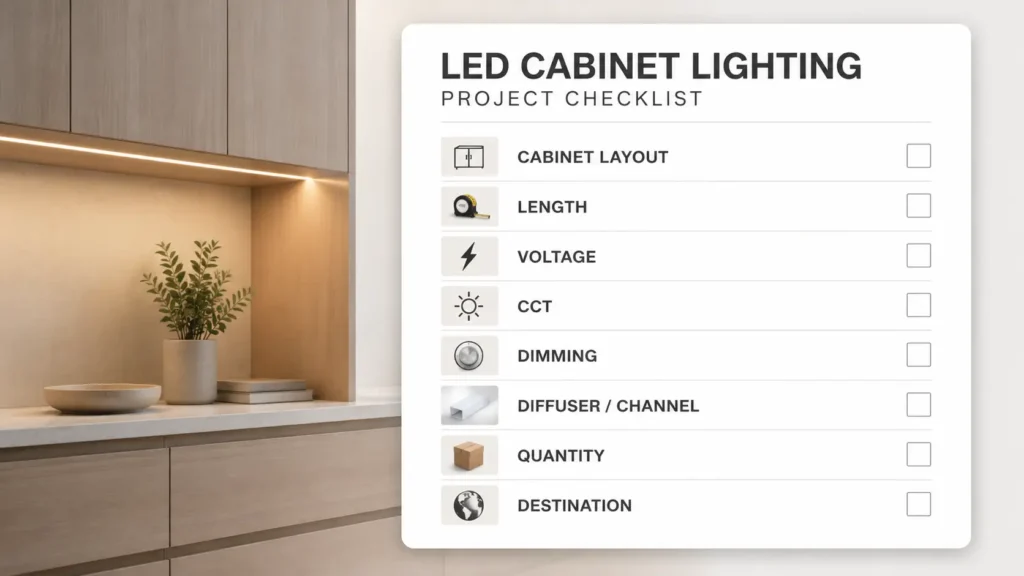
Do not rely only on a keyword such as “under-cabinet LED strip.” Instead, check placement, channel style, power route, control method, and surface conditions together.
For project review, you can compare LED under cabinet lighting options, review seamless LED under-cabinet lights as a product example, and share the layout through the contact page. Even then, the final choice should be checked against the real cabinet conditions.
For task light, front or middle-front placement is usually the better start because it sends more light to the counter work area. However, back placement can work when the goal is backsplash glow or soft accent light. Therefore, test the final choice with the actual cabinet and counter.
There is no single distance that fits every cabinet. For example, cabinet depth, cabinet lip, strip brightness, beam direction, backsplash shine, counter finish, and diffuser use can all affect placement. So, test the strip before final mounting instead of relying on one fixed distance.
Yes, LED strips can work well under kitchen cabinets when the strip, power supply, control method, channel, and placement match the job. In addition, they are useful when the project needs a smooth line of light under the cabinet. However, poor placement or mismatched parts can cause glare, shadows, or uneven light.
First, test the strip before you mount it. Then, try front, middle-front, and back positions if possible. Also, a diffuser or channel may soften the visible light line. However, do not assume the glare is fixed until the setup is tested in the real space.
Yes. Test the strip while it is powered and held in place under the cabinet. Then, check glare, shadows, LED dot view, wire path, and channel fit. This step is especially useful before you use adhesive backing, clips, or channel mounting.
Prepare cabinet photos or drawings, total length, desired placement, color tone, dimming or control needs, channel or diffuser plan, counter material, quantity, and ship-to area. As a result, the supplier can discuss strip and mounting options with less guessing.
Under-cabinet LED strip placement works best when the lighting goal and cabinet conditions are clear. Before you choose a strip or final mount, prepare photos, drawings, cabinet size, total length, color tone, dimming needs, and channel or diffuser needs.
Then, for selection help, share your layout and project details so the placement, strip type, and mounting method can be reviewed against the actual site conditions.

 English
  Spanish
  French
  Arabic