

The first time I tried installing LED strip lights, I made every mistake in the book—crooked placement, tangled wires, and sagging corners. But once I figured it out, it completely transformed my room. The glow along the ceiling gave my space a cozy, high-end vibe I never expected from a $30 DIY upgrade.
Whether you’re lighting up your ceiling, desk, cabinets, or even the back of your TV, installing LED strips the right way can make your space look professionally designed—without hiring anyone.
In this guide, I’ll walk you through everything I’ve learned—from choosing the right location and tools to avoiding beginner mistakes. Whether it’s your first time or you’re upgrading your setup, this step-by-step walkthrough will save you time, money, and frustration.

Before you peel that adhesive backing, take a moment to plan things out—trust me, it’ll save you a ton of time (and regret). I used to rush straight into installation, only to realize later that the power adapter cord wouldn’t reach the outlet, or that I misjudged a corner turn.
Here’s how I plan every LED strip install now—whether it’s on the ceiling, under a cabinet, or behind a desk.
Think about the mood and purpose of the lighting:
Sketch out or mentally map the strip’s full path—including curves, corners, or gaps.
📌 Tip: If the outlet is far, consider using an extension cord or LED amplifier for longer runs.
Use a tape measure and mark approximate cut points (usually every 5–10 cm depending on your strip type).
Avoid placing cut zones in corners or tricky spots where connectors may not fit.
Ask yourself:
🔗 Internal Link: Explore LED Mounting Accessories
📰 Pre-Installation Checklist for LED Strips – Waveform Lighting

Good preparation makes for a smooth installation. I used to think I only needed LED strips and an outlet—but after several projects, I’ve built a checklist that works for almost every setup, from living rooms to workbenches.
Here’s everything you might need, depending on your installation surface and layout.
🔗 External Reference:
📰 Complete LED Strip Tool & Accessory Guide – LEDSupply

Once your plan is ready and your tools are in hand, it’s time to install. Whether you’re lighting a ceiling or the underside of a cabinet, these steps work for almost every setup.
I’ve followed this exact process across dozens of rooms—and each time, it helped me avoid common DIY headaches.
📌 Tip: Leave a little slack near the plug or controller for adjustments.
Before mounting anything:
This saves you from installing a faulty strip.
Use a cloth or alcohol wipe to remove dust and grease. Adhesives stick best on:
Avoid mounting directly onto rough, wet, or hot surfaces.
📌 Tip: For corners, use corner connectors or cut and bridge the strip with jumper wires.
🔗 Internal Link: كيفية توصيل عدة شرائط LED بمصدر طاقة واحد
Use cable clips, ducting, or adhesive tracks to route cables neatly. Hide excess strip or wiring:
Once everything is secure:
▶️ Watch: How to Install LED Strip Lights Step-by-Step – YouTube

Not all surfaces are created equal. Installing LED strip lights on a wall is very different from mounting them under a cabinet or around a ceiling. Over the years, I’ve tried all of them—and here’s what I’ve learned.
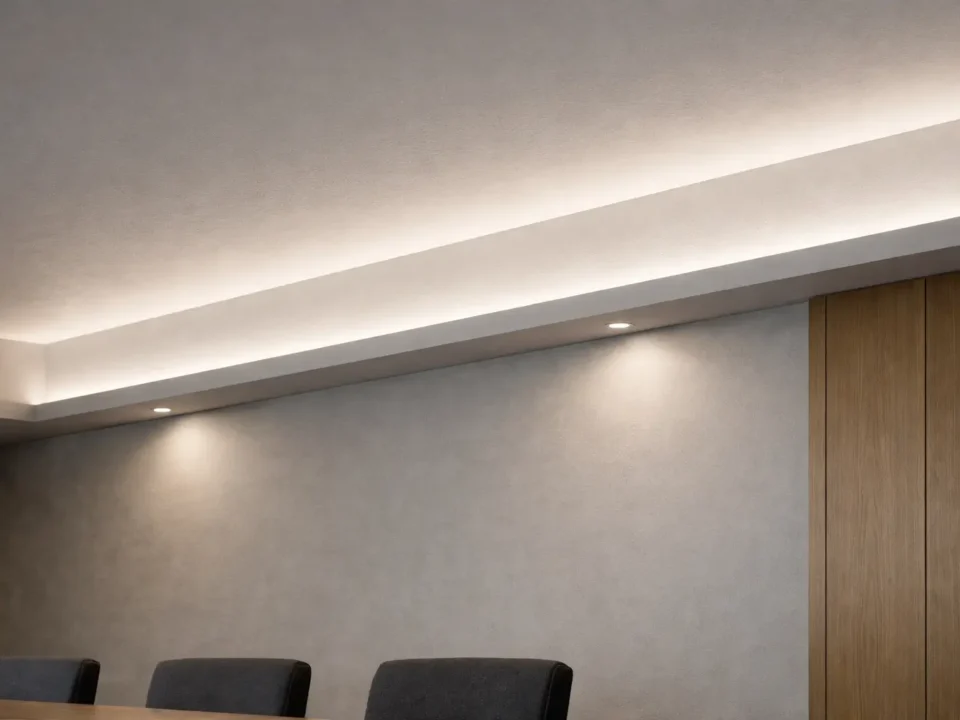
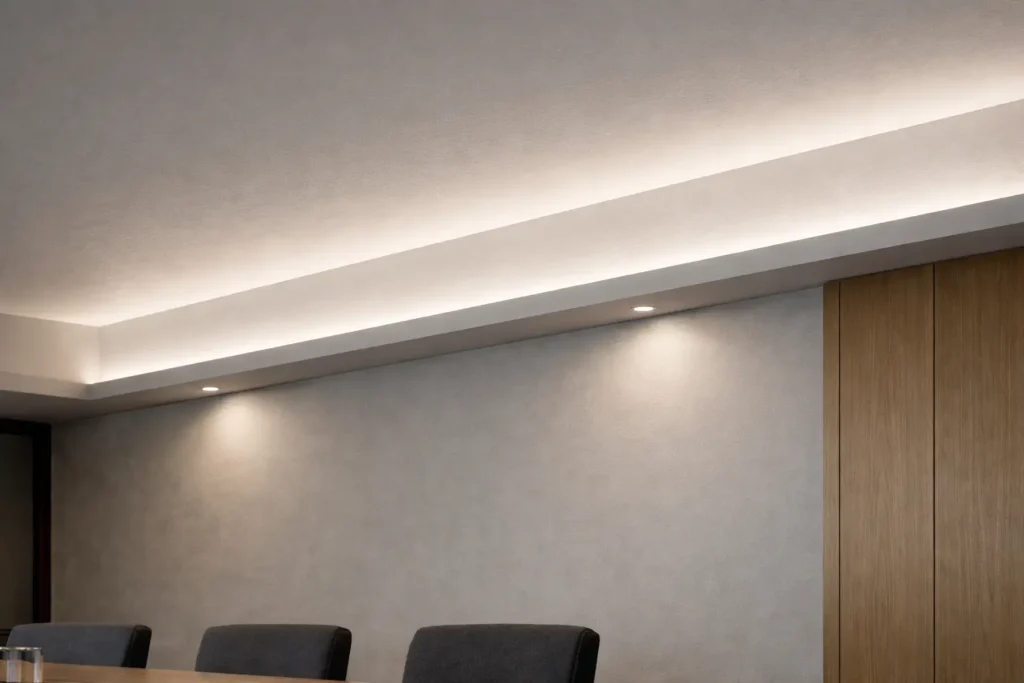
LED strips along ceilings are one of the most popular—and trickiest—placements. Here’s how to get it right:
📌 Tip: For rooms with textured paint or popcorn ceilings, avoid direct adhesive—clips work better.
Great for ambient light and eye comfort, especially for gaming or movie nights.
🔗 Internal Link: Learn More: How to Hide LED Strip Lights Effectively
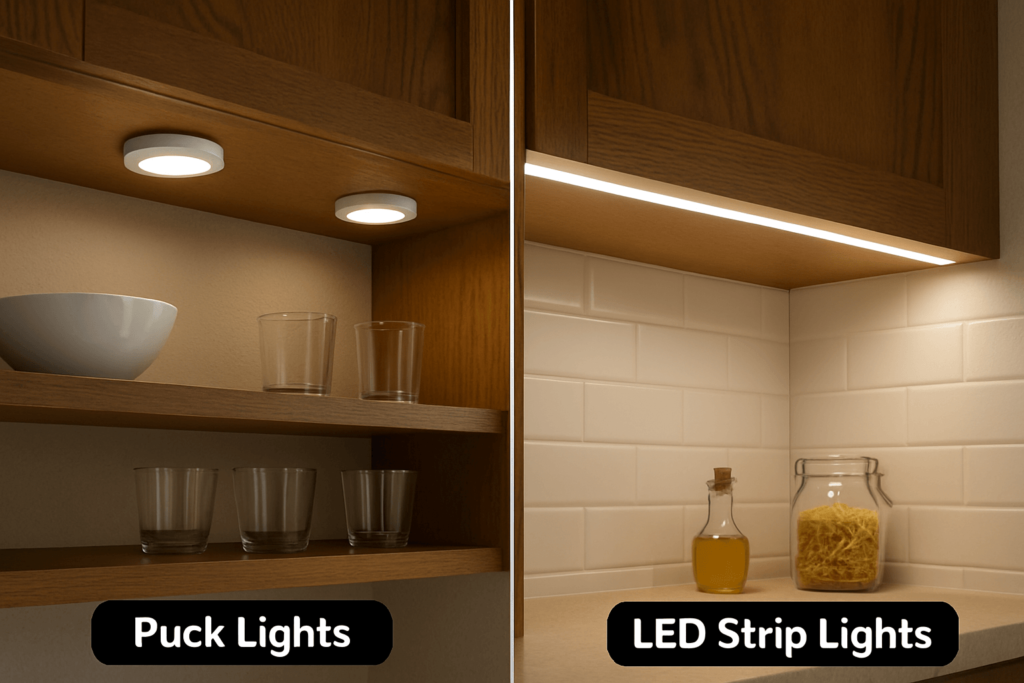
Perfect for kitchens, workbenches, or closets. It helps illuminate the workspace while remaining discreet.
📌 Tip: Angle the strip slightly toward the backsplash for softer, more even light.

I’ve installed dozens of LED strips—and I’ve made plenty of mistakes along the way. The good news? You don’t have to repeat them. Here are the most common issues I see (or have personally done), and how to avoid them.
Always plug in your strip and test it before you stick it to anything. I once installed a full 4-meter strip—only to find a 1-meter section was dead. I had to peel it off and rewire everything.
Solution: Power on and test brightness, color, and controls before mounting.
Adhesive strips won’t stick to dusty, greasy, or rough surfaces. They’ll fall off within days—especially on ceilings.
Solution: Wipe the surface with alcohol or a clean dry cloth. Let it dry before applying.
LED strips aren’t designed to fold or twist. Bending them at sharp angles can damage the circuit inside.
Solution: Use corner connectors or cut and bridge sections with jumper cables.
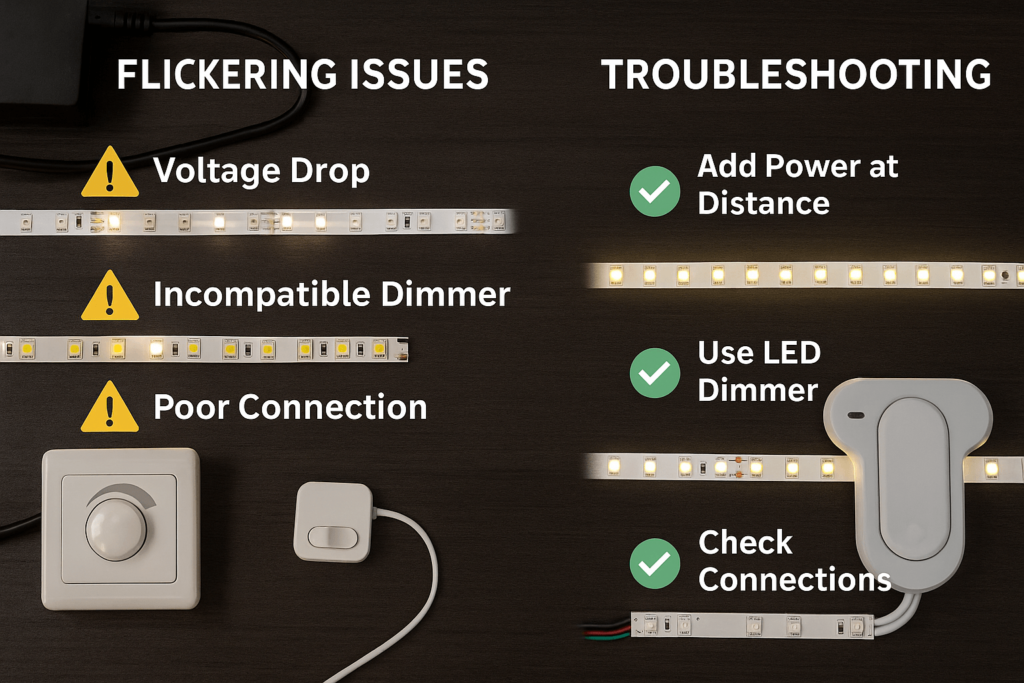
Using one adapter for multiple strips without checking wattage can lead to dimming, flickering, or even burnout.
Solution: Add up total wattage and ensure your power supply has a 20% buffer.
🔗 Internal Link: كيفية توصيل عدة شرائط LED بمصدر طاقة واحد
Hanging wires or tangled adapters ruin the aesthetic—and can be unsafe.
Solution: Use cable clips, trunking, or adhesive channels to hide and organize cables.
Are LED strip lights easy to install by yourself?
Yes! With the right tools and planning, most people can install LED strips in under an hour. Adhesive backing, pre-soldered connectors, and plug-in power supplies make it beginner-friendly.
What is the best way to hang LED strip lights on walls or ceilings?
Use the adhesive backing for smooth, clean surfaces. For textured walls or ceilings, consider mounting clips, aluminum channels, or screw-on brackets for better hold.
Can I install LED strips without damaging my wall?
Yes. If you use removable adhesive tape or command strips, you can avoid damage. Avoid screws or permanent glue unless necessary.
Do LED strip lights need to be connected to a switch?
Not always. Many LED strips come with remotes or app-based controls. However, you can wire them to a physical wall switch or timer for added convenience.
How do I hide LED strip wires and adapters?
Use cable raceways, adhesive cord clips, or route them behind furniture. You can also tuck wires behind molding or inside corner channels for a cleaner look.
📰 Guide: Hiding LED Strip Lights – LEDLightingInfo
Can I cut and reconnect LED strip lights during installation?
Yes—most LED strips are cuttable at marked copper pads. You can use solderless connectors or solder wires to reconnect segments.
▶️ Watch: LED Strip Installation Mistakes to Avoid – YouTube
Installing LED strip lights doesn’t require a toolbox full of gear or professional help—you just need a clear plan, the right tools, and a little patience. After a few installs, I’ve realized that the best results come from careful prep and small details: like cleaning the surface, using corner connectors, and managing cables properly.
Whether you’re creating cozy mood lighting, under-cabinet task lights, or a smart ambient setup, LED strips can seriously elevate your space. And once you get the hang of it, you’ll probably want to light up every room in the house.
👉 Browse LED Strip Lights by Elstar
👉 Explore LED Accessories & Connectors
👉 Learn: How to Connect LED Strips at Corners
👉 Discover: Creative Ways to Hide LED Strip Lights
مع Elstar’s high-quality LED products and guides, you’re one strip away from transforming your space.
