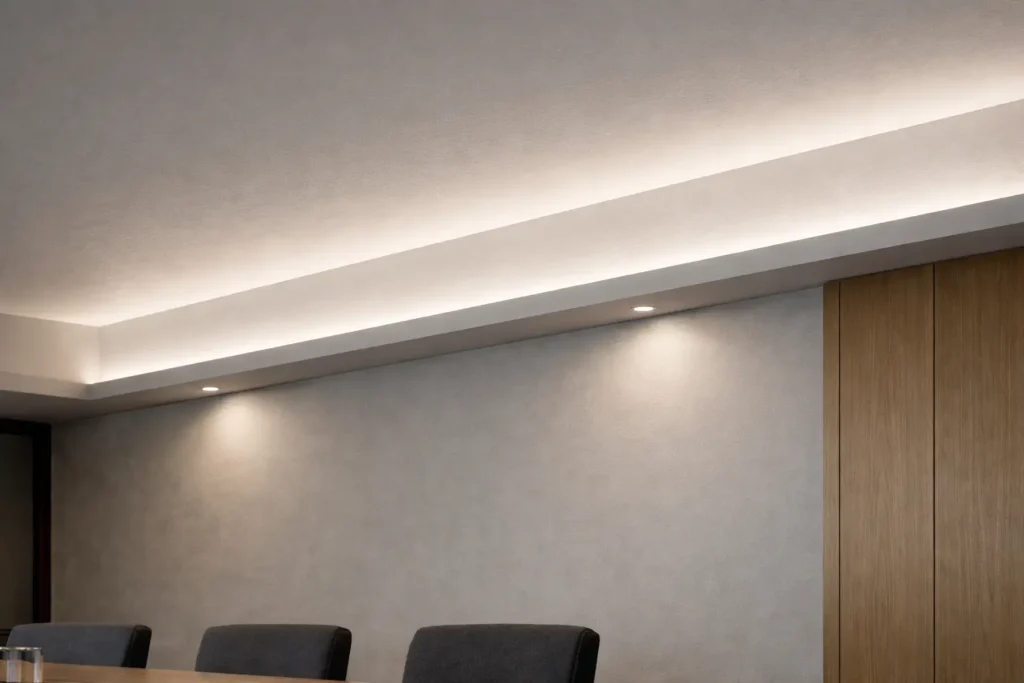
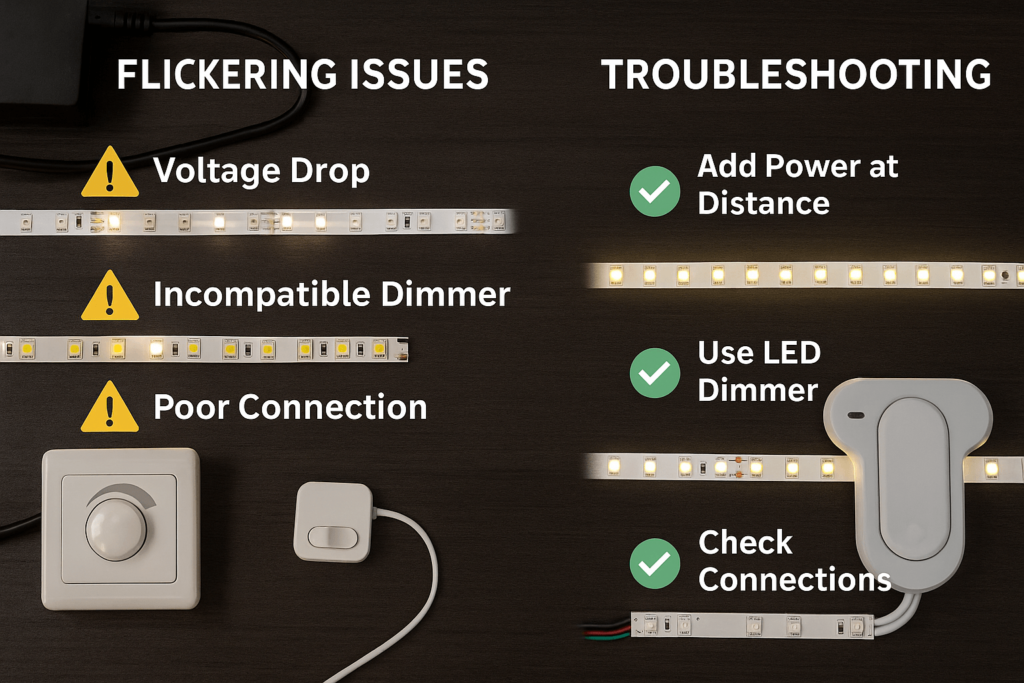
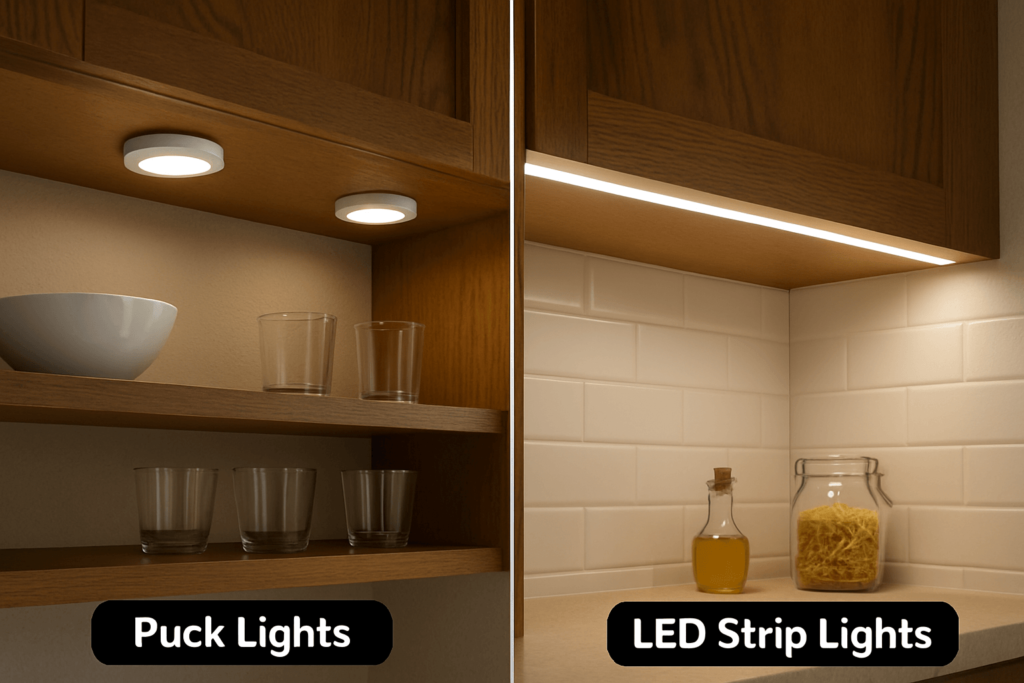
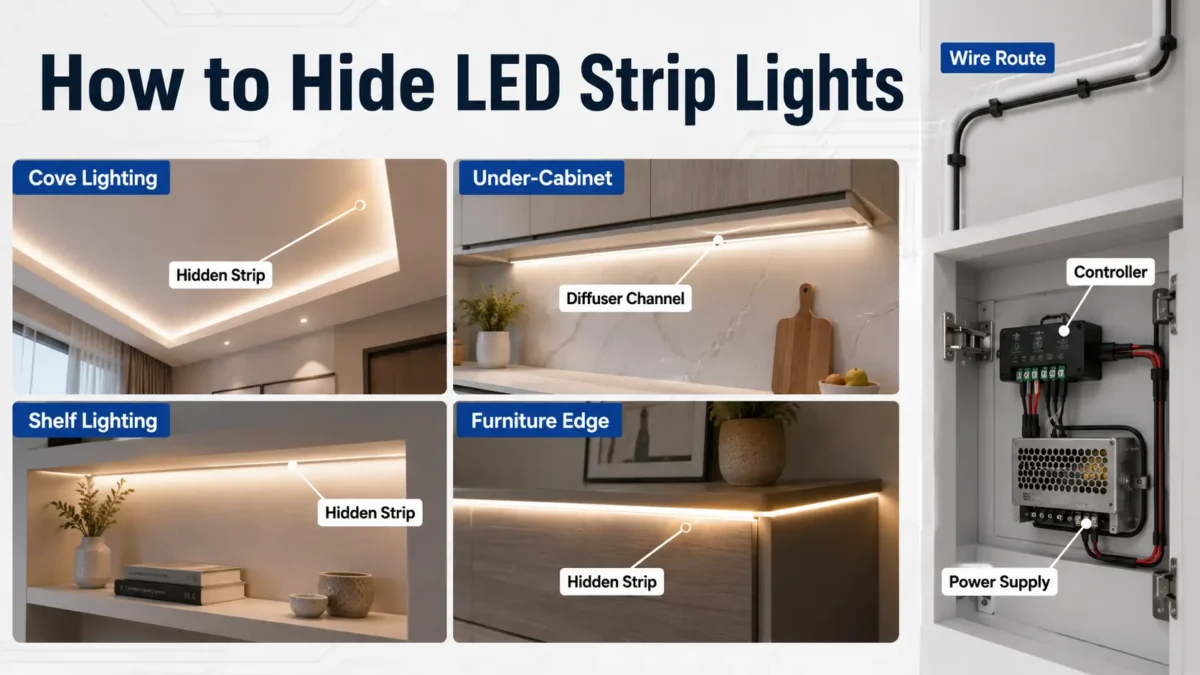
To hide LED strip lights, keep the strip out of direct sight and let the light reflect from a nearby surface. Common methods include ceiling coves, channels with diffusers, recessed shelf lips, under-cabinet profiles, trim, furniture edges, and shadow gaps. Plan the wire route, controller, and power supply location before mounting, and keep power/control parts accessible for inspection or replacement.
LED strip lights can create a clean glow, but only when the strip, wires, connectors, and power parts are planned together. Many poor installations fail for simple reasons:
A cleaner setup usually starts with one question: Where should the light be visible, and where should the hardware stay hidden?
Once that is clear, choose the hiding method by location, viewing angle, wiring path, and future access.
There is no single best way to hide LED strip lights in every project. A ceiling cove, shelf recess, cabinet channel, and stair accent all solve different problems. Use the table below to narrow the choice.
| Location / Goal | Hiding Method | Visual Result | Wiring Note | Caution |
|---|---|---|---|---|
| Ceiling glow | Cove, crown molding, or shadow gap | Soft indirect light on ceiling or wall | Route cable toward a hidden access point | Avoid placing the strip where people can see the LEDs directly |
| Wall accent | Behind trim, panels, mirrors, headboards, or furniture | Backlit glow or wall wash | Plan the cable exit before mounting furniture or panels | Avoid permanent hidden wiring without proper review |
| Under cabinets | Recessed channel, diffuser profile, or cabinet lip | Task light with less visible hardware | Route cable through cabinet edges or rear corners where suitable | Test glare from normal standing or sitting position |
| Shelves / bookcases | Shelf lip, rear recess, side channel, or diffuser | Hidden accent light on objects or back panel | Keep connectors reachable where possible | Avoid blocking future replacement access |
| Stairs | Under stair nosing, side channel, or recessed edge | Low-profile step accent | Plan cable path before fixing strips | Consider durability and maintenance access |
| Furniture edges | Behind TV unit, desk, bed frame, display case, or counter edge | Indirect ambient glow | Hide cable along rear or underside path | Avoid crushed, stretched, or exposed cable routes |
| Visible outline effect | LED neon or diffused profile | Smooth visible light line | Plan connector and power exit points early | Do not assume it replaces every hidden strip layout |
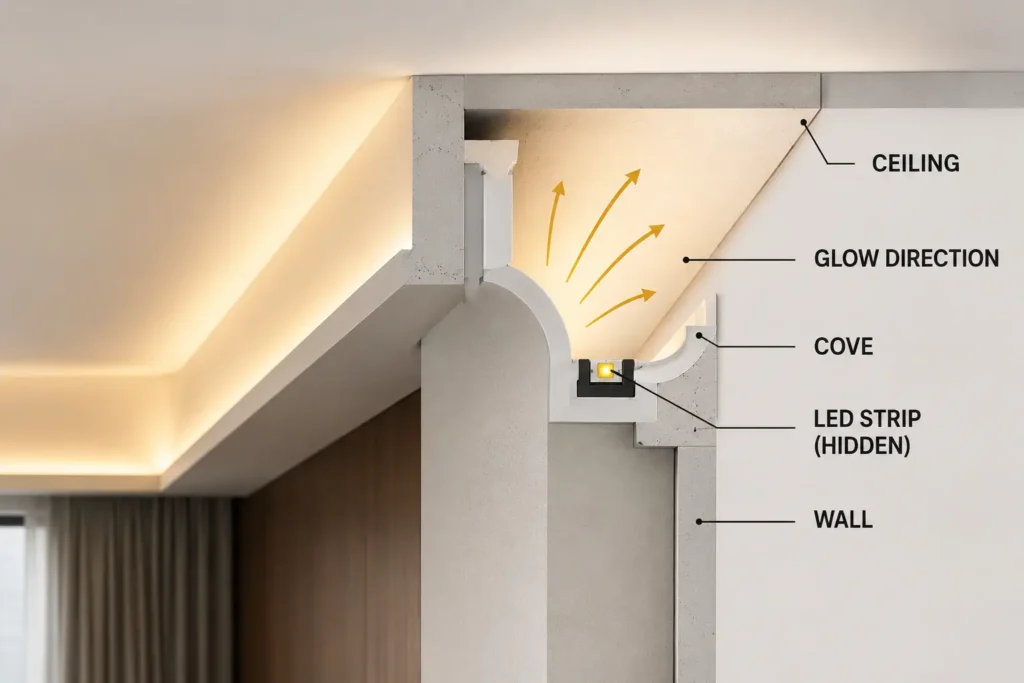
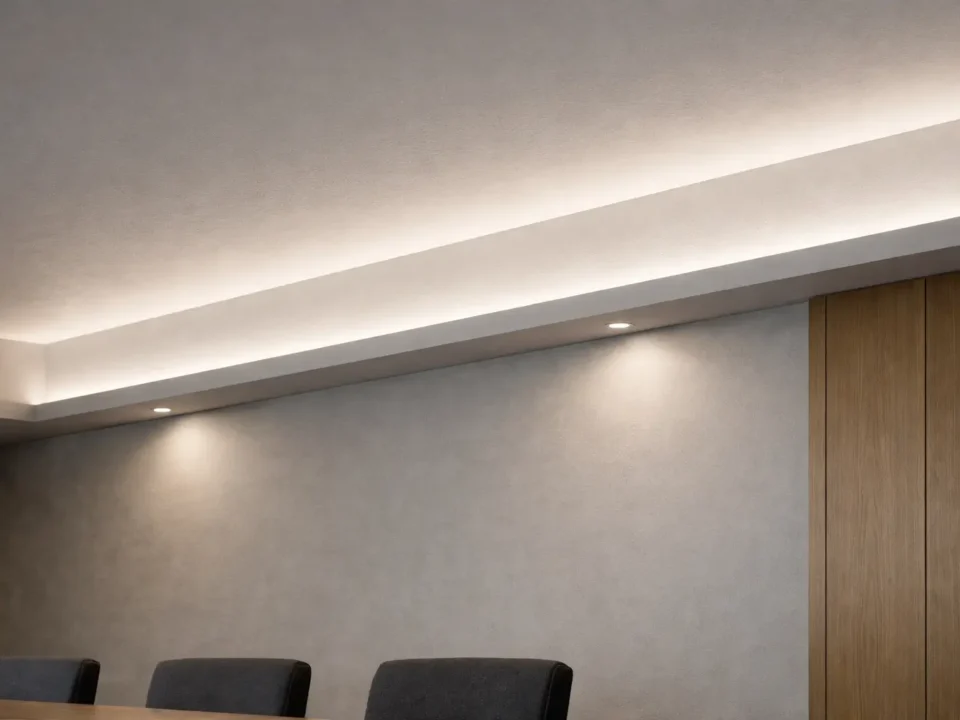
For ceilings, the cleanest effect often comes from indirect light. Instead of pointing the strip into the room, place it inside a cove, crown molding, or shadow gap so the LEDs are hidden and the light bounces across the ceiling or upper wall.
Before mounting, check the view from the normal room position. If you can see the LED points directly from a sofa, bed, desk, or doorway, the strip may need to move deeper into the cove or use a different profile.
Good ceiling hiding options include:
Avoid closing the installation before testing the light at night. A strip that looks hidden in daylight may show glare or visible dots in a darker room.
For walls, the goal is usually to hide the light source behind an object or surface. Common locations include behind a TV, mirror, wall panel, display shelf, bed frame, desk, or cabinet.
A good wall setup keeps three things out of sight:
Furniture can make this easier because the rear edge or underside can hide both the strip and cable. Still, leave enough access to replace parts or adjust the controller later.
Avoid running hidden wiring inside walls or closed structures unless the product instructions, installation conditions, and local requirements have been reviewed by a qualified person.
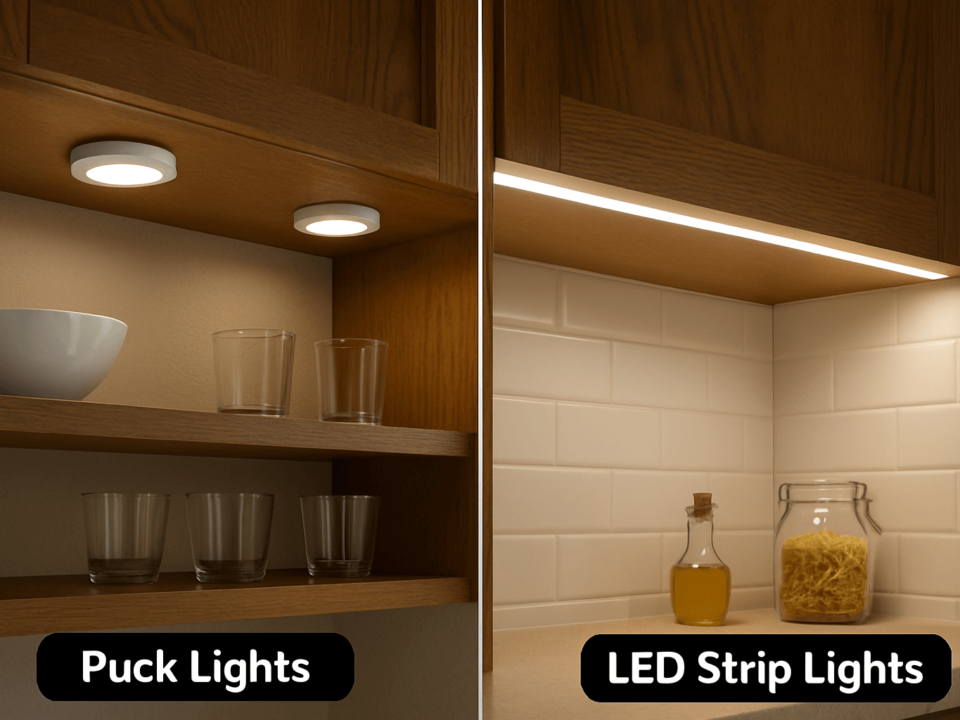
Shelves and cabinets are common places to hide LED strip lights because they naturally have lips, recesses, corners, and underside surfaces.
| Area | Hiding Method | Good For | Planning Note |
|---|---|---|---|
| Under kitchen cabinets | Recessed channel or front cabinet lip | Task light with less visible strip | Check glare from standing height |
| Bookcase shelves | Rear shelf edge or side channel | Backlighting books or display items | Hide cable along side or rear corner |
| Floating shelves | Routed groove or slim profile | Clean accent light | Confirm the cable route before mounting shelf |
| Display cabinets | Inner side channel or rear profile | Product/display lighting | Keep access to connectors and controller |
| Workbench / desk shelf | Under-shelf profile | Practical working light | Test brightness and shadow before final fixing |
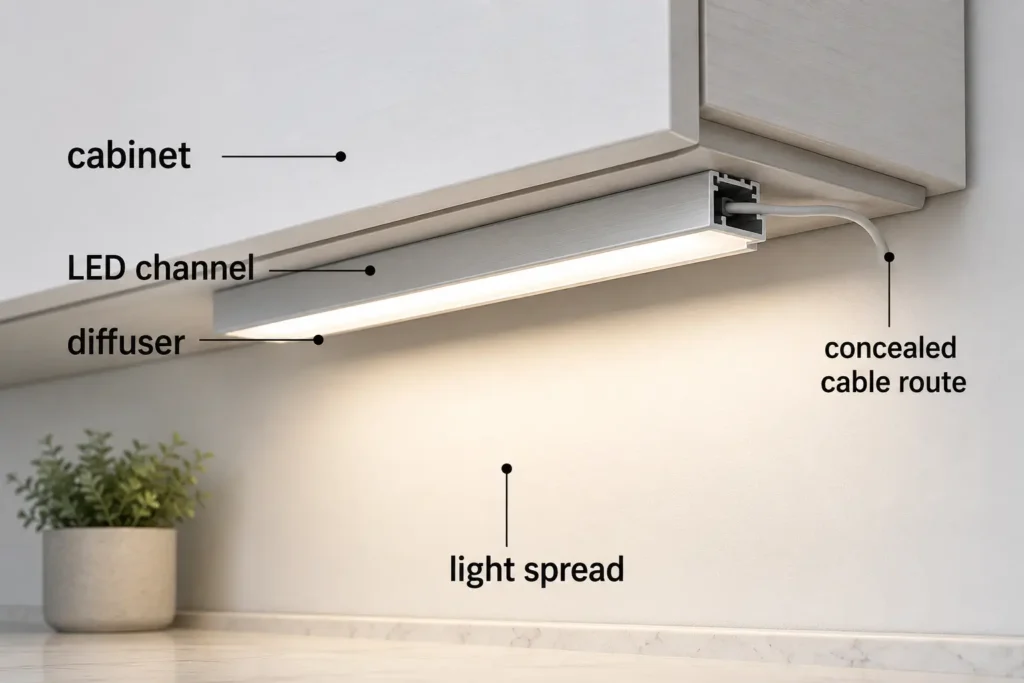
A diffuser or channel can help soften visible LED points, but the result depends on the strip type, diffuser depth, viewing distance, and surface reflection. Do not assume a shallow cover will hide every LED dot in every layout.
For stairs, the strip should be hidden where it is less likely to be touched, kicked, or seen directly. Common positions include under stair nosing, along a side channel, or inside a recessed edge.
The planning priorities are:
For stair or pathway projects, keep the article-level guidance general. If the installation is fixed, enclosed, outdoors, or code-sensitive, follow product instructions and use qualified installation review.
A hidden LED strip installation can still look unfinished if the wires and power supply are exposed. Plan these parts before peeling adhesive backing or closing channels.
| Item to Plan | Why It Matters | Safe Planning Direction |
|---|---|---|
| Cable exit point | A visible cable can ruin the clean look | Choose an exit behind trim, furniture, cabinet edge, or access panel where suitable |
| Connector location | Connectors may need inspection or replacement | Avoid sealing connectors where they cannot be reached |
| Controller position | Controllers may need signal access or adjustment | Keep the controller hidden but reachable; see LED strip controller options when planning control layout |
| Power supply location | Power parts should not be treated as decoration | Place it in a hidden but accessible location that follows product instructions; see LED power supply options for product-category context |
| Test before closing | Problems are easier to fix before final mounting | Test brightness, dimming, color, control, and cable route before closing channels |
| Access after installation | LED systems may need future service | Avoid designs that require damaging furniture or walls for basic access |
| Sensitive locations | Enclosed, wet, outdoor, or permanent installations have extra risk | Use product instructions and qualified review |
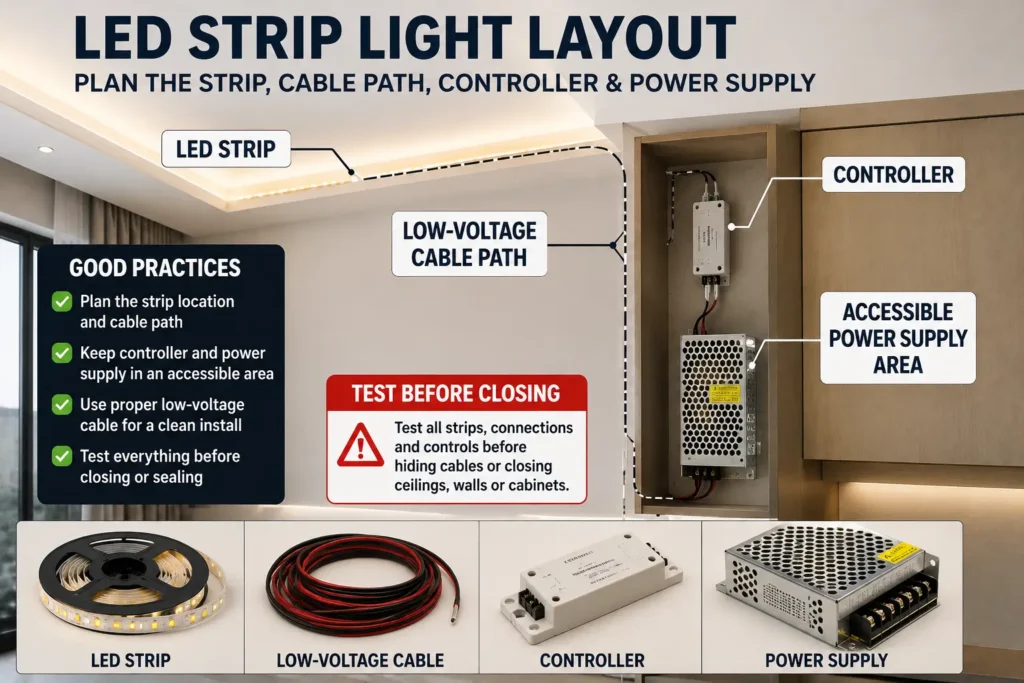
For plug-in installations, some users hide the power supply behind furniture, inside a cabinet, or near a concealed outlet area. For fixed or more complex installations, do not rely on decoration tips alone. Follow the product documentation and local electrical-code requirements.
The product choice affects how easy it is to hide the strip and how clean the light line appears. The right choice depends on whether the strip is fully hidden, partly visible, or used as a visible decorative line.
| Option | When It May Help | Visual Goal | Planning Note |
|---|---|---|---|
| Standard شريط الصمام الثنائي الباعث للضوء | When the strip is fully hidden from view | Indirect glow from a concealed source | Works best when the LEDs are not directly visible |
| شريط COB LED | When the viewer is close or diffusion space is limited | Smoother-looking light line than many standard strip layouts | Final appearance still depends on viewing distance, surface, and diffuser/profile |
| Aluminum channel with diffuser | When the strip may be partly visible or needs a cleaner mounted finish | Softer light line and tidier installation | Diffuser depth and material affect the result |
| Recessed profile | When the strip should sit inside a groove, shelf, or cabinet edge | Lower-profile hidden installation | Plan the groove/channel before mounting |
| LED neon | When the light line itself is meant to be visible | Smooth visible outline or decorative line | Better for visible line effects than trying to hide a bare strip |
| Trim, molding, or furniture edge | When the structure can hide the strip naturally | Indirect ambient glow | Check the viewing angle before final fixing |
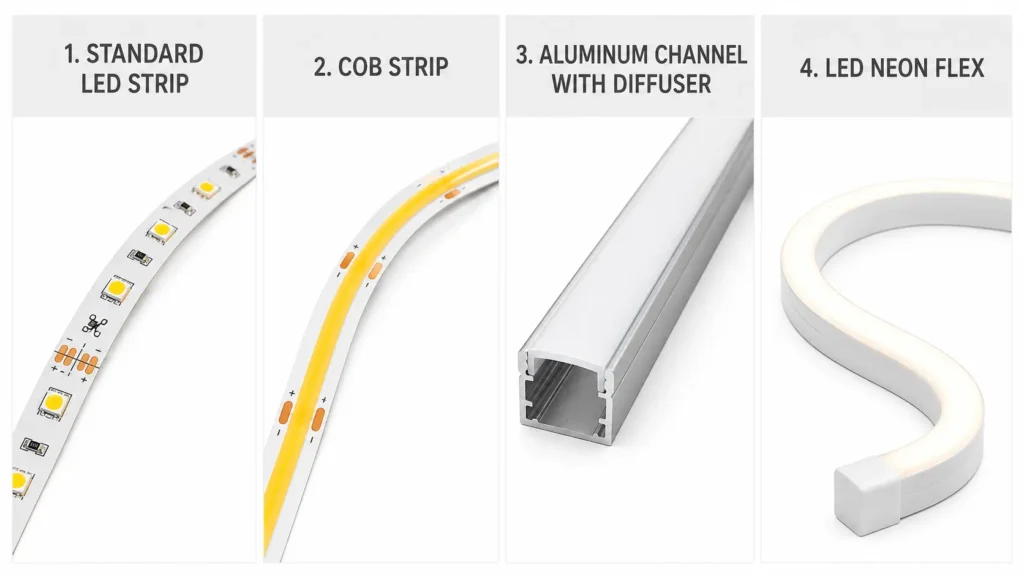
A channel or diffuser can help reduce visible dots, but it is not a universal fix.
For a cleaner project, prepare the key details before choosing strips, profiles, diffusers, controllers, or power supplies.
| Information to Prepare | Why It Helps |
|---|---|
| Installation location | Ceiling, wall, shelf, cabinet, stair, furniture, or display area affects the method |
| Total length | Helps estimate strip length and power planning needs |
| Visible or hidden light goal | Decides whether to use concealed strip, diffuser profile, or LED neon |
| Viewing distance | Helps assess whether LED points may be visible |
| Surface type | Matte, glossy, dark, or reflective surfaces change the light effect |
| Color or CCT preference | Helps match decorative, task, or ambient lighting needs |
| Dimming/control method | Affects controller and wiring layout |
| Indoor/outdoor/environment conditions | Helps identify when extra review is needed |
| Power supply location | Must be planned before mounting or closing channels |
| Drawings or photos | Helps suppliers or installers understand the layout |
| Quantity/project scale | Helps separate a small DIY setup from a project quotation |
This information is useful whether the project is a cabinet upgrade, home cove light, retail display, furniture accent, hospitality project, or custom lighting layout.
Hide LED strip lights by placing the strip behind a surface, inside a channel, under a lip, behind trim, in a cove, or along a furniture edge so the LEDs are not directly visible. Aim the light toward a nearby surface to create an indirect glow.
Plan the wire route before mounting the strip. Wires can often be routed along cabinet edges, furniture backs, trim, raceways, channels, or access panels. Keep connectors and power/control components reachable where possible, and avoid permanent hidden wiring unless installation requirements have been reviewed.
Place the power supply in a hidden but accessible location, such as behind furniture or inside a cabinet area where suitable. Do not seal it permanently behind walls, panels, or closed cavities without checking product instructions and installation requirements. For fixed or code-sensitive work, use qualified review.
Use a cabinet lip, recessed groove, slim channel, or diffuser profile to keep the strip out of direct view. Plan the cable exit along the rear or side edge where possible, and test the light from normal viewing positions before final mounting.
Not always. If the strip is fully hidden and only the reflected glow is visible, a diffuser may not be necessary. If the strip is partly visible, close to the viewer, or installed under cabinets or shelves, a channel or diffuser can help soften the light, depending on depth, strip type, and viewing distance.
Do not treat in-wall, enclosed, wet-location, outdoor, or permanent installations as simple decoration projects. Follow the product instructions and local requirements, and use a qualified installer or electrician when the installation affects fixed wiring, enclosed spaces, or code-sensitive areas.
Planning a hidden LED strip project? Share the installation location, total length, visible or hidden light goal, preferred color or CCT, control method, environment, quantity, and any drawings or photos.
ElstarLED can help review strip type, diffuser/profile options, power supply, controller, and accessory choices for your project. For fixed, enclosed, wet-location, or code-sensitive installations, confirm the installation requirements with a qualified professional before final mounting.
Contact ElstarLED with your project details.

 English
  Spanish
  French
  Arabic