Interior stair lighting is not only a design choice. It also affects how people see each step, how the stairs fit the room, and how easily the lights can be added or fixed later.
Therefore, the right idea depends on the stair shape, the lighting effect you want, and the project stage. For example, a new-build stair area gives more room for wiring and recessed channels. However, a finished stair area may need a simpler surface-mounted or side-mounted approach.
So, for project buyers, contractors, designers, and distributors, the goal is not to pick the most attractive photo. Instead, the goal is to match the lighting idea to the stair type, wire path, driver location, control type, and quote details.
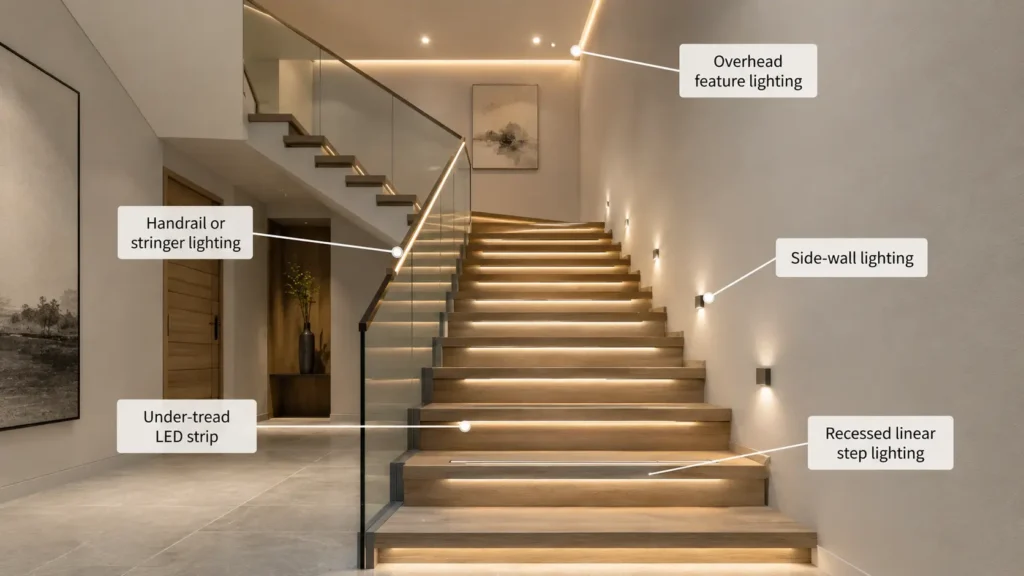
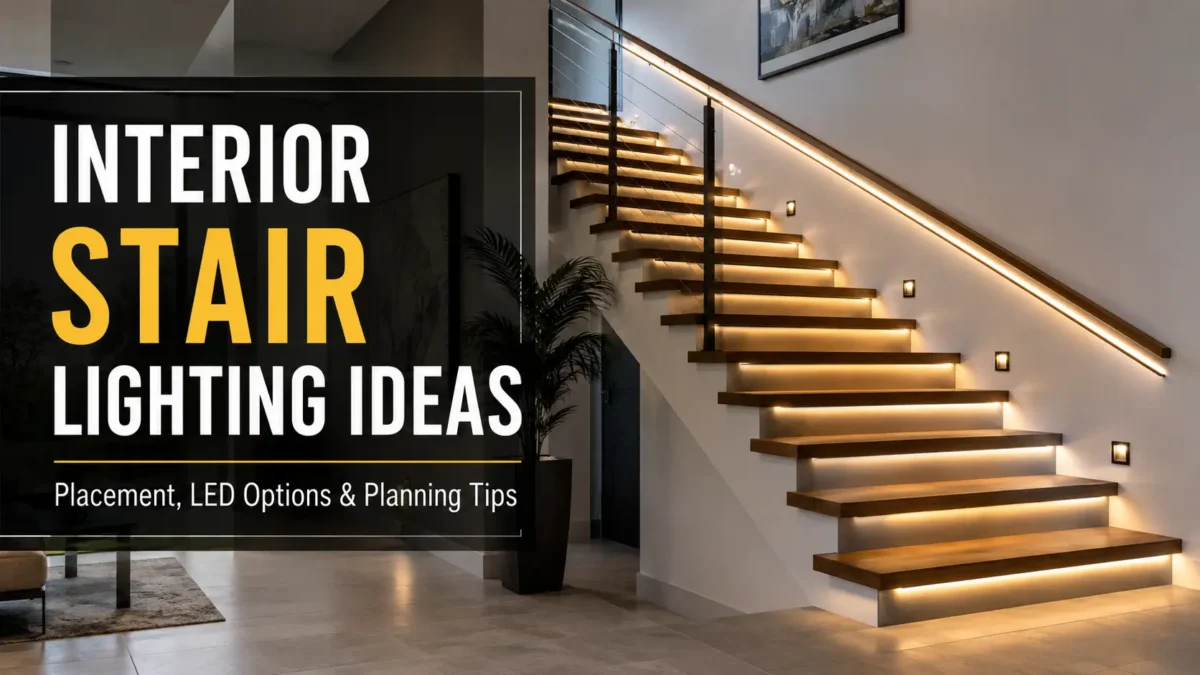
In short, the best interior stair lighting idea depends on where the light is placed and how the stairs are built. Common options include under-tread LED strips, recessed step lights, side-wall lighting, handrail or stringer lighting, pendant lighting, and motion-triggered guide lighting. Before choosing, check glare, visible LED dots, wire access, driver location, control type, and whether the project is retrofit or new-build.
First, start with placement. After all, placement affects the final look, install difficulty, glare risk, and service access. For LED-strip-specific staircase planning, Elstar also has a dedicated LED strip staircase lighting guide; this article keeps the broader interior stair-lighting angle.
| Lighting idea | Look | Best-fit project condition | Planning notes |
|---|---|---|---|
| Under-tread or under-nosing LED strips | Floating step effect, soft downward glow | New-build stairs or stairs with enough mounting space | Check strip concealment, profile depth, diffuser, wiring route, and driver access. |
| Side-wall or stringer lighting | Continuous guide line along the staircase | Modern interiors, open staircases, or projects with side access | Good for a clean linear effect, but glare and visible dots need planning. |
| Recessed step lights | Defined pools of light on each step or wall side | Projects where wall or riser recessing is possible | Requires careful layout, spacing, and service planning. |
| Handrail lighting | Light follows the user’s hand path and stair direction | Premium residential, hospitality, or commercial interior concepts | Check cable routing inside or near the rail and how the light exits the profile. |
| LED neon-style line lighting | Smooth visible line, style edge, or feature strip | Projects where the light source is meant to be seen | Useful when a continuous visible line is part of the design, not hidden detail lighting. |
| Pendant or overhead feature lighting | Style focal point above the staircase | Stairwells with enough height and ceiling structure | Works as ambient or style lighting, but may not provide direct step guidance by itself. |
| Motion-triggered stair lighting | Light activates when movement is detected | Residential, hospitality, and low-traffic interior stair areas | Sensor placement and scene behavior should be tested to reduce false triggers or missed turn-on. |
Also, finished stairs often limit where lights can be added. In contrast, new stairs can be planned around channels, profiles, drivers, and control wiring from the start.
Next, each stair lighting idea should support a clear design goal. If the goal is step visibility, the lighting method may be different from a style feature line.
| Design goal | Lighting method to consider | Why it fits | What to confirm |
|---|---|---|---|
| Soft step guidance | Under-tread LED strip or recessed step light | Helps mark the stair path without making the staircase feel too bright | Viewing angle, glare, mounting depth, and wiring route |
| Floating staircase effect | Concealed LED strip under each tread | Creates a light line below the step edge | Space for strip/profile, diffuser, and driver access |
| Clean built-in line | Side-wall strip, stringer strip, or LED neon-style line | Creates a continuous linear detail | Whether the line is hidden, semi-hidden, or visible |
| Low-glare finish | Recessed profile with diffuser or indirect placement | Reduces direct view of the light source | Profile depth, diffuser type, LED density, and brightness setting |
| Style stairwell feature | Pendant, wall light, or visible linear feature | Adds visual interest beyond functional guide lighting | Ceiling height, wall finish, and whether step visibility still needs separate lighting |
| Easy retrofit | Surface-mounted profile, side-wall light, or selected step-light locations | May reduce invasive construction compared with full recessing | Power access, cable route, mounting surface, and installer assessment |
Also, brightness and color tone should match the intended use and the surrounding room. For example, a warm tone may suit homes or hospitality spaces. However, a clearer neutral tone may fit some business interiors. Exact selection should depend on the project mood, surface color, and how much other lighting is already present. The U.S. Department of Energy also advises checking brightness and color for the intended use and location when selecting LED products; see its LED lighting guidance.
Next, indoor stair lighting often comes down to product type. Step lights, LED strips, and LED neon-style products can all work, but they create different results. Elstar describes مصابيح شريطية LED as flexible light sources commonly used for accent, task, and style lighting, while its LED strip vs LED neon guide separates hidden/detail lighting from visible smooth-line effects.
| Option | Typical final look | When to consider it | Planning boundary |
|---|---|---|---|
| Recessed step lights | Separate points or small washes of light | When each step or wall section needs a defined light point | Requires position planning and may need wall/riser preparation. |
| شرائط LED with aluminum profile and diffuser | Linear hidden or semi-hidden light | When the design needs under-tread, side, or edge lighting | The final look depends on strip type, diffuser, profile depth, viewing angle, and install. |
| LED neon-style lighting | Smooth visible line | When the light line is part of the design and should be seen | Check bend direction, mounting method, power feed, and whether the line fits the stair geometry. |
| Pendant or wall lights | Style ambient light | When the staircase needs a design feature, not only step guidance | May need to be combined with step-level lighting if direct stair visibility is required. |
| Motion-control accessories | Automatic turn-on | When hands-free operation or night guidance is desired | Sensor placement, detection range, and false-trigger behavior should be planned. |
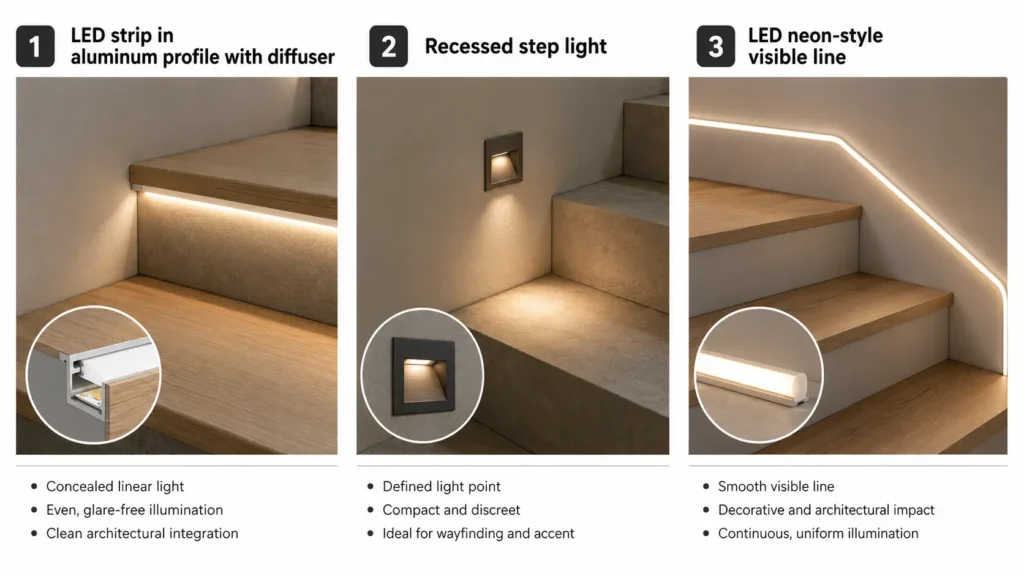
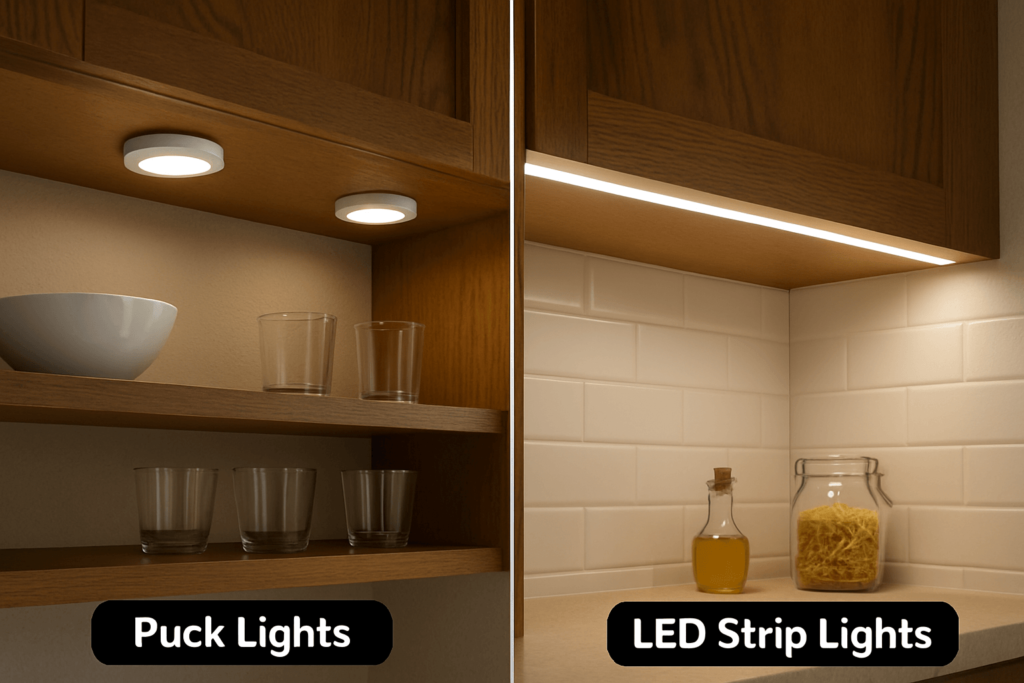
For example, LED strips are often useful for hidden accent and detail lighting. In contrast, LED neon-style lighting is more useful when the glowing line is meant to be seen. Recessed step lights can look more built-in, but they may need more wall or stair prep.
However, no single option is better for every set of stairs. The better choice depends on whether the project needs hidden light, a visible line, easier retrofit, low glare, or a more style-led finish.
Meanwhile, retrofit and new-build projects should not be planned the same way.
In a new-build project, the lighting layout can be planned with the stair structure, wall finish, cable route, and driver location. By contrast, retrofit work starts with existing limits: where power can be reached, where cables can be hidden, and how much surface change is acceptable.
| Planning item | Retrofit staircase | New-build staircase | What to confirm |
|---|---|---|---|
| Wiring route | Often limited by finished walls, treads, and surfaces | Can be planned before finishes are closed | Cable path, access points, and installer method |
| Profile or channel | May need surface-mounted or minimally invasive options | Recessed channels may be easier to coordinate | Mounting depth, diffuser clearance, and finish detail |
| Driver location | Must fit available serviceable space | Can be planned into cabinet, ceiling, wall, or service zone | Ventilation, access, cable length, and maintenance access |
| Control method | May use existing switches, added dimmers, or sensors depending on wiring | Can be coordinated with control system early | Switch position, dimming needs, sensor location, and scene behavior |
| Finish quality | Existing surfaces may limit concealment | Cleaner integration is usually easier when planned early | Visible wires, glare, dots, and service access |
| Project risk | Hidden conditions may affect fit | Fewer surprises if coordinated with drawings | Photos, drawings, site conditions, and installer review |
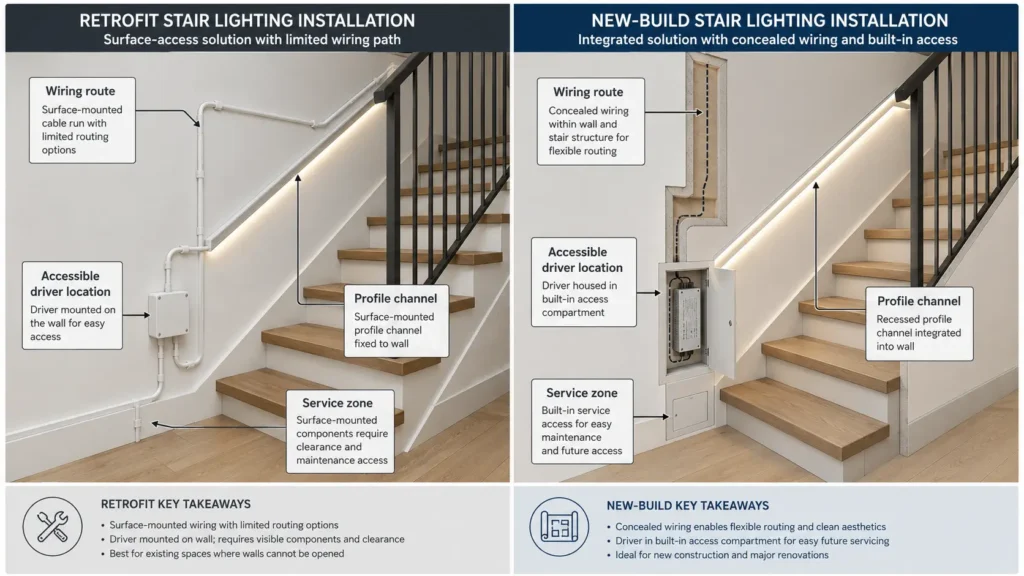
Therefore, retrofit stair lighting may be possible, but fit depends on power access, wire route, mounting surface, and installer review. For finished stairs, it is safer to confirm the install path before choosing a product style.
However, many stair lighting problems appear after the lights are added, not during product choice. Common issues include direct glare, visible LED dots, exposed wires, uneven brightness, and drivers that are hard to reach.
Therefore, use this checklist before approving the layout:
In addition, profiles, diffusers, strip type, and placement can help reduce visible dots or glare. However, they do not promise a perfect result by themselves. The final effect also depends on mounting depth, surface shine, viewing angle, dimming setting, and install quality.
Also, controls affect how the stair lighting feels in daily use.
For example, a simple switch may be enough for style lighting used with the main room lights. Dimming is useful when the stair lights need to work both as an accent feature and a low-level night guide.
However, motion sensors need planning. They can be useful when users want the lights to turn on without touching a switch. Poor sensor placement can cause false triggers, slow turn-on, or missed movement. Also, pets, nearby doors, and foot traffic around the stairs can affect sensor behavior.
For this reason, confirm these control details:
Also, for mains-side wiring or control setup, the project team should check local electrical rules and qualified install needs.
Finally, a good RFQ is more useful than a short message saying “I need stair lights.” Stair lighting depends on size details, placement, wiring, and control needs.
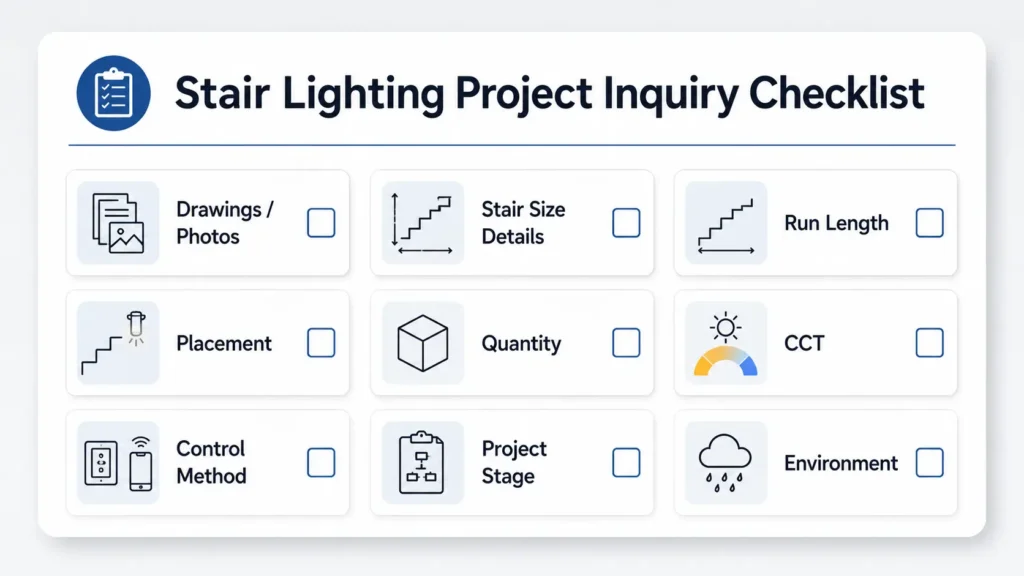
Therefore, prepare these details before asking for a quote or product review:
| RFQ item | What to provide | Why it matters |
|---|---|---|
| Stair type | Straight, L-shaped, U-shaped, spiral, open-riser, closed-riser | Affects layout and wiring route |
| Drawings or photos | Stair drawings, site photos, section details if available | Helps review placement and install constraints |
| Size details | Step count, tread width, riser height, total run length | Needed for strip length, profile planning, and quantity estimate |
| Chosen placement | Under tread, side wall, stringer, handrail, recessed step, or visible line | Determines product direction |
| Project stage | New-build, renovation, or finished staircase retrofit | Affects fit and mounting options |
| Lighting effect | Soft guide light, floating effect, feature line, low-glare path, style accent | Helps match product type and control method |
| Color preference | Warm white, neutral white, or project-specific CCT preference | Affects visual mood and compatibility with interior finishes |
| Control method | Switch, dimming, motion sensor, smart control, or project control system | Affects driver/controller selection |
| Quantity and project type | One staircase, multiple staircases, residential, hospitality, commercial, or distributor project | Helps route the inquiry |
| Environment | Indoor dry area or other conditions that need review | Helps avoid unsuitable assumptions |
| Documents needed | Datasheet, drawings, test documents, or other requested files | Must be confirmed based on available documents |
Also, do not rely on a product photo alone. A stair lighting quote is easier to review when the supplier can see the stair shape, mounting area, desired effect, and control type.
Also, ask for custom review when the stairs have an unusual shape, a clear visible-line effect, tight mounting space, special length needs, or a project control need.
In addition, custom review may help when the project needs a set strip width, LED density, profile detail, connector position, or sample check before larger orders.
For Elstar project inquiries, prepare drawings, photos, size details, chosen lighting placement, rough run length, quantity, color tone preference, voltage or control needs, and project stage. Elstar describes custom LED strip project options and a شريط إضاءة LED مخصص service, but project fit should be reviewed against the actual specifications before quoting or production planning.
In most cases, the best lighting for indoor stairs depends on the stair structure, desired effect, and project stage. For example, under-tread LED strips suit hidden line effects. Recessed step lights suit defined guide points. Side-wall, handrail, or LED neon-style lighting can create stronger design lines. For finished stairs, however, confirm wiring and mounting limits first.
LED strip lights are commonly placed under the tread or nosing, along the side wall, inside a stringer detail, under a handrail, or inside a recessed profile. However, the right placement depends on whether the light should be hidden, visible, low-glare, or style-led.
Step lights and LED strips solve different problems. For example, step lights create defined light points and can look built-in when recessed well. Meanwhile, LED strips create a continuous line and are often used for hidden accent or edge lighting. The better choice depends on the desired look, site condition, service access, and control type.
It may be possible. However, it depends on power access, wire route, mounting surface, and how much visible install work is acceptable. A finished stair area may need surface-mounted profiles, side-wall lighting, or selected step-light locations instead of fully hidden channels.
Use a suitable profile and diffuser, check the viewing angle, avoid placing bright LEDs in direct sightlines, and consider strip types made for smoother light when the line will be visible. As a result, these choices can help reduce dots and glare, but the final result depends on product choice and install quality.
Motion sensors can be useful for stair lighting, especially for night guidance or hands-free use. However, they should be planned carefully. Sensor position, detection direction, pets, nearby doors, and traffic patterns can affect how well the lights turn on.
Prepare stair drawings or photos, step count, size details, chosen placement, rough run length, quantity, project stage, color tone preference, voltage or control needs, and any document requests. For custom projects, also include target effect and mounting limits.
Do not treat any lighting product as safe on its own for every stair project. Instead, safety depends on product choice, power supply, wiring, install quality, driver placement, heat control, and local electrical rules. For mains-side work or complex controls, use qualified install support where required.
For a stair lighting project, send the available drawings or photos, stair size details, chosen lighting placement, rough run length, quantity, color tone preference, voltage or control needs, and whether the project is new-build or retrofit.
These details help narrow the selection direction before discussing LED strips, profiles, accessories, control options, or custom needs. Contact Elstar with the project details when you are ready for review. Avoid assuming that one product type will fit every staircase until the project conditions are reviewed.

 English
  Spanish
  French
  Arabic