What Are LED Strip Lights?

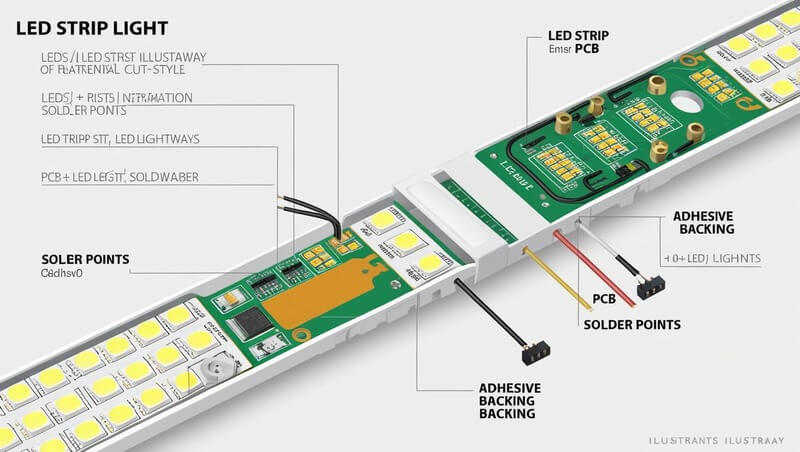
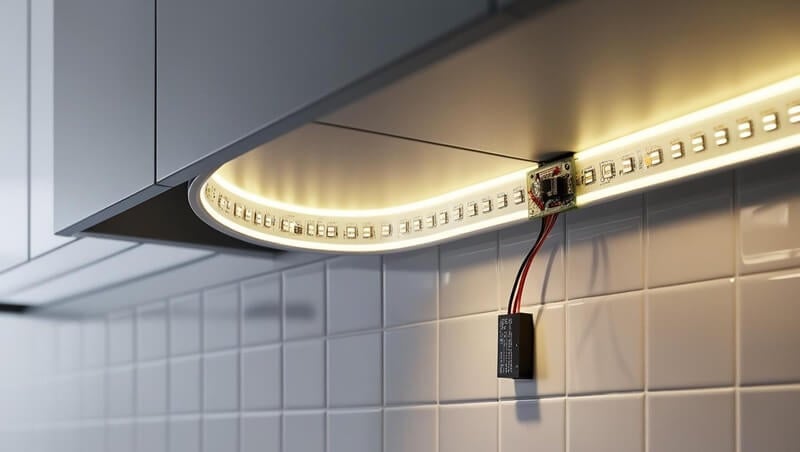
مصابيح شريطية LED consist of a narrow, flexible circuit board (PCB) populated with surface-mount LEDs, resistors, and often an adhesive backing for easy installation. Unlike traditional bulbs, these strips can bend around corners and adhere to almost any surface, making them ideal for accent, task, and decorative lighting.
Key components include:
- PCB substrate: Usually made of copper-clad fiberglass, it supports and conducts power to the LEDs.
- Surface-mount LEDs (SMD or COB): SMD designs use discrete diodes for brightness and efficiency; COB arrays pack LEDs directly onto the board for a uniform glow.
- المقاومات: Placed in series to limit current and prevent LED burnout.
- Adhesive backing: A peel-and-stick layer (often 3M) that secures strips under cabinets, shelves, or architectural features.
- Protective coating (optional): Silicone or epoxy encapsulation for moisture and dust resistance (IP20–IP68 ratings).
LED strip lights operate on low-voltage DC (12 V or 24 V). A driver (power supply) converts AC mains power to the required DC voltage, and resistors ensure each LED receives the correct current. This modular design allows you to cut strips at marked intervals—typically every 2–5 cm—and rejoin sections with solder or clip connectors for custom lengths.
For more on voltage considerations and power calculations, see our Voltage-Drop Calculator.
How Do LED Strip Lights Work?
LED strip lights run on low-voltage direct current (DC), typically 12 V or 24 V, delivered by a dedicated power supply. Inside each strip, LEDs are arranged in series–parallel circuits so that groups of diodes share voltage evenly without one section drawing too much current.
A basic strip segment contains:
- LED group – Usually sets of three SMD diodes wired in series.
- Current-limiting resistor – Placed in series with each LED group to keep the current at a safe level (e.g., 20 mA per diode).
- Copper traces on the PCB – Conduct power across the strip; wider traces reduce voltage drop.
When the driver outputs, say, 12 V DC, each LED group (3 × 3 V diodes) plus its resistor uses nearly the full voltage. Excess voltage is dropped across the resistor as heat, so choosing the correct resistor value is crucial for both brightness and longevity.
Many strips also incorporate parallel rails: multiple series-resistor strings connect in parallel across the same supply. This design means if one group fails, the rest continue to light—improving reliability.
Key points:
- Voltage driver selection ensures stable DC output. Undersized or fluctuating supplies cause uneven brightness and early LED failure.
- Resistor sizing balances brightness with heat generation. Lower resistance gives more current and brighter light—but higher junction temperature.
- Voltage drop over long runs can dim LEDs at the far end. For runs over 3 m, consider power injection or follow our Voltage-Drop Calculator to size your wiring and driver correctly.
By understanding this simple circuit layout—series diodes, resistors, and parallel rails—you can confidently cut, splice, or extend any strip light without guesswork.
Types of Strip Lights: SMD, COB, Neon & Rope
LED strip lights come in several form factors, each optimized for different applications. Understanding their construction and performance differences helps you choose the right type for your project:
- SMD (Surface-Mount Device) Strips
SMD strips mount individual LEDs—commonly 2835, 3528, or 5050 packages—onto the PCB. They’re highly efficient and offer excellent brightness per metre, making them a go-to for under-cabinet and task lighting. However, you may notice tiny hot spots where each diode sits.
- COB (Chip-On-Board) Strips
COB strips fuse many LED chips directly onto the board without distinct lenses, creating a continuous line of light. This uniform glow eliminates the dot-matrix effect of SMD. COB tends to run cooler and offers superior colour rendering, though it usually carries a premium price tag.
- Neon-Style Silicone Tubes
These combine flexible PCBs with a frosted silicone jacket, giving the appearance of traditional glass neon at a fraction of the weight and energy use. They’re a popular choice for signage, outdoor accents, and any installation that requires a soft, diffuse light. The bulkier profile means they’re less discreet than bare PCB strips.
- Rope Lights (LED & Incandescent)
Although technically a different product, rope lights remain a close cousin. Classic rope lights use incandescent filaments inside a PVC tube; modern LED rope lights swap in SMD or mini LEDs. Rope lights are easy to install—just plug into mains—yet they consume more power and offer lower lumen output than low-voltage LED strips.
Each type has its sweet spot:
- SMD strips excel where high brightness and efficiency are paramount.
- COB strips shine in decorative or high-CRI applications where a smooth beam is critical.
- Silicone-encased neon strips are ideal for weather-resistant signage and soft ambient glows.
- Rope lights work for quick, plug-and-play installations but sacrifice efficiency.
If you’re not sure which variety fits your needs, see our Beginner’s Buyer Guide for LED Strip Lights for detailed model recommendations and installation tips.
| النوع |
الإيجابيات |
السلبيات |
| SMD |
High lumen output; cost-effective |
Noticeable hotspots between LEDs |
| كوب |
Uniform light; excellent colour fidelity |
Higher price point |
| Neon |
Soft, diffuse glow; waterproof options |
Thicker profile; less discreet |
| Rope |
Simple plug-in setup; flexible tubing |
Lower efficiency; bulkier cable |
Rope Light vs Strip Light: Key Differences
While rope lights and LED strip lights both offer flexible linear illumination, they differ significantly in performance, installation, and efficiency. Here’s how to choose the right option:
Brightness & Efficiency
- Rope Light: Uses miniature incandescent or LED bulbs inside a PVC tube; brightness ranges from low to medium, with higher power consumption.
- LED Strip Light: Packs high-efficiency SMD or COB LEDs on a low-voltage PCB; delivers medium to high lumen output with far lower wattage.
Flexibility & Profile
- Rope Light: Tubular PVC housing limits tight bends; best for gentle curves around railings or décor accents.
- LED Strip Light: Ultra-thin PCB can wrap around corners and adhere to narrow channels or recesses for seamless installations.
Power & Control
- Rope Light: Plugs directly into 120 VAC outlets; little control over dimming or color options unless paired with specialized controllers.
- LED Strip Light: Requires a 12 V or 24 V DC driver and offers precise dimming, color-changing, and programmable effects via controllers.
Waterproofing & Durability
- Rope Light: PVC jacket provides basic moisture resistance but can yellow over time under UV exposure.
- LED Strip Light: Available in IP20–IP68 ratings with silicone or epoxy coatings, offering tailored protection for indoor or outdoor use.
🧾 T2 — Rope Light vs. LED Strip Light
| Feature |
ضوء الحبل |
مصباح شريطي LED |
| السطوع |
Low–Medium (incandescent or LED) |
Medium–High (SMD/COB) |
| المرونة |
Limited curves only |
Tight bends & curves allowed |
| مزود الطاقة |
120 VAC plug-in |
12 V/24 V DC driver required |
| Waterproof Rating |
PVC jacket (UV concerns) |
IP20–IP68 options |
| Control Options |
On/off, minimal dimming |
Full dimming, RGB, effects |
Understanding these differences ensures you pick the lighting solution that aligns with your project’s brightness requirements, design constraints, and control preferences.
Common Uses for LED Strip Lights
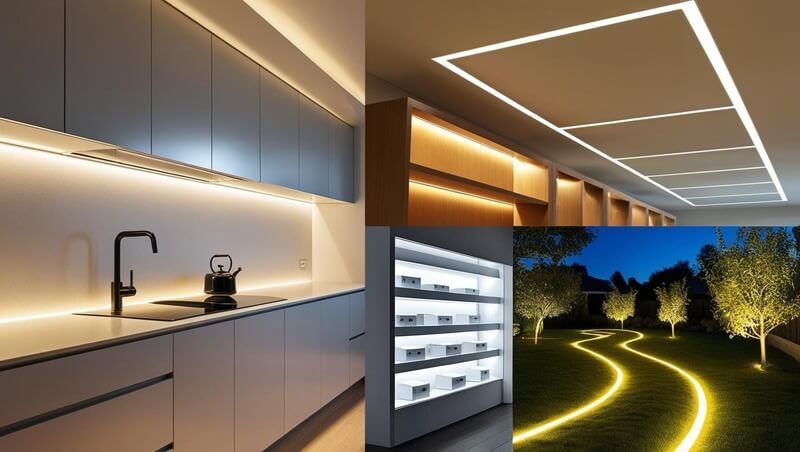
LED strip lights are incredibly versatile, adapting to both functional and decorative roles across residential, commercial, and industrial settings. I’ve found that the same tape you mount under kitchen cabinets can illuminate wardrobes, backlight signage, or highlight architectural details with minimal fuss. Their low profile and customizable lengths make them perfect for transforming spaces without bulky fixtures.
Popular Applications:
- Under-cabinet & Task Lighting: Provide bright, even illumination for kitchen counters, workbenches, and closets without glare or shadows.
- Cove & Accent Lighting: Install behind crown moulding or recessed coves to create soft, indirect ambient glows that enhance room mood.
- Backlighting & Signage: Use high-CRI strips to illuminate signs, display cases, or art installations with vibrant, consistent color.
- Automotive & Marine: Line dashboard edges, cup holders, or footwells in cars and boats—IP65+ options resist moisture and vibration.
- Retail & Hospitality: Highlight product shelves, bar counters, and stair risers; programmable RGB strips add dynamic color scenes for events.
- Outdoor & Landscape: Waterproof strips accent patios, decks, fences, and garden paths, creating dramatic effects in hard-to-reach areas.
- Horticultural Lighting: Certain full-spectrum strips support seedlings and vertical farms, offering a slim, energy-efficient grow solution.
Many installers complement these uses with internal guides or tutorials—if you’re new, check our LED Strip Lights product hub for model recommendations and layout tips tailored to each application.
Whether you’re illuminating a kitchen backsplash or adding flair to an event space, LED strips deliver consistent, low-heat light exactly where you need it. In the next section, I’ll walk you through the step-by-step process of cutting and connecting strips so you can tackle any custom installation with confidence.
How to Cut and Connect LED Strip Lights
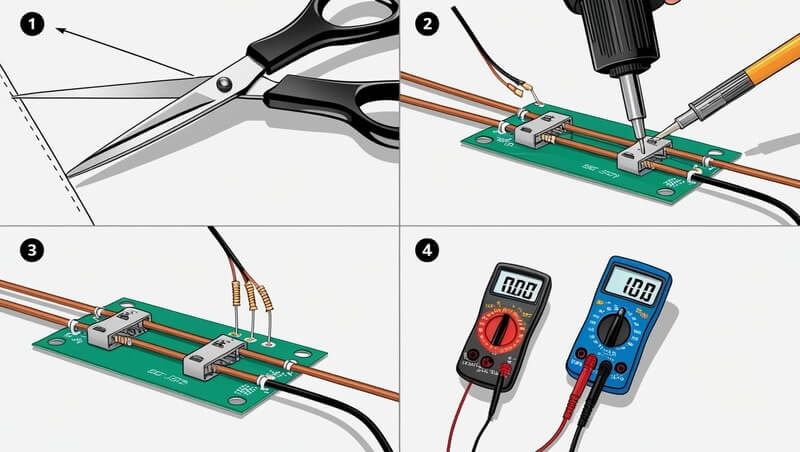
Customizing LED strip lengths is simple once you know the cut marks and connection options. I’ve trimmed and joined dozens of reels without issue—just follow these steps and always test before sealing your work.
- Identify the Cut Marks
LED strips have copper pads marked with a dashed line or scissors icon every 2–5 cm. Only cut at these points to ensure each segment contains the correct number of LEDs and resistors.
- Make a Clean Cut
Use sharp scissors or a hobby knife to cut precisely on the marked line. Avoid crushing the PCB—apply gentle, steady pressure to preserve the copper pads.
- Choose Your Connection Method
- Soldered Joints: For a permanent, low-profile link, tin the copper pads with solder, hold stripped wires or another strip segment in place, and heat briefly with a soldering iron.
- Clip-In Connectors: No soldering required. Slide the strip into the connector’s slot, ensuring the pads align with the metal contacts, and snap closed. These are perfect for quick prototypes or renters.
- Test Continuity
Before sealing or mounting, power the strip with your driver and confirm every LED segment lights. A quick continuity check with a multimeter can prevent troubleshooting later.
- Seal and Secure
If your installation is exposed to dust or moisture, add a bead of silicone or use end-caps. Mount clips or an aluminium profile channel to keep strips flat and protected.
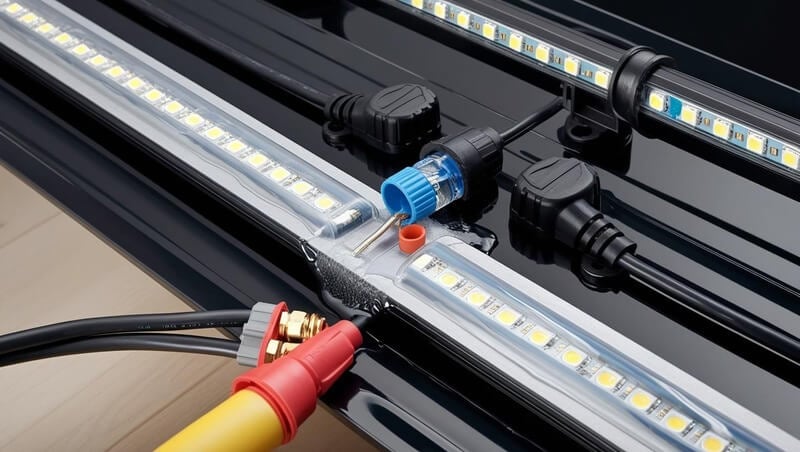
How to Waterproof LED Strip Lights
Select IP65+ rated strips and apply neutral-cure silicone to cut ends or use waterproof end-caps. For additional protection and heat dissipation, install strips inside an aluminium profile channel.
الأسئلة الشائعة
What are strip lights used for?
Strip lights serve accent, task, and decorative roles—from under-cabinet and cove lighting to signage and automotive accents.
Do strip lights need to be plugged in?
No. They require a low-voltage DC driver (12 V or 24 V) that you mount out of sight and wire to the strip.
Are LED strip lights more efficient than rope lights?
Yes—modern LED strip lights convert over 90 % of energy into light, while rope lights waste more energy as heat.
Can I cut strip lights anywhere?
Only at designated cut marks to preserve circuit integrity; cutting elsewhere breaks the circuit.
Is waterproofing necessary for outdoor use?
Yes. Use IP65+ strips and seal ends to prevent moisture ingress and corrosion.
How long do strip lights last on average?
Quality strips are rated 25 000–50 000 hours (≈ 10–15 years at 5 h/day) with proper heat and voltage management.
Should I choose SMD or COB strip lights?
Choose SMD for cost-effective brightness; opt for COB when uniform, dot-free light and high CRI are priorities.
Conclusion & Next Steps
You now understand what strip lights are, how they function, the main types available, and key installation and maintenance steps. Ready to pick the perfect strip? Explore our Beginner’s Buyer Guide for LED Strip Lights for expert recommendations and project inspiration.


